Seiten

Samstag, 30. September 2023

Doch noch ein weiteres Sneak!

 
Hallo Ihr Lieben!
Was interessiert mich mein Geschwätz von gestern - kennt Ihr diesen Ausspruch? Nun, in meinem Fall stimmt das tatsächlich. Erstens habe ich doch noch Zeit gefunden, ein weiteres Sneak auf das Oktober-Release von Stampcornner zu machen und zudem ist es auch noch eine Weihnachtskarte geworden! Naja, manchmal kommt eben alles anders, als man denkt....

Hello everyone!
Here in Germany we have a saying of "what do I care about what I said yesterday". Well, in this case this is absolutely true. Not only did I find time to make another sneak of the october release by Stampcorner, it also is a christmas card. Well, sometimes things do differently than planned....

Hier seht Ihr nicht nur eines der neuen Stempelsets, sondern auch das neue Designpapier. Das erste, das es in 12" x 12" geben wird. Ich habe ein Stück davon als Hintergrund für die Szene verwendet und außerdem ein weiteres Design als Aufleger, aus dem ich das Fenster gestanzt habe, benutzt. 

Here you not only get a look at one of the new stamp sets but also the new patterned paper pack. It's the first one that will be available in 12" x 12". I used a piece of it as the background of my scene and another design from the pad as the top layer, that I cut my window from.


Für das Schneeflocken-Fenster habe ich die Winter Wonderland Window von LawnFawn verwendet - das blanke Fenster mit dem gepiercten Rand habe ich aus dem hellbelauen Designpapier mit den Schneeflocken gestanzt, die Lage mit den Schneeflocken dahinter aus weißem Glitter-Cardstock. Und dahinter befindet sich meine Szene. Vorne fährt das kleine Auto mit dem Tannenbaum auf dem Dach, dahinter ist ein Winterdorf zu sehen. Ich habe beide Motive mit schwarzer Tinte gestempelt und mit Copics coloriert. Da ich keinen schwarzen Tannenbaum wollte, habe ich den nochnal mit grüner Tinte gestempelt, den schwarzen Baum vom Auto abgeschnitten und stattdessen den grünen aufgeklebt. Auf den gestempelten Stern an der Spitze des Tannenbaums habe ich einen kleinen silbernen Pailetten-Stern geklebt. Die Schneelagen habe ich außerdem mit Stickles beglittert.
Ganz im Hintergrund befindet sich das dunkelbaue Designpapier mit den Sternen. Auf alle Lagen habe ich außerdem etwas weiße Acrylfarbe als Schneeflocken gespritzt.

For the snowflake window I used the Winter Wonderland Window die by LawnFawn - I cut the window with the pierced outlines from the light blue paper with the snowflake pattern, the layer with the snowflakes I cut from white glitter cardstock. And behind that there's my winter scene. There's a little car with a christmas tree on the roof driving by in the front, behind it there's a wintery village. I stamped both images with black ink and colored them with Copics. Since I didn't want a black christmas tree, I've stamped that again with green ink, cut off the black one off the car and replaced it with the green one. Onto the now green star at the tip of the tree I glued a small silver star confetti. I also used Stickles to add some glitter to the snow.
In the background there's the dark blue paper with the star pattern. Onto all the layers I flicked some white acrylic paint as falling snowflakes.


Auch der Text ist aus dem neuen Stempelset. Ich habe mir eine Stelle des dunkelblauen Designpapiers gesucht, auf dem kein Muster aufgedruckt ist, und den Text dort weiß aufembosst. So passt das Papier perfekt zum Papier im Hintergrund. Dann habe ich den Text ausgeschnitten und als Deko noch einige der kleinen Schneeflocken, die mit dem Winter Wonderland Window kommen, aufgeklebt, die ich wieder aus weißem Glitter-Cardstock gestanzt habe.

Also the text is from the new stamp set - it means "oh christmas tree". I picked an area of the dark blue patterned paper where there was no image printed on and white heat embossed the text onto it. This way the papers match perfectly. Then I cut the text out and added a few small snowflakes, that also come in the Winter Wonderland Window die set, again cut from white glitter cardstock.


Um die verschiedenen Lagen aufeinander zu kleben, habe ich dünnes 3D Tape benutzt. Nur das Winterdorf ist direkt auf das dunkelblaue Designpapier geklebt. Zum Schluss habe ich alles auf einen weißen Kartenrohling geklebt.

To put the different layers together I used thin foam tape, only the winter village is glued directly onto the dark blue patterned paper. Then I put everything onto a white note card.

Freitag, 29. September 2023

Stampcorner Oktober-Release Sneak

 
Hallo Ihr Lieben!
Wir waren in Urlaub, deswegen bin ich bis jetzt nicht dazugekommen, Euch ein Sneak auf das Oktober-Release von Stampcorner zu zeigen. Jetzt habe ich aber doch zumindest eine Karte geschafft, und die zeige ich Euch heute.

Hello everyone!
We've been on vacation so I didn't have time yet to share a sneak of the october release by Stampcorner. Now I at least found time to make one card, and that one I'm sharing with you today.

Das Release ist etwas gemixt - Herbst aber auch Weihnachten sind beide enthalten. Ich habe mich für ein Motiv aus dem neuen Herbstset entschieden. So direkt vom Strand konnte ich einfach noch keine Weihnachtskarte machen!
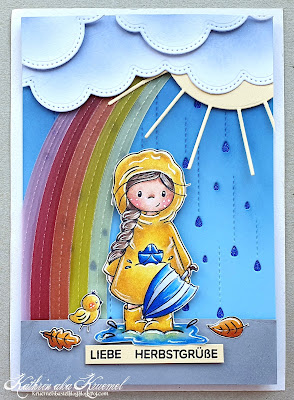
Hier habe ich die Raindrop Cover Stanze von MamaElephant aus hellblauem Cardstock gestanzt. Oben habe ich dann zwei Reihen Wolken, gemacht mit einer Wolken-Borderstanze, aufgeklebt. Die Wolken habe ich von oben ein wenit mit Distress Oxide Stormy Sky gewischt. Das sowie ein wenig Faded Jeans habe ich auch verwendet, um den oberen Teil des blauen Cardstocks etwas abzudunkeln. 
Hinter die Wolken habe ich eine Sonne sowie einen Regenbogen geklebt, beide mit Stanzen von MFT gemacht. Den Regenbogen habe ich aus Vellum gestanzt, damit man die Regentropfen dahinter noch etwas sehen kann. Ich musste die Rückseite der Stanzteile verwenden, damit mein Regenbogen in die richtige Richtung zeigt. Die ist ja oft nicht so schön wie die "richtige" Seite, aber bei Vellum fällt das gar nicht so auf. Und hier war es sogar ein Glücksfall - das Vellum ist hinten etwas softer als auf der Vorderseite, was ich zuvor noch gar nicht bemerkt hatte. Aber so gefällt mir der Regenbogen viel besser. 

This release is a bit a mix of autumn and christmas themed stamp sets. I went with the fall set - right from the beach I wasn't able to make a christmas card.
Here I die cut the Raindrop Cover by MamaElephant from light blue cardstock. To the top I added two rows of clouds, made using a cloud border die. I shaded the top of the clouds with a bit of Distress Oxide Stormy Sky. That and a bit of Faded Jeans is also what I used to darken the top of the blue cardstock a bit. 
Behind the clouds I put a sun and a rainbow, both cut using dies by MFT. I die cut the rainbow from vellum so the raindrops behind it would still be a little visible. To make sure the rainbow goes in the right direction, I had to use the back of the die cuts. Most times those aren't as pretty as the "right" sides, but it's not that bad with vellum. And here acutally it was luck, because the back of the vellum is a bit lighter than the ront, something I hadn't realized before. But I like the rainbow a lot better this way.


Das süße Mädel hat sich trotz Regenwetter hinausgewagt und springt durch die Pfützen - mit der richtigen Kleidung überhaupt kein Problem! Ich habe sie - sowie die Herbstblätter und das Vögelchen aus dem selben Set - mit Copics coloriert und dabei traditionell gelb für den Regenmantel und die Gummistiefel verwendet, einfach die einzige richtige Farbe hier. 
Die Pfütze ist mit einem weiteren Stempel aus dem Set gemacht - eigentlich schwimmt darin ein Papierboot. Das habe ich wegmaskiert und dafür das Mädchen hineingestempelt. Die Außenlinien der Pfütze habe ich frei Hand gestaltet. Anschließend habe ich die Pfütze mit Glossy Accents überzogen.
Der Text ist mit Stempeln aus dem Sets Kleine Worte und Kleine Worte 2 zusammengestzt.
Ich habe alle Motive sowie den Text auf einen Streifen grauen Cardstocks geklebt, den ich an den Rändern ein wenig mit Hickory Smoke gewischt habe, und dann auf dem Hintergrund befestigt.

The cute girl doesn't care about the weather and is jumping into puddles - no big deal if you wear the right clothes. I colored her - and the leaves and the bird from the same set - with my Copics, using yellow for her rain coat and rubber boots. In my opinion the only color for those.
For the puddle I used another stamp from the same set - originally there's a paper boat swimming in it. I masked that off and stamped the girl into it instead. The outlines of the puddle are drawn free hand. Then I covered the puddle with Glossy Accents.
The text means "fall greetings". I attached the images and the text to a strip of grey cardstock, that I shaded with some Hickory Smoke on the edges.


Zum Aufkleben der Elemente habe ich teilweise 3D Tape verwendet. 
Hinter die Regentropfen habe ich dunkelblauen Glitter-Cardstock gesetzt, dann habe ich alles auf einem weißen Kartenrohling befestigt.

I used foam tape behind a few of the elements.
Behind the raindrops I put some dark blue glitter cardstock, then I adhered everything to a white note card.

Donnerstag, 28. September 2023

Advents-Zauber

 
Hallo Ihr Lieben!
Ich muss der Realität ins Auge schauen - auch wenn es noch so weh tut und für mich die Sommer gefühlt mal wieder viel zu schnell vorübergegangen ist. Aber die Weihnachtszeit rückt näher. Und da wird es Zeit, sich mit dem Thema auch basteltechnisch zu beschäftigen. Also zeige ich heute auf dem Stampcorner Blog diese Advents-/Weihnachtskarte.

Hello everyone!
I have to face the truth - even if it really hurts and it feels like summer was once again way too short and over too soon. But christmas season is coming closer and it's time to start making christmas cards. So I am sharing this one over on the Stampcorner Blog today.

Für den Hintergrund habe ich hier eines der Papiere aus dem Paper Pack 05 verwendet. Ich wollte ein schwarz-weißes Thema mit etwas grün und gold für meine Karte, da war das Papier mit den schwarzen Bäumen perfekt. Ich habe nur etwas goldene Metallic Watercolor darauf gespritzt, um die großen weißen Flächen ein wenig zu füllen.

For the background I used one of the papers from the Paper Pack 05. I wanted to make a black and white card with a bit of gold and green, so the paper with the black pine trees was perfect. I just flicked some gold metallic watercolor onto it to fill the large white space a bit.


Da die Karte recht klar werden sollte - ich finde, das passt prima zum modernen Farbschema - habe ich auch ein klares Design gewählt und mittig auf meinem Hintergrund ein Quadrat mit den Motiven aufgeklebt. 
Auf das Quadrat, das ich aus weißem Cardstock geschnitten habe, habe ich den Kranz aus dem Stempelset Weihnachten 1 aufgestempelt. Aus diesem Set sind übrigens alle Motive und Texte dieser Karte. Ich habe den Kranz einmal mit hellgrüner Tinte abgestempelt, den Stempel dann etwas gedreht und ein weiteres Mal mit dunkel-grüner Tinte darüber gestempelt. Unten rechts auf den Kranz habe ich dann erst zwei Tannenbäume, die ich aus dem Designpapier ausgeschnitten habe, aufgeklebt. Darauf kam ein kleines Haus. Das ist schwarz auf weißen Cardstock gestempelt. Auf das kleine Herz im Dachgiebel habe ich ein kleines goldenes Herz-Konfetti geklebt.
Die Bäume sind direkt auf den Kranz geklebt, das Haus habe ich mit 3D Tape befestigt. Dann habe ich noch eine kleine Schleife, gebunden aus beigefarbener Schnur, unter das Haus geklebt.
Auch den Text habe ich schwarz gestempelt. Ich habe den Cardstockstreifen schwarz gemattet und dann ebenfalls mit 3D Tape auf den Kranz geklebt. Von der rechten Ecke habe ich dann noch zwei Sterne hängen lassen. Die habe ich mit goldenem Glitter-Embossingpulver embosst und dann hinter dem Text befestigt. 
Dekoriert habe ich den Kranz dann noch mit einigen goldenen Foliensternen sowie ein paar winzigen weißen Perlen, die wie Beeren aussehen.

Since I planned to make the card pretty clean - and I really think that's a perfect match with the modern color theme - I also went with a clean layout and put a square with my images into the center of the background.
I cut the square from white cardstock and stamped the wreath from the stamp set Weihnachten 1 onto it. All images and even the text are from this set. I stamped the wreath once with light green ink, then turned the stamp a bit and stamped another wreath with darker green ink over the lighter one. Onto the bottom right of the wreath I first glued two pine trees, that I simply cut from the patterned paper, on top I placed a little house. I stamped that with black ink and put a gold heart confetti onto the heart that is stamped in the gable.
The trees I adhered directly onto the wreath, to attach the house I used some foam tape. Then I tied a bow from cream colored twine and tucked it under the house.
I also stamped the text in black, then matted the cardstock strip black and adhered it to the wreath with foam tape again. From the bottom right of this cardstock strip I hung down two stars. I heat embossed those with gold glitter embossing powder and attached them to the back of the text strip.
I also dekorated the wreath with a few gold star confetti and some tiny white beads, that look like berries.


Zum Schluss habe ich das Quadrat schwarz gemattet und es mit 3D Tape auf das Designpapier geklebt. Auch das habe ich schwarz gemattet und alles auf einem weißen Kartenrohling befestigt.

In the end I matted the square black and attached it to the patterned paper with foam tape I also matted the patterned paper black and attached everything to a white note card.

Mittwoch, 27. September 2023

Watch the Clouds....


 Hallo Ihr Lieben!
Heute zeige ich Euch eine weitere Karte, auf der ich eine Mekka-Errungenschaft verwendet habe. An diesem süßen Bär von Kreative Ideenwerkstatt konnte ich nicht vorbei.

Hello everyone!
Today I am sharing another card using one of the many things I bought at Stempel-Mekka. I just couldn't resist this cute bear by Kreative Ideenwerkstatt.

Schon als ich das Motiv sah, habe ich ihn mir in einer Blumenwiese liegend die Wolken beobachten vorgestellt. Und das war dann auch das, was ich auf dieser Karte umgesetzt habe. Nun war es so, dass ich die Karte an dem Tag angefangen habe, an dem wir abends in den Urlaub gestartet sind. Vielleicht nicht unbedingt der beste Zeitpunkt, und ich mag keine UFOs, wenn ich heimkomme. Deswegen ist die Karte auch etwas einfacher ausgefallen, als ich es eigentlich im Sinn hatte. Aber so kann ich mich zumindest steigern. Und sie gefällt mir trotzdem.
Ich habe einen Hügel aus einem Stück Masking Tape geschnitten und damit den oberen Teil eines Stücks weißen Cardstocks maskiert. Dann habe ich unten Distress Oxide Mowed Lawn aufgewischt. Anschließend habe ich drei Wolken von MFT und LawnFawn in den Himmel gestempelt, maskiert und anschließend den gerade gewischten Hügel maskiert. Mit Salvaged Patina habe ich dann den Himmel gewischt. Beide Farben habe ich jeweils nach links und oben bzw. unten ins Weiß des Cardstocks auslaufen lassen. Auf den grünen Hügel habe ich dann noch weiße Acrylfarbe als Blümchen gespritzt.

Right when I saw this image, I pictured the little bear laying in the grass and watching the clouds. So that's the idea I turned into a card first. Well, I started it right that morning when we left for vacation in the evening, so that was probably not the best time, and I don't like any UFOs - unfinished objects - on my table when I come home. That's why the card turned out simpler than I had planned. But at least there's room left now and I still like how card turned out.
I cut a hill from a piece of masking tape and covered the top area of a piece of white cardstock. Then I inked the bottom with Distress Oxide Mowed Lawn. Then I stamped three clouds by MFT and LawnFawn onto the sky, masked those, put on the mask on the green inked hill and inked the sky with Salvaged Patina. Both colors I let fade into the white of the cardstock on the left and bottom/top. Onto the green hill I also spritzed some white acrylic paint as tiny flowers.


Den Bären habe ich auf ein Stück weißen Cardstock gestempelt und dann drumherum Blumen gesetzt. Die sind aus dem selben Stempeltset Olafs Gartenliebe. Damit der Bär zumindest eine kleine Chance hat, die Wolken am Himmel auch zu sehen, habe ich die eigentlich längere Blume beim Stempeln etwas gekürzt. 
Bären und Blumen habe ich erst mit Copics coloriert, dann habe ich mit Polychromos das Fell auf den Bären gezeichnet. Anschließend habe ich das Motiv samt Blumen ausgeschnitten und auf das Gras geklebt. Die Gräser drumherum habe ich anschließend mit einem grünen Polychromo hinzugefügt. Und den Wolken am Himmel habe ich unten jeweils einen ganz leichten Schatten mit Copics verpasst. 

I stamped the bear onto a piece of white cardstock and then stamped flowers around him. Those are from the same Olafs Gartenliebe stamp set. To give the bear at least a little chance to see the clouds in the sky, I masked off the bottom of the originally taller flower while stamping it. 
I colored the bear and flowers with Copics, then added the fur with Polychromos. Then I cut the image including the flowers out and adhered it to the grass. The grass around the bear I added with a green Polychromo later. And with my Copics I added a very light shade to the bottom of each cloud.


Nun brauchte ich noch einen Text, der zur Szene passt. Watch the clouds and relax hat mir gut gefallen. Die kleineren Worte habe ich mit Stempeln aus verschiedenen LawnFawn-Sets zusammengesetzt. Das Wort Clouds sogar aus einzelnen Buchstaben. Aber von denen war tatsächlich das einzige Stempelset mit dem Wort watch darin. Zum Glück nutzen sie so oft die selbe Schriftart und -größe, da ist das dann relativ einfach.
Das Wort Relax habe ich mit einem alten Alphabet Stanzenset von Whiff of Joy einmal aus hellblauem und einmal aus schwarzem Cardstock gestanzt. Die blauen Buchstaben habe ich von unten mit Salvaged Patina etwas gewischt, dann die Buchstaben leicht versetzt aufeinander und unten auf die Karte geklebt.
Und um das Rosa in den Ohren des Bären nochmal aufzugreifen, habe ich fünf kleine rosafarbene Herzen auf der Karte verteilt. 
Zum Schluss habe ich alles schwarz gemattet und auf einen weißen Kartenrohling geklebt.

Now I needed a text that workes with the scene. I really liked "watch the clouds and relax". I used different stamps from different stamp sets by LawnFawn for the smaller words. The word clouds I even had to put together using letters from other words. But I actually only had one stamp set - and that was by LF - with the word watch in it. Luckily they use the same font and size in a lot of sets so creating your own words isn't that hard.
The word relax I die cut with an old alphabet die set by Whiff of Joy - once from light blue, once from black cardstock. I shaded the bottom of the blue letters with a bit of Salvaged Patina, then put the black letters a bit offset under the blue ones and adhered them to the bottom of the card.
To pick up the pink in the bear's ears again, I added five pink hearts to the card.
To finish it, I matted the white cardstock black and attached it to a white note card.

Montag, 25. September 2023

Willkommen Herbst

 
Hallo Ihr Lieben!
Dieses Jahr bin ich im Pilzmodus und habe mich zu dem Thema auf dem Mekka auch ordentlich eingedeckt. Offenbar fiel das Wort so oft, dass meine Begleiterin nur noch Pilze in allen Varianten auf ihrem Handy angezeigt bekommen hat. Die ersten Pilzprodukte habe ich dann hier eingeweiht.

Hello everyone!
This year I am in a mushroom mood and when I attended the Stempel-Mekka I also shopped quite some stuff with mushrooms. The word seems to have mentioned that often, that my friend was shown only mushrooms of all kinds on her cell. On this card I used some of those newly shopped mushroom products.

Ich wollte unbedingt einen Pilz-Layering-Stencil. Da ich aber nichts finden kann, was meinen Vorstellungen entspricht, habe ich mir mit Stanzen von Charlie und Paulchen selbst einen aus Mylar gemacht. Er besteht aus vier Lagen - einmal die Stiele, eine Lage mit den hier helltürkis gewischten Flächen einiger der Pilze, eine Lage mit den Pilzhüten und dann noch eine Lage mit Punkten, die die Zwischenräume füllen. Um die Punkte auf die Pilze zu bringen, muss ich die ausgestanzten Pilzköpfe einlegen und drüberwischen. Ist etwas umständlich, aber es funktioniert. 
Hier habe ich die Stiele mit Distress Oxide Pumice Stone, die helleren Pilzflächen mit Salvaged Patina, die Pilzhüte mit Broken China und die Punkte mit Peeled Paint gewischt. Die Muster auf den Pilzen habe ich mit Glitterpaste aufgetragen. 
Anschließend habe ich hell-silberfarbene Metallic Watercolor über den Cardstock gespritzt. 
Und weil die Pilze hinter einem Motiv doch etwas sehr knallig waren, habe ich ein Stück Vellum in der selben Größe meines Cardstocks zugeschnitten und aus der Mitte eines der Rounded Stitched Corners von Create a Smile ausgestanzt. Das habe ich als Aufleger benutzt - so ist der Hintergrund rundum und vor allem hinter dem Motiv etwas abgeschwächt, im Fenster ist er aber in voller Farbpracht zu sehen. 

I wanted a mushroom layering stencil really baly. But I wasn't able to find one and so I used some mushroom dies by Charlie und Paulchen to create my own from Mylar. It's a four layer stencil - one layer with the stems, one with the here light aqua inked bottom layers of the larger mushrooms, one with the musroom heads and a last one for some dots to fill in the spaces between the mushrooms. To add the pattern to the mushrooms, I have to put in the small cut out mushrooms and inked over those. It's a bit time consuming this way but it works.
Here I inked the stems with Distress Oxide Pumice Stone, the lighter mushroom areas with Salvaged Patina, the heads with Broken China and for the dots I used Peeled Paint. For the pattern on the mushroom heads I used some glitter paste.
Then I spattered some light silver metallic watercolor onto the cardstock.
And since the mushroooms were a bit bright behind an image, I cut a piece of vellum the same size as my cardstock and die cut one of the Rounded Stitched Corners by Create a Smile from the center. I used that as the top layer - it tones down the background, especially behind the images, but in the cut out window the background is still visible in all its beauty.


Auch das Stempelset Mushrooms von Create a Smile habe ich auf dem Mekka erstanden. Ich hatte schon länger damit geliebäugelt, jetzt durfte es endlich mit. Hier habe ich zwei der Pilze plus einen ganz kleinen aus dem Set Herbst Minis mit Copics farblich passend zu den Pilzen im Hintergrund gewischt und mit Stickles frei Hand Punkte darauf verteilt. 
Als niedliches Motiv passte natürlich ein Igel perfekt zwischen die Pilze. Der ist aus dem Set Igelfreunde - und schaut zu einem herbfallenden Blatt aus dem selben Set auf, das ich am oberen Rand des Fenster aufgeklebt habe.
Als Boden habe ich aus grünem Cardstock eines der Ovale aus dem Shadows and Flowers Stanzenset unter die Motive geklebt.
Der Text ist aus dem Stempelset Der Herbst ist Da bzw. das kleine Willkommen aus dem Set Kleine Sprüche. Ich habe ihn schwarz auf helltürkis farbenen Cardstock gestempelt, in drei Teile geschnitten und links über den Motiven angebracht.
Und als Deko durften noch ein paar grüne Enamel Dots mit auf die Karte.

Also the Mushrooms stamp set by Create a Smile is one I brought home with me from Stempel-Mekka. I have been eyeing with it for quite some time, now it was the time to buy it. Here I used two of the mushrooms from the set and added a tiny one from the Herbst Minis stamp set. I colored them with Copics matching the colors of the mushrooms on the background and added the dots with Stickles.
As the cute image a hedgehog was perfect to be put between all these mushrooms. It's from the Igelfreunde stamp set - and he's looking up to a falling leave from the same set, that I attached to the top right corner of the cut out window.
For the ground I die cut an oval from green cardstock, using the Shadows and Flowers die set, and put the images on top.
The text means "finally - welcome fall". I stamped it black onto light aqua cardstock, cut it into three parts and adhered those above the images.
To decorate the card I added a few green Enamel Dots.
 

 Die Motive habe ich jeweils mit 3D Tape auf das Vellum geklebt, dann habe ich von hinten wieder 3D Tape aufgebracht und das Vellum so auf dem Hintergrund fixiert. Die Ecke oben links steht ein wenig auf, aber das sieht nur auf diesem Bild so extrem aus.
Zum Schluss habe ich alles auf einen weißen Kartenrohling geklebt.

I used foam tape to adhere the images to the vellum, then put more foam tape on the back and used this to fix the vellum on the background. The top left corner of the vellum is bending upwards a bit, but it doesn't look as bad in real life.
To finish the card, I attached everything to a white note card.

Samstag, 23. September 2023

Farbenfrohe Freundschafts-Karte mit Halloween-Touch

 
Hallo Ihr Lieben!
Achtung, heute wird es farbenfroh. Und einen leichten Halloween-Touch hat diese Freundschaftskarte auch...

Hello everyone!
Warning, it's getting colorful today. And this friendship card also spreads some Halloween vibes....

Die Ideen zu meinen Karten kommen manchmal aus den ungewöhnlichsten Quellen, so auch hier. Ich schaue gerne Märchen im TV, vor kurzem kam Nils Holgerson. Und als ich den so auf Martin, der Gans, durch die Luft fliegen sah, war da plötzlich die Idee zu dieser Karte in meinem Kopf. Ihr müsst nämlich wissen, manche Hexen sind ganz klein und können so wunderbar auf einer Fledermaus durch die Lüfte fliegen! Sehr praktisch, wenn man einen Drachen steigen lassen möchte - mit Hilfe der Fledermaus ist das ein Kinderspiel!
Hier habe ich ein Stück Masking Tape als Hügel auf weißen Cardstock geklebt und dann den Himmel mit Distress Ink Mustard Seed, Picked Raspberry, Seedless Preservers und Black Soot gewischt. Auf diesen Bereich der Karte habe ich dann weiße Acrylfarbe aufgespritzt und anschließend den Hügel/Boden mit Distress Ink Pumice Stone und Black Soot gewischt. 
Auf die linke Seite der Karte habe ich dann noch den Baum aus dem Stempelset Abhängen von Create a Smile - von denen alle Motive auf der Karte sind - aufgeklebt. Da ich nicht wusste, ob der Baum hoch genug ist, habe ich den unteren Teil nicht mit abgestempelt und konnte ihn so etwas verlängern. 

Sometimes I get ideas for my cards at the weirdest occasions. I love to watch fairytales - the traditional old german ones - on TV. A little ago "Nils Holgerson" was on. And when I saw the little boy riding up in the air on Martin, the goose, I immediately had the idea for this card in my head. You have to know, some witches are really tiny and they can easily fly around on a bat. That comes in very handy when you want to fly a kite - it's as easy as one-two-three with a bat as a friend!
Here I cut a hill from a piece of masking tape and adhered it to a piece of white cardstock. Then I inked the sky with Distress Ink Mustard Seed, Picked Raspberry, Seedless Preserves and Black Soot. I also flicked some white acrylic paint onto the sky. Then I did the hill/ground with Distress Ink Pumice Stone and Black Soot.
On the left side of my card I planted the tree from the Abhängen stamp set by Create a Smile - all images on this card are by them. Since I didn't know if the tree will be tall enough, I didn't stamp the very bottom and this way was able to make it a bit taller.


Hier könnt Ihr die kleine Hexe und die Fledermaus besser sehen. Hexe und Drachen sind aus dem Herbst Minis Set, die Fledermaus wieder aus dem Set Abhängen. Coloriert habe ich mit Copics und teilweise mit Polychromos. Ich wollte  nämlich unbedingt einige Motivteile passend zu dem im Himmel verwendeten Seedles Preserves colorieren. Ich glaube, ich habe mindestens 30 Minuten versucht, mit verschiedenen Lila-, Grau-, Rot- und Pinktönen einen solchen Ton mit Copics hinzubekommen. Keine Chance - die Lilatöne von Copic sind mir, bis auf die 20er, und die sind doch sehr grau, alle viel zu pink. Also habe ich diese Teile grau coloriert und dann passende Polychromos darübergelegt. 
In den Hintergrund habe ich einen Schwarm kleinerer Fledermäuse, auch aus dem Set Abhängen, gestempelt, die der Fledermaus mit Hexe und Drachen folgen. Die Schnur des Drachens habe ich übrigens mit einem weißen Gelstift per Hand dazu gemalt.

Here you can see the with and bat better. Witch and kite are from the Herbst Minis stamp set, the bat again from the set Abhängen. I colored the images with Copics and then put some Polychromos on a few of them. I had planned to color some parts of the images matching the Seedles Preserves I used in the background and tried at least 30 minutes to get a kind of matching color from mixing different shades of purple, grey, red and pink. No chance - to me all the purples by Copics are way too pink, except for the 20s, which I like but which have way too much grey to be used here. So I simply colored those parts grey and then put a layer of a matching Polychromo on top.
In the background I stamped some small bats, again from the set Abhängen, that are following the bat with the witch and kite. The string on the kite I added by hand using a white gel pen.


Unten links auf der Karte, vor dem Baum, stehen zwei Sonnenblumen und zwei Kürbisse. Die sind farblich alle etwas ausgefallen geraten, aber ich wollte die Farben des Himmels wieder aufgreifen. Und wo Hexen auf Fledermäusen reiten, kann auch die Natur andere Farben haben. 
Daneben sitzt ein Rabe, der nicht so ganz weiß, was er von dem Duo, das da auf ihn zugeflogen kommt, halten soll. Die Motive hier sind aus dem Set Krähm dela Krähm. Dazwischen habe ich etwas Gras, gestanzt aus schwarzem Cardstock, gesetzt. 
Und hier war auch Platz für meinen Text. Ich fand "Freunde wie Du sind unbezahlbar" aus dem Set Ausflippen einfach perfekt, auch wenn es ein wenig zu lang war. Ich habe es mit weißem Embossingpulver auf schwarzen Cardstock gestempelt und einfach rechts bis an den Rand der weißen Kartenbasis reichen lassen. 

On the bottom left, in front of the tree, I placed two sunflowers and two pumpkins. They are not your usual colors, but I wanted to pick up the colors from the sky. And where witches ride on bats, also nature can be a bit different.
There's a crow sitting next to the pumpkins - and he obviously isn't that sure about what to think about that couple, that's flying towards him. The images here are from the Krähm dela Krähm stamp set. I put a few pieces of grass, die cut from black cardstock, between the elements here.
And there was also room for my text. I thought, a "friends like you are priceless" perfect here, even if it was a bit too long. I white heat embossed it onto a strip of black cardstock and let it reach the edge of my white card base.


Zum Aufkleben der Motive habe ich teilweise dünnes und dickes 3D Tape verwendet. Dann habe ich alles schwarz gemattet und auf einen weißen Kartenrohling geklebt.

To attach some of the images I used thin or thick foam tape. Then I matted the cardstock black and adhered it to a white note card.

Donnerstag, 21. September 2023

Der Herbst ist da!

 
Hallo Ihr Lieben!
September ist für mich der offizielle Beginn der Herbst-Bastelzeit. Und so zeige ich heute auf dem Stampcorner Blog diese herbstliche Karte.

Hello everyone!
September to me is the official start of fall crafting season. And so I am sharing this fall-ish card over on the Stampcorner Blog today.

Auch wenn mir der Sommer nicht lang genug dauern kann - auf die Farben, die der Herbst in die Natur zaubert, freue ich mich. Und die mussten natürlich hier zum Einsatz kommen.
Ganz im Hintergrund befindet sich ein Stück hell-türkisfarbener Cardstock, den ich an den Rändern ein wenig mit Distress Oxide Broken China gewischt habe. 
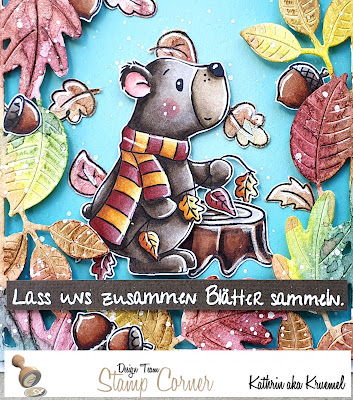
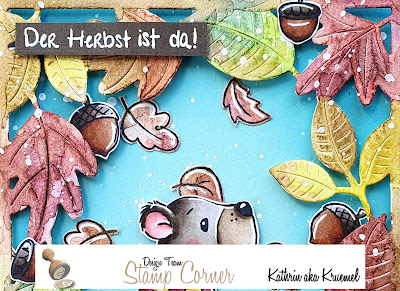
Der tolle Blätterrahmen ist mit der Lots of Leaves Cover-Up Stanze von MFT gemacht. Ich habe ihn aus Watercolor Cardstock gestanzt und dann mit den Nuvo Shimmer Powdern eingefärbt. Dazu habe ich jeweils ein Blatt mit einem Pinsel und Wasser nass gemacht und dann jeweils zwei Farben der Powders aufgetragen. Die habe ich zuvor auf einem Stück Folie mit etwas Wasser angerührt. Jedes Blatt habe ich dann mit dem Fön getrocknet, bevor ich das nächste Blatt eingefärbt habe. Der goldene Shimmer der Blätter bringt für mich den "goldenen Herbst" auf die Karte. Ich habe hier die Powders in Solar Flare, Fantail Firecracker, Golden Sparkler, Maroon Spark und ein wenig Green Parade benutzt. Anschließend habe ich über den getrockneten Rahmen und auch den türkisfarbenen Cardstock etwas des Copic Opaque White aufgespritzt. 

Even if summer can never be long enough for me, I am really looking forward to all those colors fall will bring to nature. And of course that's what I had to include on this card.
In the background I used a piece of light aqua cardstock. The edges I inked with Distress Oxide Broken China.
The great leaves frame is made with the Lots of Leaves Cover-Up die by MFT. I die cut it from watercolor cardstock and then colored it with the Nuvo Shimmer Powders. I used a brush and water to wet one leave, than dabbed some of the Powders onto it. Before I mixed the powders with a bit of water on a sheet of acetate. I dried each leaf with my embossing gun before working on the next one. The gold shimmer on the leaves really brings the "golden fall" onto my card. I used the powders in Solar Flare, Fantail Firecracker, Golden Sparkler, Marron Sparks and a bit of Green Parade. Then I flicked some Copic Opaque White onto the dried frame and also the aqua background cardstock.


Als Hauptelement der Karte habe ich den süßen Bär aus dem Set Herbstbär verwendet. Der kam ja während der Adventsaktion 2022 heraus und ist wegen des herbstlichen Themas in meinen Augen ein wenig untergegangen. Hier hat er seinen großen Auftritt. Ich habe ihn mit Copics coloriert und ausgeschnitten. Dahinter habe ich den Baumstumpf aus dem Set Herbsttiere gesetzt.
In beiden Sets gibt es Blätter und Eicheln. Die Eicheln habe ich mit Copics coloriert, ausgeschnitten und zwischen die Blätter am Rahmen gesetzt. Für die Blätter habe ich das übrige angemischte Pulver auf einem Stück Watercolor Cardstock verteilt und nach dem Trocknen die Blätter aufgestempelt. Die habe ich dann ausgeschnitten und rund um den Bären verteilt. 
Für die Highlights habe ich einen weißen Gelstift benutzt.

Main character on this card is the little bear from the Herbstbär stamp set. He was release during the 2022 advent calendar and because of the fall-ish theme I think hje didn't get the attention he deserves. But not his time has come! I colored him with Copics and cut him out. Behind him I put the tree trunk from the Herbsttiere set.
In both stamp sets there are leaves and acorns. I colored the acorns with Copics, cut them out and put them between the leaves of the frame. For the leaves I used up the left over Shimmer Powder I had already mixed with water and just put it onto a piece of watercolor cardstock. After it had dried I put stamped the leaves on top, cut them out and arranged them around the bear.
For the hightlights I used a white gel pen.
 

 Beide Texte auf der Karte sind aus dem Set Herbstbär. Ich habe sie jeweils mit weißem Embossingpulver auf braunen Cardstock embosst. Da ich viel lieber einzeilige Texte verwende, die Stempel aber zwei- bzw. dreizeilig sind, habe ich sie mit der Schere zerschnitten und konnte sie so anders angeordnet abstempeln.

Both texts on the card are from the Herbstbär stamp set. They mean "Fall is here! Let's collect leaves together". I white heat embossed them onto dark brown cardstock.


Die kleine Blätter und den Baumstumpf habe ich direkt auf den Hintergrund geklebt, zum Aufkleben des Bären habe ich dann dünnes 3D Tape benutzt. Hinter den Rahmen habe ich dickeres 3D Tape gesetzt - das kann man prima hinter die Blätter kleben und muss so keine super dünnen Streifen zurechtschneiden. Die Texte habe ich dann wieder mit dem dünneren Tape auf dem Rahmen befestigt. Ganz zum Schluss habe ich noch alles auf einen weißen Kartenrohling geklebt.

I adhered the small leaves and the tree trunk directly onto the aqua cardstock in the background, to attach the bear I used thin foam tape. Behind the frame I put some thick foam tape - you can put that behind the leaves so you don't have to cut extra thin strips from it to put all around the frame. To adhere the text strips I used the thinner tape again and glued them across the card on top of the leaves. As the last step I put everything onto a white card base.

Mittwoch, 20. September 2023

Stampcorner September Challenge


 Hallo Ihr Lieben!
Der September ist basteltechnisch ja oft schon ein wenig "chaotisch". Der eine macht noch Sommerkarten, der andere sitzt schon an der Weihnachtskartenproduktion. Manche machen Herbst-, andere Halloweenkarten. Deswegen haben wir uns "Wald" als das Thema der neuen Stampcorner Challenge, die heute startet, ausgesucht. Das dürfte dann für viele passen. Und es muss auch kein richtiger Wald gestaltet werden - Blätter oder Waldtiere oder Pilze passen natürlich ebenso gut.

Hello everyone!
September often is a bit chaotic when it comes to crafts. Some are still making summer cards, others are working on their christmas cards. Some make fall, others Halloween cards. That's why we picked "the woods" for the theme of the new Stampcorner Challenge, that starts today. That should fit any of these occasions. And of course you don't have to create an actual wood on your card, leaves, forest critters or mushrooms work as well. 

Ich habe mich trotzdem für eine Waldszene entschieden. Allerdings wollte ich diese nur in der Mitte meiner Karte haben. Also habe ich das Rectangle Extraordinaire Stencilset von MFT genommen und erst die Mitte eines Stücks weißen Cardstocks abgedeckt. Dann habe ich den äußeren Bereich mit Distress Oxide Uncharted Mariner gewischt. Dann habe ich den Rahmen, also den Stencil mit dem aus der Mitte herausgeschnittenen Rechteck, aufgelegt. Im Inneren meines Rechtecks sollten Birken wachsen. Also habe ich auf die rechteckige Stencil den Teil des Birch Tree Stencilsets von LawnFawn aufgelegt, der den Bereich rund um die Birken füllt. Diesen Bereich habe ich dann mit Peacock Feathers und Salvaged Patina gewischt. 
Anschließend habe ich den anderen Teil der Birch Tree Stencils aufgelegt - ebenfalls oben auf die Rechteckstencil - und die Birken ein wenig mit Hickory Smoke gewischt. 
Und dann wurde es richtig wild. Kennt Ihr diese besondere Stimmung, wenn Sonnenstrahlen ganz sanft durch die Bäume im Wald scheinen? Genau diese Stimmung wollte ich auf meiner Karte haben. Also habe ich die Stencil mit dem rechteckigen Fenster, darauf die Stencil mit den Baum-Zwischenräumen und darauf dann noch einen Strahlenstencil gelegt. Durch diese drei Stencils habe ich dann weiße Stempelfarbe gewischt. 
Nur im Inneren des Rechtecks habe ich dann goldene Metallic Watercolor, anschließend auf den kompletten Cardstock weiße Acrylfarbe aufgespritzt.

I still went with an actual forest scene. But I only wanted to have that in the center of my card. So I used the Rectangle Extraordinaire stencil set by MFT and laid down the inner rectangle onto a piece of white cardstock. Then I inked the area around it with Distress Oxide Uncharted Mariner. Then I used the frame stencil - the other piece from the set - and put that onto my cardstock. Inside my rectangle I wanted to have some birch trees. So on top of the rectangle stencil I put the part of the Birch Tree stencil set by LawnFawn, that inks the areas between the trees. Then I inked that with Peacock Feathers and Salvaged Patina.
Next I used the other stencil from the Birch Tree stencil set - also on top of the rectangle frame - and lightly shaded the trees with Hickory Smoke.
And then I got really wild. Do you know the special mood, when sunrays shine between the trees in the woods? That's what I wanted to bring onto my card. So on top of the rectangle frame stencil and the stencil with the areas between the birch trees I put a ray stencil as a third stencil. Through all these three layers of stencils I inked the rays with white pigment ink.
Only inside the rectangle frame I flicked some gold metallic color onto the cardstock, then white acrylic paint onto the whole cardstock piece. 


Hier könnt Ihr den Hintergrund besser sehen. Im oberen Bereich habe ich dann einige Blätter aufgeklebt, die im sanften Herbstwind tanzen. Sie sind aus den Stempelsets Herbsttiere und Coole Pilze und mit Copics coloriert. 

Here you get a better look at the background. I glued down a few leaves, that are dancing in a soft fall breeze. They are from the stamp sets Herbsttiere and Coole Pilze and colored with Copics.


Unten am Rand des Fensters mit der Waldszene habe ich dann meine Motive aufgeklebt. Der Pilz, der sich so über den kleinen Schmetterling, der gerade auf ihm gelandet ist, freut, ist aus dem Set Coole Pilze, die übrigen Motive sind alle aus dem Set Herbsttiere. Auch sie sind mit Copics coloriert. 
Unter die Motive, quasi als Boden, habe ich einen Cardstockstreifen mit dem Text aufgeklebt. Hier habe ich das Wort Herbstliebe aus dem Set Herbstbär mit weißem Embossingpulver auf braunen Cardstock embosst.

At the bottom edge of the forest scene I attached the images. The mushrooms, that's so delighted about the little butterfly that just landed on his head, is from the Set Coole Pilze, all the other images are from the Herbsttiere set. Again I used my Copics to color them in.
Under the images, acting as some kind of ground for the images, I added a cardstock strip with a "fall love" text. I white heat embossed it onto a strip of dark brown cardstock.


Wie so oft habe ich teilweise 3D Tape um Aufkleben der Motive benutzt. Außerdem habe ich einige matt-goldene Pailetten als Deko aufgeklebt. 
Zum Schluss habe ich den Cardstock schwarz gemattet und alles auf einem weißen Kartenrohling befestigt. 

As so often I used foam tape to attach a few of the images. I also added a few matte gold sequins as decorations.
To finish the card, I matted the cardstock black and adhered it to a white note card.

Montag, 18. September 2023

Ta Da - eine Diorama Karte!

 
Hallo Ihr Lieben!
Habt Ihr die neue TaDa-Diorama Stanze von LawnFawn gesehen? Ich war mir ja nicht sicher, ob ich die Stanze brauche, vor allem, weil wir 2019 beim Stempeleinmaleins bereits eine Anleitung für diese Kartenart hatten, damals unter dem Namen Ziehkulissenkarte. Die war ohne Zwischenlagen und in einer anderen Größe, aber das Prinzip ist/war das selbe. Die Anpassungen können ja nicht so schwer sein, dachte ich mir - und habe mich ohne die Stanze ans Werk gemacht. Hat geklappt, aber mein Gott war das ein Gefummel und so einiger Cardstock ist in der Tonne gelandet. Und weil ich das Video von Jennifer McGuire gesehen habe, bei dem sie dieses Stanzenset verwendet und einen Giftcard Holder daraus macht - die Idee finde ich klasse und werde sie mir für Weihnachten merken! - habe ich die Stanze dann doch noch geordert. Dies hier ist allerdings meine Karte, die ich ohne die Stanze gemacht habe.

Hello everyone!
Have you seen LawnFawn's new TaDa-Diorama die? I really wasn't sure if I needed this die, especially since we from Stempeleinmaleins had a tutorial for this kind of card back in 2019, named Ziehkulissenkarte. It was without the layers inbetween and also different in size, but I really wasn't sure making these changes couldn't be that complicated. So I sat down and got started - it worked, but oh my god, it was kind of heart with lots of trial and error. I also saw Jennifer McGuire's video where she takes the die and makes a giftcard holder with it - something I really want to make for christmas! - I went ahead and ordered the die. But this is the card I made without it.

Hier habe ich den Mechanismus - bzw. die Diorama-Karte, denn die kann man natürlich auch so verwenden - auf ein Stück Designpapier aus dem Into the Woods Paper Pad und anschließend auf einen weißen Kartenrohling geklebt. So hat man innen noch schön Platz für persönliche Worte und muss sie nicht auf die Rückseite des interaktiven Elements schreiben.

Here I attached the mechanism - or the diorama card because it can also be used as is - onto a piece of patterned paper from the Into the Woods paper pad and then adhered everything to a white note card. This way there's room for some personal words and you don't have to write those onto the back of the interactive element.


Für das Grundpanel meines Diramas habe ich aus einem blauen Designpapier mit weißen Punkten aus dem selben Paper Pad eine der Stitched Rectangles von Stampcorner gestanzt und seitlich zwei Eingrifflöcher ausgestanzt. Mit der selben Stanze habe ich auch die Rückseite sowie die beiden Seitenteile gestanzt, von den Seitenteilen habe ich jeweils den Cardstock außerhalb der gestitchten Linien weggeschnitten. 
Bei meinem Fenster war ich ja total frei - also habe ich aus dem gepunkteten Designpapier einen großen Kürbis gestanzt. Dafür habe ich die Pumpkin House Stanze von LawnFawn benutzt. Mit der sind auch die Blätter und der Stiel des Kürbis gemacht. Die Schnörkel sind aus dem selben Set sowie dem Stitched Pumpkin Frame Set. 
Da mir nur eine große orangefarbene Fläche hinter dem Ausschnitt nicht gefallen hat, habe ich mir mit dem Pumpkin House auch noch eine Stencil gemacht. Dafür habe ich den Kürbis aus Mylarfolie gestanzt und den mittleren Teil entlang der gestitchten Linien ausgeschnitten. Nach dem Falten der inneren Teile, habe ich sie auf Stoß zusammen und passend hinter den Aufleger gelegt um sicher zu gehen, dasss ich den Kürbis auch an der richtigen Stelle aufwische. Dann habe ich erst den kompletten Kürbis mit Distress Ink Spiced Marmalade gewischt, dann den mittleren Teil der Stanze aufgelegt und die äußeren Teile des Kürbis noch mit Rustiy Hinge etwas dunkler gestaltet. Zum Schluss habe ich noch Details mit einem weißen Gelstift aufgemalt. 
Die Blätter habe ich ein wenig mit Mowed Lawn gewischt und unten auf die Karte geklebt. Dazu kamen einige Eicheln sowie gestanzte Pilze, die ich mit Copics coloriert habe. 
Unter dem Ausschnitt habe ich noch den Text angebracht. Er ist aus dem Set Jump for Joy und weiß auf braunen Cardstock embosst. Dann habe ich ihn unter die beiden inneren Pilze geschoben. 
Als Deko kamen hier noch ein paar goldene Perlen zum Einsatz.

For the base of my diorama I die cut one of the Stitched Rectangles by Stampcorner from blue patterned paper with white dots from the same paper pad and cut two half circles out of the shorter sides. Using the same die I also created the back and the two side pieces of my diorama. From the side pieces I cut off the top and bottom along the stitched lines. 
I was totally free in choosing my window - so I die cut a pumpkin from the patterned paper. I used the Pumpkin House die by LawnFawn for that and also to cut the leaves and stem of the pumpkin. The swirly pieces are from the same set and from the Stitched Pumpkin Frame set.
Since just a plain orange area behind the window wasn't that beautiful I used the Pumpkin House die to create a stencil. I cut the pumpkin from Mylar and then cut off the inner piece along the stitched lines. After I had scored and folded my side pieces I put them behind the dotted paper and put my stencil on top to make sure, I ink the pumpkin in the right spot. Then I first inked the whole pumpkin with Distress Ink Spiced Marmalade, put in the middle piece of my stencil and inked only the outer parts with Rusty Hinge. Then I added some lines with a white gel pen.
I inked the leaves with a bit of Mowed Lawn and attached them to the bottom of my card. Then I added a few acorns and mushrooms, that I colored with Copics.
At the bottom of my pumpkin window I added a text. It's from the Jump for Joy set and white heat embossed onto brown cardstock. Then I tucked it under the two inner mushrooms.
As decoration I added a few gold pearls.


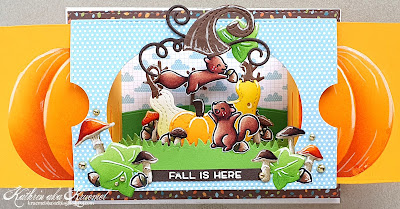
Greift man den orangen Cardstock durch die Eingrifflöcher und zieht daran, dann poppt die Vorderseite auf und es bildet sich ein Diorama mit toller Tiefe - und viel Platz für eine Szene.

When you grab the orange cardtock through the cut out half circles and pull them, the front of the diorama pops up and creates a great diorama with great depth - and lots of space for a scene.


Bei mir tummeln sich zwei Eichhörnchen zwischen Kürbissen, Eicheln und Pilzen. 
Für den Hintergrund habe ich ein weiteres Papier aus dem Into the Woods Paper Pad verwendet. Darauf befindet sich ein grüner Hügel mit Herbstbäumen. Die sieht man später auf einem anderen Bild nochmal besser.

In my scene two squirrels are playing inbetween some pumpkins, acorns and mushrooms.
For the background I used another sheet from the Into the Woods paper pad. There's a green hill with two fall trees glued onto it. You'll be able to see those better on another picture a bit later in this post.


Das Innenleben der Karte zu fotografieren ist gar nicht so einfach!
Die Kürbisse sind mit den Stanzensets Stitched Pumpkins und Stitched Gours aus cremefarbenem, gelbem und orangefarbenem Cardstock gestanzt. Dann habe ich sie mit Distress Ink Bundled Sage, Spiced Marmalade und Mustard Seed gewischt.
Die Eichhörnchen und Eicheln sind aus dem Set Let's Go Nuts und mit Copics coloriert. 
Da ich zu faul zum Aufstehen war und auf der Magnetplatte, auf der sich die Kürbisse befanden, auch die Various Mushroom Pilzstanzen von  CraftEmotions sowie die Pilze aus dem All Seasons Tree Set von WhimsyStamps waren, habe ich einfach die verwendet und Pilze aus weißem Cardstock gestanzt. Dann habe ich sie mit Copics coloriert.
Die Einleger habe ich mit Grasstanzen gemacht und nach dem Einschieben in die Schlitze außen jeweils einen Cardstockstreifen als Stopper angeklebt. Die Schlitze habe ich mit einer Stanze aus dem Let's Toast Stanzenset gemacht und später noch etwas verlängert. So kann man die Motive auf den Streifen weiter nach außen setzen, da sie dann beim Zusammenklappen der Karte ein wenig mit durch die Schlitze rutschen. Die Motive habe ich an die Grasstreifen geklebt und das springende Eichhörnchen im Hintergrund mit Hilfe eines Folienstreifens befestigt.  

Photographing the inside of this card really isn't easy!
For the pumpkins I used the Stitched Pumpkins and the Stitched Gourds die set and cut them from cream, yellow and orange cardstock. Then I inked them with Distress Ink Bundled Sage, Spiced Marmalade and Mustard Seed.
The squirrels and acorns are from the Let's Go Nuts set and colored with Copics.
Since I was too lazy to get up and there were the mushroom dies from the Various Mushrooms die set by CraftEmotions and the mushrooms from the All Seasons Tree set by WhimsyStamps on the same magnet sheet as my pumpkins, I used those to cut the mushrooms from white paper and colored them with Copics.
The elements across the inside are made using grass border dies and after putting them through the slits in the sides I glued some strips of paper to their ends as stoppers. To cut the slits I used a die from the Let's Toast die set and later cut them a bit longer. This way I was able to put the images on my grass layers a bit further out because when I fold the card together, the images can partly slide through those slits as well. I attached the images to the grass and used a piece of acetate to attach the jumping squirrel.


Und hier ist noch ein Bild aus einem anderen Winkel. Hier kann man die Bäume zumindest ein wenig erkennen. Ich habe sie ohne die Laub-Lage verwendet, so passen sie besser zum Herbst, finde ich. Gemacht sind sie aus braunem Cardstock mit der Simple Stitched Tree Border. Damit habe ich auch den grünen Hügel gestanzt - diesmal aus grünem Cardstock, dann habe ich die Bäume mit einer Schere weggeschnitten.
So, und jetzt warte ich mal auf die Post und bin gespannt, ob die Karte mit dem Stanzenset schneller geht!

And here's a picture taken from a different angle. Hier you can see the trees at least a bit. I used them withouth the leaf layer, I think they go better with the fall theme without. I used the Simple Stitched Tree Border to die cut them from brown cardstock. I also made the hill with this die by cutting it from green cardstock, then simply snipping the trees off with my scissors.
Now I'm waiting for the postie and am really curious to find out, if this type of card is made faster using the die set!

Samstag, 16. September 2023

don't worry, be flappy!

 
Hallo Ihr Lieben!
Ich habe hier doch noch so einige noch unverwendete Produkte aus dem letzten LawnFawn Release liegen. Mit einem Teil davon habe ich diese Karte gestaltet. Sie hat definitiv einen Halloween-Look, ist aber eigentlich gar keine klassische Halloweenkarte. 

Hello everyone!
I still have quite a few still unused products from the latest LawnFawn releases on my desk. With some of them I made this card. It definately has a Halloween look but actually isn't a Halloween card.
 
Für den Hintergrund habe ich die Birch Tree Stencil von LawnFawn verwendet und nur auf den linken Teil eines Stücks weißen Cardstocks gelegt. Dann habe ich den Himmel mit Distress Oxide Peacock Feathers, Faded Jeans, Chipped Sapphire und Black Soot gewischt. Die Birken habe ich mit ein wenig Hickory Smoke nur auf der jeweils linken Seite schattiert. Anschließend habe ich noch weiße Acrylfarbe und goldene Metallic Watercolor aufgespritzt.

For the background I used the Birch Tree stencils by LawnFawn and covered only the left side of a piece of white cardstock. Then I inked the sky with Distress Oxide Peacock Featheres, Faded Jeans, Chipped Sapphire and Black Soot. The birch trees I lightly shaded with Hickory Smoke only on their left sides. Then I flicked some white acrylic paint and gold metallic watercolor onto the sky.


Auf der rechten Seiten der Karte befindet sich einn Mond und ein Baum aus dem Stempelset Wild Wolves. Sie sind, wie alle Motive auf der Karte, mit Copics coloriert. Davor steht das Spooky Gate. Den Pfosten habe ich aus dunkelgrauem Cardstock gestanzt und ebenfalls mit Copics und einem weißen Gelstift coloriert. Das Tor selbst ist aus schwarzem Cardstock mit silbern-metallischem Schimmer gestanzt. Und weil so ein Tor ja nicht im Nichts steht, habe ich links und rechts davon jeweils ein Stück des Spooky Fence, ebenfalls aus dem metallischen Cardstock gestanzt, aufgeklebt. Mit dem habe ich auch den Boden auf der Karte gestaltet - ich habe ihn aus einem Stück schwarzem Cardstock gestanzt und den Zaun einfach weggeschnitten. So passte er perfekt, um den metallischen Boden unter dem Zaun abzudecken.

On the right side of the card there's a full moon and a tree, both from the Wild Wolves stamp set. I colored those with Copics, as I did all the images on this card. In front of them there's the Spooky Gate. I die cut the post from dark grey cardstock and shaded it with Copics and a white gel pen. The gate itself is cut from black cardstock with a silver metallic shimmer. And since a gate is not standing there without anything attached to it, I die cut the Spooky Fence from the same metallic-shimmery cardstock and placed a piece on both the left and right side of the cardstock. I used the same die to cut the black ground - I cut it from black cardstock and simply cut off the fence. This way it covers the black-shimmery ground perfectly.


Und links auf der Karte ist die süße Fledermaus aus dem Set Batty for You. Sie versteckt sich ein wenig hinter zwei Kürbissen. Die sind mit dem Stanzenset Stitched Pumpkins aus orange- und hell türkis farbenem Cardstock gestanzt und mit Distress Ink Rusty Hinge und Peacock Feathers etwas schattiert. Davor steht noch die Laterne aus dem Set Spooky Gate. 
Vielleicht habt Ihr es schon an der weißen Linie am Körper der Fledermaus erkannt, oder aber Ihr kennt das Stempelset - es ist für eine interaktive Karte ausgelegt (aber nicht nur, sie kann natürlich auch einfach so benutzt werden). Das musste ich natürlich ausprobieren:

On the left side there's the cute bat from the Batty for You set. She's hiding partly behind two pumpkins. Those I cut from orange and light aqua cardstock using dies from the Stitched Pumpkin set, then shaded them with Distress Ink Rusty Hinge and Peacock Feathers. In front of them there's the lantern from the Spooky Gate set.
Maybe you've already guessed it from the white line along the bat's body, maybe you've already seen the stamp set - it's made to create an interactive card (but of course it can also be used as the image on a regular card).  Of course I had to try that:


Ist da nicht süß? Und so macht dann auch der Text auf der Karte gleich noch mehr Sinn. Der ist übrigens ebenfalls aus dem Set Batty For You und weiß auf schwarzen Cardstock embosst. Dann habe ich in türkis hinterlegt und das linke Ende hinter die Kürbisse gesteckt. 
Für den Mechanismus habe ich das Waving Pull Tab Stanzenset verwendet. Wie Ihr seht, ist es möglich, die Position auf der Karte auch frei zu wählen. Außerdem funktioniert er auch, wenn das Motiv schräg auf der Karte angebracht ist - allerdings läuft dann auch der Tab zum Ziehen schräg, aber das stört mich nicht.

Isn't that lovely? And now the text on the card makes double sense. It's again from the Batty for You stamp set and white heat embossed onto black cardstock. Then I matted the cardstock strip aqua and tucked the left end under the pumpkins.
For the mechanism I used the Waving Pull Tab die set. As you can see, it's also possible to pick the position of the image wherever you want it to on your card. And it also works when the image is attached at an angle - but that also means, that the tab has to be pulled at an angle instead of straightly down. That really doesn't bother me.


Alle Elemente, die hinter der Fledermaus liegen, musste ich direkt auf den Cardstock kleben, damit der Mechanismus funktionert und die Flügel der Fledermaus nirgends hängen bleiben. Dafür habe ich hinter die Kürbisse, den Text und die Laterne sowie den Körper der Fledermaus dann dünnes bzw. dickes 3D Tape gesetzt. 
Den Mond, die Flügel der Fledermaus und die Kürbisse habe ich dann noch mit Stickles beglittert. Dann habe ich den Cardstock schwarz gemattet und alles auf einen weißen Kartenrohling geklebt.

All elements behind the bat I had to glue directly to the background, to make the mechanism work smoothly and avoid the bat's wings gettings stuck somewhere. But to attach the pumpkins, the text, the lantern and the bat's body I used thin and thick foam tape.
I used Stickles to add some glitter to the moon, the bat's wings and the pumpkins, then matted my cardstock black and attached it to a white note card.