
Hallo Ihr Lieben!
Heute geht es weiter mit den Weihnachtskarten. Auf dieser hier habe ich ein Pfingstrosenmotiv verwendet - aber das merkt man gar nicht. Es lohnt sich also, auch mal durch die nicht-weihnachtlichen Stempel zu schauen, ob sich da nicht was passendes findet....
Hello everyone!
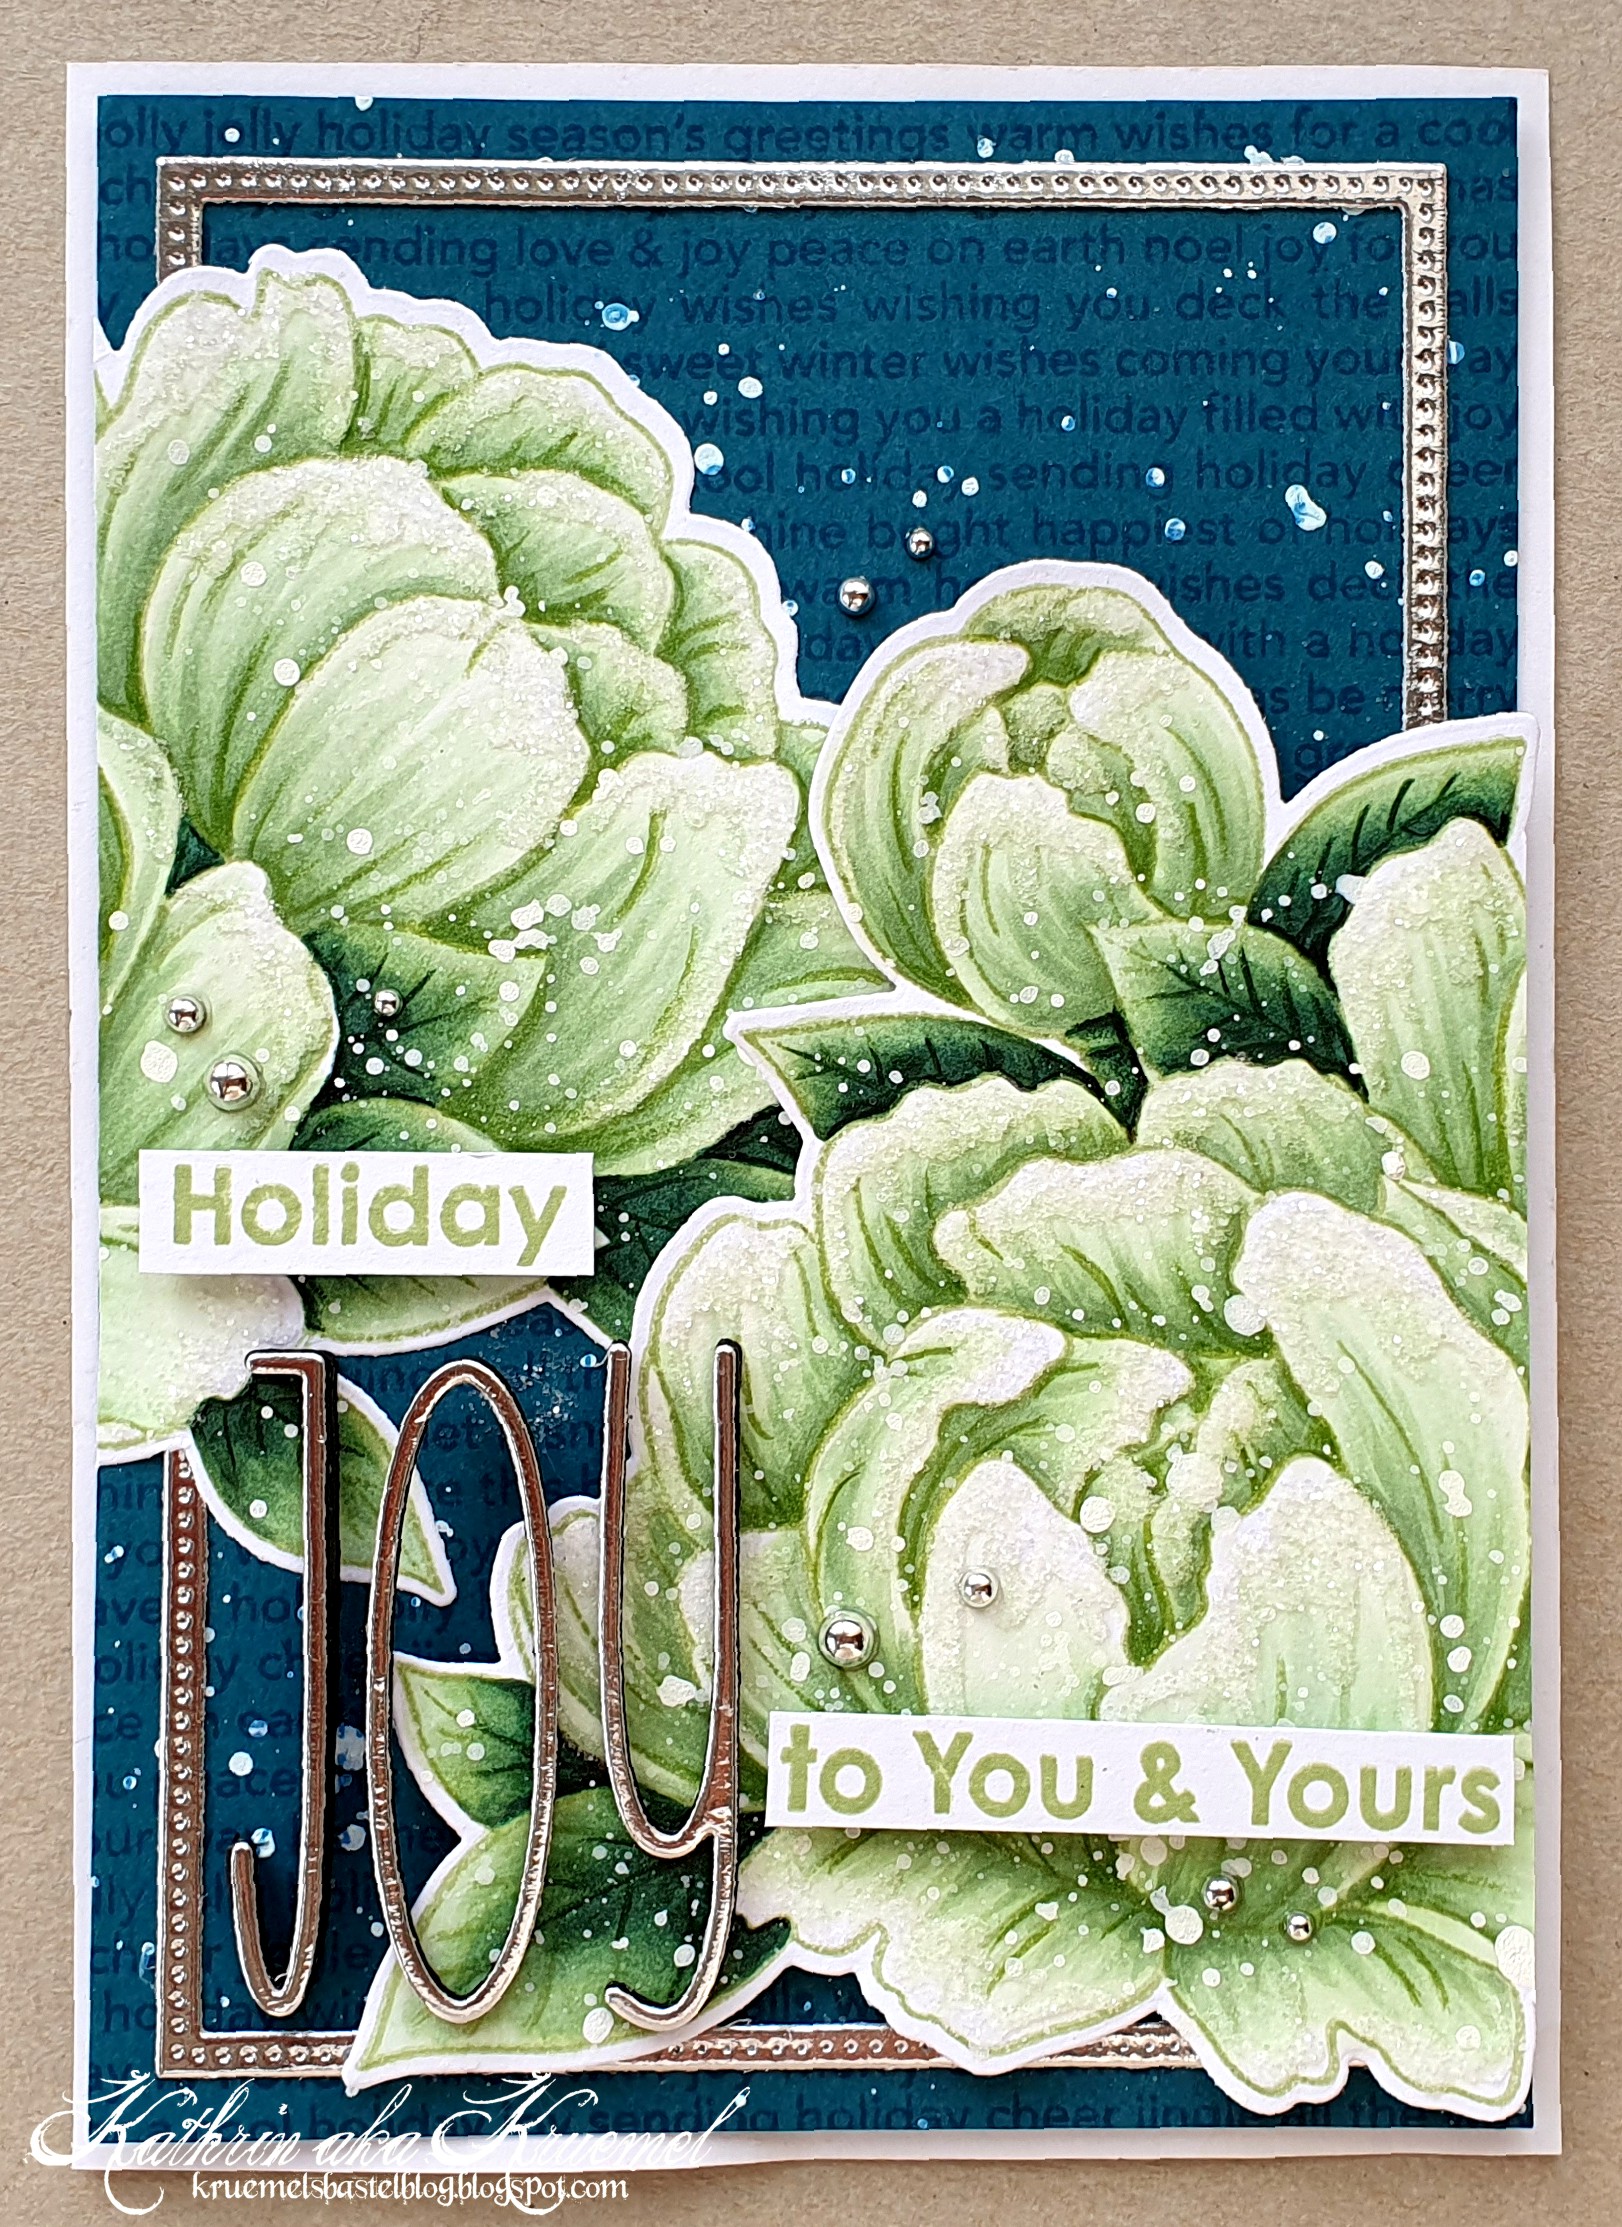
I am continuing to share christmas cards. On this one I used a peony image - but you can hardly recognize it as that. So it's always worth going through your non-christmas stamps, maybe there's something among those, that works on a christmas card as well.
Hier habe ich für den Hintergrund ein Stück dunkel-türkisfarbenen Cardstock zugeschnitten und weiße Acrylfarbe aufgespritzt. Dann habe ich den Christmas Background von MFT mit Distress Ink Uncharted Mariner darüber gestempelt. Der Text ist ziemlich subtil, und trotzdem wirkt der Hintergrund dadurch so viel interessanter.
Da ich hier auf die Mattung meines Cardstocks verzichtet habe - sonst hätte ich so viel des Motivs wegschneiden müssen - habe ich stattdessen mit einer der Stitched Rectangle Frames von Create a Smile einen Rahmen aus silberfarbenem Spiegelcardstock gestanzt und auf den Hintergrund geklebt.
For my background I cut a piece of dark turquoise cardstock a bit smaller than my card base and spritzed some white acrylic paint onto it. Then I stamped the Christmas Background by MFT on top, using Distress Ink Uncharted Mariner. The text is quite tone on tone with the cardstock, but still it adds a lot of interest to the background.
Since I didn't mat my cardstock for this card - I would have had to cut off quite a bit of the image otherwise - I die cut a frame from silver mirror cardstock using one of the Stitched Rectangle Frames by Create a Smile and glued that onto the background.

Die tolle Pfingstrose ist aus dem Gracious Peonies Stempelset von Altenew. Ich habe das Motiv mit hellgrüner Tinte auf weißen Cardstock gestempelt und es dann mit Copics coloriert - die Blüten in ganz zartem Grün, die Blätter in dunklerem Grün. Anschließend habe ich das Motiv noch einmal mit der selben Tinte aufgestempelt - durch die Feuchtigkeit der Copics waren die Linien, die ich mit Dye Ink gestempelt hatte, doch recht verblasst. Indem ich das Motiv noch einmal aufgestempelt habe, waren die Details wieder sichtbar. Nur an den dunklen Stellen der Blätter kam die hellgrüne Tinte natürlich nicht durch. Deswegen habe ich dort die Blattadern mit einem dunkelgrünen Polychromo nachgemalt.
Anschließend habe ich das Motiv mit der passenden Outline-Stanze ausgestanzt. Und dann fing das Drama in meinem Kopf an. Ich sah auf einmal statt der tollen Blüten nur noch Kopfsalat. Das hat natürlich nichts mit dem tollen Motiv, sondern mit meiner Farbwahl zu tun. Aber da war die Idee nun mal in meinem Kopf... Also habe ich erstmal weiße Acrylfarbe über das Motiv gespritzt, dann habe ich auf die hellsten Bereiche der Blütenblätter Kleber aufgetragen und Distress Rock Candy Glitter aufgestreut. Anschließend habe ich das Motiv zerschnitten, komplett hätte es nie auf meine Karte gepasst. So habe ich einen Teil links direkt auf die Karte geklebt, den größeren Teil dann rechts mit 3D Tape leicht überlappend darüber. Egal, der Kopfsalat ist immer noch in meinem Kopf... ;)
Those beautiful peonies are from the Gracious Peonies stamp set by Altenew. I stamped the image with light green ink onto some white cardstock, then used my Copics to color the petals a very light green, the leaves a quite dark green. Then I stamped the image again, using the same ink. I had used a Dye Ink, and the moisture of the Copics had let the ink fade a bit. By stamping it on top again, the details are more visible. And since the details weren't visible under the dark green of the leaves, I used a dark green Polychromo to re-draw those.
Then I used the matching outline die to cut the image out. And then the drama started. Instead of seeing some beautiful peonies, all I saw were heads of lettuce. Of course this has nothing to do with the beautiful image itself, but everything with the colors I've chosen. But well, the idea was stuck in my head... So I spritzed some white acrylic paint over the image as well, then applied some clear drying glue to the lightest areas of the petals and covered them with Distress Rock Candy glitter. I cut the image apart - it was way too big for my card. I attached the smaller part onto the left edge of my background, glueing it directly onto the cardstock. To adhere the bigger part to the right edge, overlapping it a bit with the other part, I used foam tape. But well, there's still lettuce in my head... ;)
.jpg)
Für den Text habe ich wieder eine Mischung aus gestanzten Buchstaben und gestempelten Worten verwendet. Das Wort Joy ist mit dem Tall Skinny Alphabet Stanzenset von Scrapbook.com gemacht. Erst als meine Karte fertig war und ich die Stanzen wieder aufgeräumt habe, ist mir aufgefallen, dass ich das Y von den Kleinbuchstaben verwendet habe. Da aber alle Buchstaben gleich hoch sind, fällt das gar nicht auf.
Ich habe alle Buchstaben aus silberfarbenem Spiegelcardstock gestanzt und mit 4 Lagen aus schwarzem Cardstock hinterlegt. Dann fiel mir auf, dass das J tiefer sitzt, da ich das Motiv rechts ja mit 3D Tape aufgeklebt habe. Also habe ich noch ein paar weitere schwarze Js gestanzt, so dass sich dort insgesamt 8 Lagen schwarzen Cardstocks hinter dem silbernen Buchstaben befinden.
Für den Rest des Textes habe ich Stempel aus dem Set Filled with Joy von MFT verwendet und sie mit der selben grünen Tinte gestempelt, die ich auch für das Motiv verwendet habe. Die Streifen mit den aufgestempelten Texten habe ich dann wieder mit 3D Tape aufgeklebt.
For the text I used a mix of die cut letters and stamped words again. The word JOY is cut with the Tall Skinny Alphabet die set by Scrapbook.com. After I had finished my card and was putting my dies away, I realized, that I had used the lowercase Y with the uppercase J and O. But since all letters have the same size, I didn't care.
I cut the letters from silver mirror cardstock and glued 4 layers cut from black cardstock behind each letter. Then I realized, that the J will be lower because I had attached the image on the right with foam tape. So I've cut a few more black Js and now there are 8 black layers behind the silver letter.
For the rest of the text I used stamps from the Filled with Joy stamp set by MFT and stamped the words with the same green ink I had used for the image. Then I adhered the strips with the stamped on texts with foam tape.

Durch den Glitter auf den Blütenblättern - und in Kombi mit dem silberfarbenen Spiegelcardstock - hat die Karte einen tollen und perfekt zu Weihnachten passenden Schimmer.
Eigentlich hatte ich es nicht geplant, habe abe dann doch einige wenige, kleine silberne Perlen auf der Karte verteilt. Dann habe ich alles auf einen weißen Kartenrohling geklebt.
With the glitter on the petals and in combination with the silver mirror cardstock this card has a wonderful and christmassy shimmer.
I really hadn't planned to, but then I decided to add a few tiny silver pearls to my card and attached it to a white note card.