Posts mit dem Label PrettyPinkPosh werden angezeigt. Alle Posts anzeigen

Mittwoch, 20. August 2025

Technique Throwback Thursday Challenge August 2025

 
Hallo Ihr Lieben!
Ich habe dieses Jahr schon die ein oder andere Halloween-Karte gemacht und bin irgendwie schon richtig drin in dem Thema. Deswegen ist auch meine Karte für die Technique Throwback Thursday Challegen im August eine Halloween-Karte geworden.
Thema ist diesmal eine Technik, bei der ein mit Alkohol besprühter Stencil auf einen zuvor gewischten Hintergrund gelegt und zum Prägen durch die Big Shot gedreht wird. Durch die Feuchtigkeit wird das Muster des Stencils im Cardstock heller und gleichzeitig natürlich eingeprägt. Soweit die Theorie...
 
Hello everyone!
I have already made quite a few Halloween cards this year and so it is no wonder that also my card for the august Technique Throwback Thursday challenge is a Halloween card.
Theme is a technique, where you place a stencil, nested with alcohol, on a previously inked background and ran it through your Big Shot to emboss the stencil pattern into the cardstock. The moisture of the alcohol makes the ink lighten up. Well, at least in theorie....
 
Ich habe hier ein Stück weißen Cardstock mit Distress Ink Dusty Concord, Wilted Violet, Villainous Potion und Black Soot gewischt und dann die Technik mit dem Stencil probiert. Ich habe den Spinnennetz-Stencil von LawnFawn bestimmt 6 mal mit Alcohol besprüht und dann durch die Big Shot gedreht, aber so richtig hell wollte mein Muster nicht werden. Vielleicht war es der falsche Cardstock - wobei ich den immer zum Ink Blending benutze und Wassertropfen normalerweise schön hell werden -, vielleicht lag es auch daran, dass es super heiß war und der Alkohol eventuell zu schnell getrocknet ist. Ich habe mich im Endeffekt dazu entschlossen, das Muster ganz leicht mit einem weißen Polychromo nachzumalen, habe also quasi ein wenig gecheatet. Aber so sieht man das Spinnennetz zumindest. 
Und dann habe ich angefangen, viele Elemente auf die Karte zu packen. Zuerst habe ich durch den Stencil hindurch den Ghoulish Greetings Background von MFT mit schwarzer Tinte auf den Cardstock gestempelt, anschließend habe ich weiße Acrylfarbe aufgespritzt. Außerdem habe ich mit schwarzer Stencil Butter und dem Layered Bats Stencil von SimonSaysStamp Fledermäuse quer auf den Hintergrund aufgetragen.
 
I inked a piece of white cardstock with Distress Ink Dusty Concord, Wilted Violet, Villainous Potion and Black Soot and then tried out the technique with the stencil. I misted the spiderweb stencil by LawnFawn at least 6 times with alcohol and ran it through the Big Shot, but the pattern on my card didn't want to become really light. Maybe it was the wrong cardstock for this technique - it's the same cardstock I always use for ink blending and water drops usually light it up pretty well though - or maybe it's because it was a really hot day and the alcohol might have evaporated too quickly. In the end I decided to use  a white Polychromo and lightly trace the pattern, so yes, I cheated a bit. Bit this way the  spider web is at least visible better. 
And then I started to pack more and more things on this card. First I stamped the Ghoulish Greetings Background by MFT with black ink, stamping through the stencil. Then I added splatters of white acrylic paint. I also used black stencil butter and the Layered Bats stencil by SimonSaysStamp to add some bats  across the background.
 

 Aus lila-farbenem Vellum habe ich den Drippy Frame von WhimsyStamps gestanzt und die Ränder leicht mit Black Soot gewischt. Den Rahmen habe ich mittig auf meinen Hintergrund gelegt und dahinter einen Mond und Nebelschwaden geklebt. 
Der Mond ist mit der Over the Moon Stanze von MFT aus hell-lila Cardstock gestanzt und mit Dusty Concord ein wenig schattiert. Ich habe ihn so aufgeklebt, dass er oben über den Hintergrund hinausragt und den Überstand abgeschnitten.
Die Nebelschwaden sind mit einem Clouds-Stanzenset von MFT aus Vellum gemacht.  
 
From purple vellum I die cut the Drippy Frame by WhimsyStamps and inked the edges with a bit of Black Soot. I placed the frame centered onto the background and put a moon and some fog behind it. The moon I cut with the Over the Moon die by MFT from light purple cardstock and shaded it with a bit of Dusty Concord. I adhered it to the background, letting it go over the top edge of the cardstock, then cut off the overhang.
The fog is made from vellum using a cloud die set by MFT.
 

 Mittig in den Rahmen habe ich ein Boo geklebt. Das habe ich mit der Boo Script Stanze von PrettyPinkPosh einmal aus schwarzem Cardstock und einmal aus silbernem Glitter-Cardstock gestanzt und leicht versetzt aufgeklebt.
Den Text ergänzt dann ein "2 you", das ich unten auf den Rahmen geklebt habe. Auch diese Buchstaben sind aus schwarzem Cardstock und silbernem Glitter-Cardstock gemacht. Die Zahl 2 ist aus dem Set Wedding Alphabet von X-Cut, das you Teil der Happy Birthday To You Stanze von MFT.
 Und dann habe ich noch ein paar größere Fledermäuse ausgestanzt und auf die Karte geklebt. Ich habe hier das Bat Trio Stanzenset von SimonSaysStamp benutzt. Die Fledermäuse sind jeweils einmal aus silbernem Glitter-Cardstock und einmal aus schwarzem Mirror-Cardstock gestanzt. Die schwarzen Fledermäuse habe ich jeweils in drei Teile geschnitten und dann den Körper auf, die Flügel hinter die silberne Fledermaus geklebt. Die Augen sind mit einem silbernen Glitter-Gelstift gemacht.
 
Centerd into the frame I glued a boo. I made that with the Boo Script die by PrettyPinkPosh, cutting it once from black cardstock and once from silver glitter cardtock, then layering them a bit offset.
The text is completed by a "2 you", that I adhered to the bottom of the frame. Again I cut the letters from black cardstock and silver glitter cardstock. The number 2 is from Wedding Alphabet by X-Cut, the you part of the Happy Birthday to You die by MFT.
And then I also added some larger bats. I die cut those with the Bat Trio die by SimonSaysStamp and cut them once from silver glitter cardstock, once from black mirror cardstock. I cut the black bats into three pieces, then glued the bodies on top, the wings behind the silver bats. The eyes I drew with a silver glitter gel pen.
 

 Auf dieser Karte habe ich nur hinter die Fleermäuse etwas dünnes 3D Tape gesetzt, der Rest ist direkt auf den Hintergrund geklebt.
Als Deko habe ich noch ein paar silberne Glitter-Pailetten auf der Karte verteilt und dann alles auf einen weißen Kartenrohling geklebt.
 
On this card I only used a bit of thin foam tape behind the bats, the rest I glued directly onto the background.
I added a few silver glitter sequins as decoration and attached the card panel to a white note card.
 

Samstag, 31. August 2024

Danke sagen

 
Hallo Ihr Lieben!
Eine Freundin wohnt in einem von drei Häusern, die in einer kleinen Sackgasse stehen. Und genau die war nun für Monate gesperrt und damit auch der Weg zu Haus und Garage versperrt. Aber die Nachbarn waren so lieb und haben sie über ihre privaten Grundstücke fahren lassen, so dass das doch möglich war. Dafür möchte sie sich nun erkenntlich zeigen und hat mich gefragt, ob ich ihr zwei Karten machen könnte. Und das hier ist sie - sind sie. Da beide gleich ausgefallen sind, zeige ich nur eine.

Hello everyone!
A friend of mine lives in one of three houses at the end of a dead end road. And this road was closed for several months due to construction works. That also meant that she wasn't able to drive to her house. Well, it would have meant that if the neighbours wouldn't have given her permission to drive through their private properties. She wants to thank them now and asked me, if I can make her two cards. And here it is - they are. I made two identical ones so I am only sharing one.

Ich habe auf ein Stück weißen Cardstock den Himmel mit Distress Oxide Mermaid Lagoon, das Gras mit Mowed Lawn gewischt. Dann habe ich zwei Straßen aufgeklebt. Die sind mit der On the Road Stanze von LawnFawn sowie einer der Open Road Stanzen von MFT gestanzt. Ich habe sie mit schwarzer und grauer Metallic Watercolor bespritzt und dann die Mittelstreifen weiß hinterlegt.

I inked a sky with Distress Oxide Mermaid Lagoon and some grass with Mowed Lawn onto a piece of white cardstock. Then I glued two roads on top. I die cut those from black cardstock using the On the Road die by LawnFawn and one of the Open Road dies by MFT. I added splatters of black and grey metallic watercolor, then put white cardstock behind the center lines.


Oben, entlang der quer aufgestellten Straße, habe ich die drei Häuser platziert. Die sind, genauso wie die Bäume dahinter, mit dem Home Sweet Home Stanzenset von MFT aus farbigem Cardstock gestanzt.

At the top. along the street I glued across the background, I placed the three houses. These and also the trees behind them are die cut with the Home Sweet Home die set by MFT from colored cardstock.


Und unten auf der Karte befindet sich die gesperrte Straße samt Baustelle.
Die Baustelle ist mit Stempeln aus den Sets Helper Vehicles, Construction Trucks und Construction Additions von PrettyPinkPosh gemacht. Ich habe alle Teile mit Copics coloriert und per Hand ausgeschnitten.
Und unter der Baustelle war dann noch genug Platz auf der Straße, um meinen Text unterzubringen. Das Danke besteht aus mehreren Lagen, alle aus weißem Cardstock gestanzt. Und weil die Freundin einen tierischen Nachnamen hat, musste ich einfach diesen kleinen freundlichen Bären aus dem Treat Cart Set von LawnFawn mit auf die Karte bringen.
Der kleine Text darunter ist am PC geschrieben - "für Eure Hilfe" fand ich irgendwie unpassend, aber einen anderen passenden Text konnte ich unter meinen Stempeln auch nicht ausmachen. Also habe ich mir so beholfen.

At the bottom of the card there's the closed road with the construction site.
The construction images are from the sets Helper Vehicles, Construction Trucks and Construction Additoins by PrettyPinkPosh. I colored all pieces with Copics and cut them out with my scissors.
Under the construction site there was enough room on the road to add my text. The danke - thank you - is made from several layers, all cut from white cardstock. And since my friend's last name is just like the name of a wild animal I just had to add that cute, friendly little bear from the Treat Cart set by LawnFawn.
The small text underneath means "for showing a way through the chaos" and I printed that with my home printer. It was the only text that made sense but I really wasn't able to find a stamp like that in my stash. 


Die Baustellenelemente sind jeweils mit dünnem 3D Tape hinterlegt, hinter den Bären und den gedruckten Text habe ich dickes 3D Tape gelegt. Zum Schluss habe ich den Cardstock auf einen weißen Kartenrohling geklebt.

I put thin foam tape behind the construction site elementes, the bear and the printed text I backed with thick foam tape. Then I adhered the card panel to a white note card.

Mittwoch, 24. Juli 2024

Sound the Alarm

 
Hallo Ihr Lieben!
Vor kurzem habe ich Euch ja meine Baustellenkarte mit den genialen Fahrzeugen von PrettyPinkPosh gezeigt. Heute habe ich mal Motive aus dem Set Helper Vehicles verwendet, in dem neben dem Feuerwehrauto oben auch ein Krankenwagen und ein Polizeiauto sowie diverses Zubehör zu finden ist. Und über ein Feuerwehrauto freuen sich doch kleine und große Jungs gleichermaßen.

Hello everyone!
A little ago I shared my construction zone card using those amazing construction vehicles by PrettyPinkPosh. On today's card I used images from the Helper Vehicles set, that does not only have a firetruck image but also an ambulance and a police car and some accessoires to go with them. And I'm sure, a firetruck fits a card for both, small and big boys equally.

Den Himmel habe ich auf weißen Cardstock gewischt und dabei den Drapped Ribbon Stencil von LawnFawn und Distress Oxide Wild Honey, Spiced Marmalade, Crackling Campfire, Candied Apple und ein wenig Aged Mahogany verwendet. Dann habe ich goldene Metallic Watercolor und weiße Acrylfarbe aufgespritzt.

I created the sky on a piece of white cardstock using the Draped Ribbon Stencil by LawnFawn and Distress Oxide Wild Honey, Spiced Marmalade, Crackling Campfire, Candied Apple and a bit of Aged Mahogany. Then I added splatters with gold metallic watercolor and white acrylic paint.


Beim Zuschneiden des Cardstocks - ich mache ihn beim Wischen meist ein wenig größer - habe ich mich leider verschnitten und musste rechts einen Streifen wieder anstückeln. Aber wenn ich es Euch nicht gesagt hätte, wäre das bestimmt nicht aufgefallen, oder?
Ganz oben auf der Karte habe ich einen "lasst die Sirenen heulen" Text aufgeklebt. Der ist ebenfalls aus dem Set mit dem Feuerwehrauto und weiß auf schwarzen Cardstock embosst.

When I cut down the sky - I usually make my backgrounds a bit larger first - I made a mistake and so I had to add a strip on the right, that I accidently had cut off. But if I didn't tell you wouldn't have noticed, right?
Onto the very top of the card I added a "sound the siren"  text. It also comes in the set with the firetruck and white heat embossed onto black cardstock.


Das Feuerwehrauto, und alle anderen Motive, habe ich mit Copics coloriert. Ich habe hier zudem einen Hyranten und einen Feuerwehrschlauch verwendet. 
Auf den weißen Streifen, der quer über das Auto verläuft, habe ich mit brauner Tinte eine "hooray" aus dem Itty Bitty Birthday Stempelset von MFT aufgestempelt und zwei kleine, rote Sternkonfetti aufgeklebt. Die Fensterscheibe und das Blaulicht sind außerdem mit Glossy Accents überzogen.
Auf den Himmel habe ich dann erst eine Skyline City Block Set von MFT aufgeklebt. Die habe ich aus schwarzem Cardstock gestanzt und die Fenster mit Cardstockstreifen, die ich leicht mit Wild Honey gewischt habe, hinterlegt. Darunter kam dann ein Stück grauer Cardstock, den ich am Rand ganz leicht mit Black Soot gewischt habe, dann habe ich ein wenig davon und weiße Acrylfarbe aufgespritzt.
Und darauf kam dann das Feuerwehrauto. Ich wollte es so aussehen lassen, dass die Feuerwehrleute bei der Alarmierung so schnell losgefahren sind, dass sie gar nicht gemerkt haben, dass der Schlauch nicht ganz aufgerollt war und den nun hinter sich herschleifen. Wie gut, dass sie nicht zu einem Brand, sondern nur zu einer Geburtstagsparty ausrücken!

The firetruck, and all the other images on the card, I colored with Copics. I also used a fireplug and a fire hose here.
Onto the white strip, that goes across the truck, I stamped "hooray" from the Itty Bitty Birthday stamp set by MFT and light brown ink. I also glued down two small, red star confetti here, the window and the blue light I covered with Glossy Accents.
Onto the sky I first glued a skyline, that I die cut with one of the dies from the City Block set by MFT from black cardstock. Behind the windows I put cardstock strips, that inked lightly with Wild Honey. As the ground I used a piece of dark grey cardstock. I inked the edges lightly with Black Soot, then splattered some of it and some white acrylic paint onto it.
Then I glued the firetruck on top. I wanted it to look like those fireworkers responded to the allarm that quickly, that they didn't realize that the hose wasn't stored correctly and that they are dragging it behind the car now. Luckily they are only out for a birthday party and not a real fire!


Und unten auf der Straße habe ich dann den Rest meines Textes aufgeklebt. Das Birthday ist mit der Happy Birthday Stanze von MFT aus weißem Cardstock gestanzt, dann habe ich es mit den selben Farben, die ich auch für den Himmel verwendet habe, gewischt und wieder goldene Metallic Watercolor aufgespritzt.
Das kleine "it's your" ist wieder aus dem Set Itty Bitty Birthday. 
Und unten rechts habe ich auf den Text  noch einen Feuerwehrhelm aufgeklebt. 

At the bottom of the card, on top of the street, there was room for my text. I die cut the word birthday from white cardstock using the Happy Birthday die by MFT, then inked it with the same colors I had also used for the background. And again I added splatter with gold metallic watercolor.
The little "it's your" is again from the Itty Bitty Birthday set.
To the right I adhered a helmet to the word.


Beim Aufkleben der Elemente habe ich teilweise dünnes und dickes 3D Tape benutzt, der Text ist das höchste Element. Als Deko habe ich auf den Himmel kleine und unten auf die Straße etwas größere goldene Sterne aufgeklebt und mit einem davon auch den I-Punkt ersetzt. 
Zum Schluss habe ich alles schwarz gemattet und auf einen weißen Kartenrohling geklebt.

Whe adhering the elements I partly used thin and thick foam tape, the text ist the most raised element. I added small gold stars to the sky and a bit larger ones onto the street, using one as the tittle of the I.
Then I matted the card panel black and attached it to a white card base.

Samstag, 13. Juli 2024

Karte oder Wimmelbild?

 
Hallo Ihr Lieben!
Mit dieser Karte sind die Pferde - oder Mäuse - wohl ein wenig mit mir durchgegangen.... Aber dazu gleich mehr.

Hello everyone!
I think, on this card I went a bit overboard with all the images... But a bit more about that later.
 
Zuerst einmal sieht die Karte gar nicht so "wild" aus. Ich glaube, es war vorletztes Jahr, dass PrettyPinkPosh  Stempelsets mit Fahrzeugen herausgebracht hat. Und ich hatte mir die damals bestellt. Als nun vor kurzem drei weitere Sets herauskamen, musste ich die als Jungs-Oma natürlich auch haben. Und hier habe ich sie benutzt. 
Ich habe hier eine Gatefold Card gemacht, die mit einer Banderole geschlossen gehalten wird. Für die Banderole habe ich die Diagonal Stripes Border Stanze von LawnFawn benutzt und sie aus rotem sowie den Schatten aus weißem Cardstdock gestanzt, denn so erinnert sie mich an eine Absperrung. Damit die Banderolen auch jeweils einmal rund um meine Karte passt, habe ich sie per Partial Diecutting verlängert,dann gekreuzt aufeinander geklebt und um die Karte gelegt.

At first, this card doesn't look "wild" at all. I think, it was two years ago, that PrettyPinkPosh released some stamp sets with vehicles and I had ordered them back then. When they release three more sets recently, me as a boys grandma of course had to get them. And I used them on this card.
I made a gatefold card here, that is held closed by a sleeve. For the sleeve I used the Diagonal Stripes Border die by LawnFawn and die cut it from red and the shadow from white cardstock because that reminded me of a barrier. To make the borders long enough to fit around my card I did some partial diecutting to make them longer, than glued them crossed onto each other and wrapped it around the card base.


Oben auf die Banderole habe ich schon mal die ersten Baustellenmotive geklebt. Auf einer Straße befindet sich ein Lastwagen sowie zwei Pylonen, eine Straßenabsperrung und ein Verkehrsschild. Zu diesen Stempeln dann gleich noch mehr.
Außerdem habe ich hier auch noch einen Text angebracht. Das Danger ist aus einem Stempelset von StudioG und schwarz auf dunkelgelben Cardstock gestempelt. Den Text "Roadworks Adhead" habe ich mit einem Alphabet von WhimsyStamps auf heller-gelbem Cardstock zusammengesetzt.

On top of the sleeve I added the first construction images. On a street there's a truck, two pylons, a barrier and a street sign. More about the images a bit later.
I also added a text here. The Danger is from a stamp set by StudioG and stamped black onto dark yellow cardstock. The "roadworks ahead" text I put together using an alphabet set by WhimsyStamps, stamping it onto lighter yellow cardstock.


Das Wort Danger habe ich direkt auf eine der Klappen der Kartenfront geklebt, es bleibt nach dem Abziehen der Banderole auf der Karte.
Für den Hintergrund habe ich mir einen Sechseckstencil nach der Größe des Stopschilds aus dem Set Across the Miles Stempelset gemacht. Durch diesen Stencil habe ich dann mit Distress Ink Barn Door ein Stück weißen Cardstocks rote Sechsecke gewischt. Auf die habe ich später mit weißem Embossingpulver das Stoppschild  - mehr oder weniger perfekt - aufembosst.
Die Ränder des Cardstocks habe ich mit Distress Ink Scorched Timber ein wenig schattiert. 

I glued the word danger directly onto one of the flaps of the card front, it is still visible after the sleeve has been taken off.
For the background I created myself a hexagon stencil in the size of the stop sign from the Across the Miles stamp set. Using this stencil and Distress Ink Barn Door I filled a piece of white cardstock with red hexagons. Later I white heat embossed the stop sign onto them - more or less perfectly, but I don't mind.
I used Distress Ink Scorched Timber to darken the edges of the cardstock.


Auf den weißen Cardstock habe ich dann noch goldene Metallic Watercolor aufgespritzt. Dann habe ich ihn schwarz gemattet, mittig halbiert und auf die beiden Klappen meiner Gatefold Card geklebt.

I added splatters with some gold metallic watercolor to the cardstock, then matted it black, cut it in half and adhered the pieces to the front flaps of my gatefold card.


So, und beim Blick ins Innere der Karte versteht Ihr sicherlich auch meinen Posttitel. Ich konnte mich einfach nicht beherrschen und einmal mehr passend die Mäuse von LawnFawn einfach perfekt zu all den Baustellenfahrzeugen. Und ehrlich gesagt, war das auch der Grund, warum ich eine Gatefold Card gemacht habe. Auf eine normale Karte hätte ich diese Szene nie untergebracht.

Well, and with one look on the inside of the card you understand, why I named this post "is it a card or a hidden object picture". I just couldn't resist and those mice by LawnFawn once again fit perfectly with all those construction vehicles. And to be honest, that's also the reason why I made a gatefold card. There would have been no way to fit this scene onto a regular card front.


Den Himmel habe ich mit Distress Oxide Tumbled Glass gewischt - ich glaube, da war noch ein wenig Salvaged Patina auf dem Pinsel, aber ich finde die Farbe klasse.
Darunter habe ich eine Lage Häuse aus hellgrauem Cardstock aufgeklebt, die ich mit einer Stanze aus dem Slimline Cityscapes Stanzenset von WhimsyStamps gestanzt habe. Dahinter habe ich dann noch einige weitere Häuser, gemacht aus schwarzem Cardstock mit einer Stanze aus dem Cityline und Tower Set von Kulricke, gesetzt. Beides habe ich an den oberen Rand der Karte geklebt und darunter quer verlaufend eine Straße gesetzt. Die ist aus dem Set Open Road von MFT und wieder per Partial Diecutting verlängert.
 
I inked the sky with Distress Oxide Tumbled Glass. Seems like there was some Salvaged Patina left on the brush but I like the color the way it is.
On top I adhered a skyline, made from grey cardstock using a die from the Slimline Cityscapes die set by Whimsystamps. Behind those houses I put a few more, this time die cut from black cardstock using a die from the Cityline and Tower set by Kulricke. I put the houses close to the top edge of the card and put a street under it. This one I made using a die from the Open Road set by MFT and again did some partial diecutting to make it longer.
 

 Hier, quer über die Häuser, habe ich dann auch den Text meiner Karte untergebracht. Der ist mit schwarzer Tinte auf gelben Cardstock gestempelt und weiß gemattet. Für den Text habe ich Stempel aus den LawnFawn Sets Oh what Fun, Treat Cart Sentiment Add-On, Berry Special und Apple-Solutely Awesome kombiniert.

Here, across the houses, I found space for my text. I stamped it with black ink onto yellow cardstock and matted it white. For the text I combined stamps from the LawnFawn sets Oh what Fun, Treat Cart Sentiment Add-On, Berry Special and Apple-Solutely Awesome.


Und darunter ist die Straßenbaustelle in vollem Gange. Ich finde, man sieht den Mäusen an, wie viel Spaß sie bei der Arbeit haben. 
Für den erdigen Boden habe ich den Rest der Karte mit Distress Oxide Frayed Burlap und Scorched Timber bewusst ein wenig fleckig gewischt. Dann habe ich schwarze und braune Metallic Watercolor sowie weiße Acrylfarbe aufgespritzt.

Under the far-off city there's the road construction scene and you can see, how much fun those mice have at work.
For the ground I inked the rest of the card with Distress Oxide Frayed Burlap and Scorched Timber, keeping it a bit splotchy on purpose. Then I added splatters with black and brown metallic watercolor and white acrlic paint.


Für die Verbindungsstraße zwischen der Stadt und der im Bau befindlichen Straße habe ich die On the Road Stanze von LawnFawn benutzt. Alle Straßen habe ich aus schwarzem Cardstock gestanzt und sie mit schwarzer und silberner Metallic Watercolor sowie weißer Acrylfarbe bespritzt. Bis auf die große Straße vorne/unten habe ich die Mittelstreifen mit weißem Cardstock hinterlegt.
Die Motive hier sind alle aus den Sets Helper Vehicles, Utility Vehicles, Construction Trucks und Construction Additions von PrettyPinkPosh und mit Copics coloriert. Dann habe ich sie per Hand ausgeschnitten.

For the road between the city and the road under construction I used the On the Road die by LawnFawn. I die cut all  the streets here from black cardstock and splattered black and silver metallic watercolor and white acrylic paint onto them. The center lines I made from white cardstock.
All images are from the stamp sets Helper Vehicles, Utility Vehicles, Construction Trucks and Construction Additions by PrettyPink Posh. I colored them all with Copics and cut them out by hand.


Die Straße vorne besteht einfach aus einem Streifen schwarzen Cardstocks. In den habe ich in der Mitte ein Oval mit einer der Oval Shadows Stanzen von MFT ausgestanzt, um ein Loch, das der Bagger gerade ausgehoben hat, darzustellen. 
Die Mäuse sind aus den Sets Berry Special, Apple-Solutely Awesome, Veggie Happy, Whoosh Kites, Sew Very Mice und Hay There Hayrides Mice Add-On. Aus letzterem ist die kleine Maus, die am Steuer des Baggers links sitzt - sogar die passt perfekt. Natürlich tragen alle Mäuse vorschriftsmäßig einen Baustellenhelm aus einem der Sets von PrettyPinkPosh. Und aus deren Sets sind neben den Fahrzeugen auch all die kleinen Motive wie Pylonen, Straßenschilder, Erd- und Steinhaufen, Schaufeln, Straßensperren und der Hydrant. 

The street in the front is simply made from a strip of black cardstock. I used one of the Oval Shadows by MFT to die cut an oval into its center to create the hole, that the mice just digged. 
The mice are from the sets Berry Special, Apple-Solutely Awesome, Veggie Happy, Whoosh Kites, Sew Very Mice and Hay There Hayrides Mice Add-On. From this last set comes the little mouse driving the excavator on the left - even this one was perfect in size. Of course all the mice are following the rules and are wearing helmets from one of the PrettyPinkPosh sets. Besides the vehicles also all those small images like the pylons, street signs, soil and stone piles, shovels, barriers and the hydrant come from their sets.


Und auf der rechten Seite läuft noch eine Maus mit Schubkarre, die ebenfalls aus dem Set Veggie Happy ist. Vorne, in der Mitte der Karte, seht Ihr übrigens den Bauleiter, der sich über sein tolles Team und die gute Arbeit freut.
Damit die Karte auch zu schließen ist, habe ich alle Motive direkt aufgeklebt und auf 3D Tape komplett verzichtet.

On the right side there's a mouse with a wheelbarrow, that's also from the Veggie Happy set. In the bottom center you can see the construction manager, who's overly excited about his team and the great work.
To make sure the card can still be closed I adhered all images directly and without any foam tape.

So, vielleicht mag mein Enthusiasmus hier ein wenig mit mir durchgegangen sein, aber: mein Enkel liebt die Karte!

Well, my fantasy might have gotten a bit overboard here but let me tell you: my grandson loves this card!

Samstag, 12. August 2023

August Technique Throwback Thursday Challenge

 
Hallo Ihr Lieben!
Ein neuer Monat hat begonnen und somit gibt es auch eine neue Technique Throwback Thursday Challenge in der Share Handmade Kindness Gruppe. Und diesmal wollte ich meine Karte nicht wieder auf den letzten Drücker machen. 
Thema ist diesmal das Video "Creative Use of Sentiments", in dem Jennifer aus einzelnen Textstempeln einen Hintergrund zusammensetzt. Eigentlich dachte ich, das Zusammensetzen würde ewig dauern, aber so wild war es gar nicht. Da hat das Zurückordnen der einzelnen Stempel in ihr passendes Stempelset fast genauso lang gedauert! ;)

Hello everyone!
A new month has started and so there's also a new Technique Throwback Thursday challenge in the Share Handmade Kindness group. And this time I didn't want to enter my card last minute.
Theme this month is the "Creative Use of Sentiments" video, where Jennifer uses a lot of small text stamps to create her own background. Honestly I thought that putting together the background will take forever. But it wasn't that hard - and putting back the stamps into each of their stamp sets took nearly as long. ;)
 
Hier habe ich im Hintergrund erstmal Geburtstagskerzen auf ein Stück craft farbenen Cardstock gestencilt. Dafür habe ich die Birthday Candles Layering Stencil von PrettyPinkPosh und Distress Oxide Broken China, Wild Honey sowie Hickory Smoke benutzt. Da das mit Hickory Smoke auf die Kerzen gewischte Muster irgendwie unterging, habe ich dann noch ganz leicht Black Soot obenauf gewischt. 
Und dann kam das Zusammensetzen des Hintergrund-Textes. Ich habe ihn mit Stempeln aus den Sets Itty Bitty Birthdays, Itty Bitty Celebrations, Little Birthday Notes und Bitty Birthday Wishes von MFT sowie für die größeren Worte dem Offset Saysings Birthday von LawnFawn zusammengesetzt. Dann habe ich ihn mit dem weißen Yeti Stempelkissen von LawnFawn auf den gestencilten Cardstock gestempelt. Mein craft farbener Cardstock saugt recht stark, deswegen habe ich mehrere Lagen aufeinander gestempelt und die Tinte zwischendurch immer Trocknen lassen. Und die Tatsache, dass ich mir nach den ersten zwei Lagen nicht sicher war, ob das Weiß gut genug sichtbar ist, und deswegen den Text einmal mit Distress Oxide Salvaged Patina auf den bereits weiß gestempelten Text gestempelt habe, war nicht gerade hilfreich. Das Salvaged Patina war auf den Kerzen so gut wie gar nicht sichtbar. Also habe ich noch ein paar weiße Lagen darüber gestempelt, um das helle Türkis wieder zu überdecken. Aber irgendwann war es dann lesbar. 
Um das Gelb der Flammen nochmal aufzugreifen habe ich dann ein wenig gelb-goldene Metallic Watercolor aufgespritzt. 
 
Here I first inked some birthday candles onto a piece of kraft colored cardstock. I used the Birthday Candles Layering stencilset by PrettyPinkPosh and Distress Oxide Broken China, Wild Honey and Hickory Smoke. Since the patterns on the candles, that I inked with Hickory Smoke, were hardly visible, I put a bit of Black Soot on top.
And then I had to put my background text together.  I did it with stamps from the sets Itty Bitty Birthdays, Itty Bitty Celebrations, Little Birthday Notes and Bitty Birthday Wishes by MFT and - for the larger words - the Offset Sayings Birthday stamp set by LawnFawn. Then I stamped it with the white Yeti ink onto the stenciled candles. My kraft colored cardstock soaked in the ink quite a bit, so I had to put down several layers of the white ink, letting the ink dry inbetween. Well, it didn't help that I wasn't sure if the white would be visible enough so after having stamped two layers of white I switched to Distress Oxide Salvaged Patina. But the light aqua wasn't visible on the darker aqua candles - and I had to do a few more layers of white to cover the light aqua again. But then I was finally happy with the result.
To pick up the yellow of the flames again, I flicked just a bit of yellow-ish gold metallic watercolor onto the background.


Als Motiv habe ich mich für den süßen Bären aus dem Set Happy Day von ColoradoCraft verwendet. Allerdings hält er hier statt der Blume den Luftballon, den eigentlich der Hase aus dem Set Birthday Wishing hält. Ich wollte unbedingt einen Luftballon auf der Karte, der Hase hat aber irgendwie nicht richtig gepasst. Also habe ich den Bären gestempelt, dabei die Blume abgedeckt und dann stattdessen den Luftballon - diesmal mit abgedecktem Hasen - abgstempelt. Dann habe ich das Motiv mit Copics coloriert, farblich passend zum craft farbenen Cardstock.
Aus dunkel grau-braunem Cardstock habe ich dann noch einen der Oval Shadows von MFT gestempelt und unter dem Bären als Boden/Schatten aufgeklebt.

As the image I picked the cute bear from the Happy Day set by ColoradoCraft. But instead of the flower I let him hold a balloon, that's from the bunny from the Birthday Wishing set. I really wanted to have a balloon on my card, but the bunny just didn't fit. So I stamped the bear, covering the flower he's holding, and then stamped the balloon - this time covering the bunny - in its place. I used Copics to color the image, trying to make the color match the kraft cardstock in the background.
From some dark greyish-brown cardstock I die cut one of the Oval Shadows by MFT and put it as a ground/shadow under the bear.


Der Text ist wieder aus dem Set Birthday Wishing. Ich habe ihn mehrfach mit der weißen Tinte auf ein weiteres Stück des grau-braunen Cardstocks gestempelt und dann in Streifen geschnitten. Zum Embossen war der Text zu fein - ich habe es probiert, er war nicht mehr lesbar. 

The text is again from the Birthday Wishing stamp set. I stamped it several times with the white ink onto another piece of the grey-ish brown cardstock, then cut it into strips. The text was too fine to heat emboss it - I've tried it and it was hardly legible. 


Den Bären sowie die Textstreifen habe ich dann mit dünnem 3D Tape auf dem Hintergrund befestigt und als Deko ein paar ebenfalls dunkelbraune Pailetten aufgeklebt. Dann habe ich den Cardstock dunkelbraun gemattet und alles auf einem weißen Kartenrohling angebracht.

I used thin foam tape to attach the bear and the text strips to the background and added a few dark brown sequins as decoration. Then I matted my cardstock dark brown and adhered everything to a white note card.

Freitag, 24. März 2023

Loads of Birthday Wishes

 
Hallo Ihr Lieben!
In einer kleinen privaten Facebook-Bastelgruppe gibt es alle zwei Wochen eine kleine Challenge - diesmal mit einem Sketch. Und weil mir aufgefallen ist, dass ich zwar einige Geburtstagskarten auf Lager habe, darunter aber keine für Jungs - oder jung gebliebene Männer - ist, habe ich den Sketch für eine solche Karte verwendet. 

Hello everyone!
In a small private Facebook group we have a little challenge each fortnight - this time with a sketch. And since I realized that I have quite a few birthday cards at hand right now, but none of them fits a young man - or an older one that's young at heart - I used the sketch to make such a card.

Hier habe ich die übriggebliebenen Streifen eines gleichen Hintergrunds verwendet - ich hatte die Simple Stripes Diagonal Stanze von LawnFawn aus gelbem und schwarzem Cardstock gestanzt und dann die Streifen abwechselnd aneinander gesetzt. Somit erhalte ich zwei Hintergründe. Dieser lag noch auf meinem Tisch. Ich habe für diese Karte nur etwas weiße Acrylfarbe darüber gespritzt.

Here I used the left over strips from another background I'd made - I had die cut the Simple Stripes Diagonal die by LawnFawn from yellow and black cardstock and thenput the strips together interchanging in color. This way I ended up with two backgrounds. This one was still on my table. For this card I flicked some white acrylic paint onto it.


Ich muss wohl nicht verstehen, warum, aber irgendwie haben doch alle Männer ein Faible für Baumschinen - je größer, desto besser. Deswegen habe ich Motive aus dem Stempelset Construction Trucks von Pretty Pink Posh verwendet. Alle Motive sind aus diesem Set. Ich habe sie abgestempelt, mit Copics coloriert und ausgeschnitten.
Für den Szene drumherum habe ich ein Stück weißen Cardstock oben mit Distress Oxide Mermaid Lagoon gewischt, den erdigen Boden habe ich mit Gathered Twigs und Ground Espresso gemacht. Dabei habe ich optisch eine zweite Lage mit eingewischt. Auf die Erde habe ich dann einige Wassertropfen und ebenfalls weiße Acrylfarbe aufgespritzt. 
Ich habe alle Motive auf den Hintergrund geklebt und an den Auspuff des Baggers drei winzige Wolken, gestanzt aus weißem Cardstock, aufgeklebt. Außerdem habe ich mit grauer Tinte zweimal das Wort Vroom aus dem Across the Miles Stempelset von PrettyPinkPosh in den Himmel gestempelt. Das war so nicht geplant, ich hatte aber, ohne es zu merken, Wasser an einem meiner Finger und habe damit beim Aufkleben der Motive den Himmel "versaut". Ich hatte zwar versucht, den Fleck zu überwischen, das Ergebnis war aber nicht optimal. Der aufgestempelte Text hier lenkt vom Fleck ab (und Ihr könnt ihn jetzt auf jeden Fall sehen). 
Für den Text auf der Karte habe ich ein Sending, ebenfalls aus dem Stempelset Across the Miles, schwarz auf weißen Cardstock gestempelt, ausgeschnitten und mit 3D Tape auf den dekorierten Cardstock geklebt. Den habe ich dann noch weiß gemattet. 
Für den Rest des Textes habe ich mit einer der Simple Wavy Banners von LawnFawn ein Banner aus weißem Cardstock gestanzt und dann einen Text aus dem Stempelset Big Pickup Cab von HoneybeeStamps aufgestempelt. Den Stempel habe ich an die Rundungen des Banners angepasst ins Misti geklebt.

I don't guess I have to understand, why, but it seems like all men are crazy for cronstruction vehicles - the bigger, the better. So I used images from the Construction Trucks stamp set by PrettyPinkPosh for this card. All images on the card are from this set. I stamped them, colored them with Copics and then cut them out with my scissors. 
For the backdrop I inked the top of a piece of white cardstock with Distress Oxide Mermaid Lagoon, for the soil I used Gathered Twigs and Ground Espresso, adding two different levels of soily ground. Onto the soil I flicked some water and white acrylic paint.
I attached the images onto the scene and added three tiny puffy clouds, cut from white cardstock, above the excavator's exhaust. I also stamped the word vroom from the Scross the Miles stamp set by PrettyPinkPosh twice onto the sky. I hadn't planned that, but when I attached the images I had a bit of water on my finger - which I didn't realize - and so I messed up the sky. I had tried to cover the spot with Distress Oxide again, but wasn't happy with the result. The stamped words here distract from that kind of strange spot (which of course you all can locate and see now).
For the text I stamped a little Sending, also from the Across the Miles stamp set, with black ink onto white cardstock, cut it out and adhered it with foam tape to the decorated cardstock. Then I matted that white.
For the rest of the text I die cut one of the Simple Wavy Banners by LawnFawn from white cardstock and then stamped a text from the Big Pickup Cab stamp set by HoneyeeStamps onto it. When placing the stamp in my Misti, I bend it a bit to make it fit the shape of the banner.


Zum Schluss habe ich das Banner und den Cardstock mit den Motiven mit 3D Tape auf den gestreiften Hintergrund geklebt und alles auf einem weißen Kartenrohling befestigt.

To finish this card I adhered the banner and the cardstock with the images to the striped background using foam tape, then attached everything to a white note card.

Sonntag, 30. Oktober 2022

Noch eine Karte nach dem neuen Stempeleinmaleins-Sketch

 
Hallo Ihr Lieben!
Seit gestern gibt es den neuen Sketch beim Stempeleinmaleins. Und gestern habe ich Euch bereits meine Karte danach gezeigt. Nun, die Karte von gestern war der zweite Versucht. Heute zeige ich Euch den ersten, mit dem ich aber irgendwie nicht ganz zufrieden bin. Aber zeigen möchte ich sie Euch dann doch.

Hello everyone!
Since yesterday there's a new sketch at Stempeleinmaleins. I already shared my card after it yesterday. Well, actually yesterday's card was my second attempt. Today I am sharing my original card, that I somehow am not completly happy with. But I want to show it to you anyway.

Der Sketch hat mich doch glatt dazu verführt, eine One-Layer-Karte zu machen. Okay, fast, der Text ist dann doch etwas erhöht aufgeklebt.
Ich habe hier grauen Cardstock als Basis genommen und die Deko mit Stencils aufgewischt. Dazu gleich mehr. Vom Rand her habe ich Distress Oxide Black Soot aufgetragen. Da ich hier bewusst auf die schwarze Mattung, die ich ja fast immer benutze, verzichtet habe, entsteht so zumindest ein wenig Kontrast zum weißen Kartenrohling.

The sketch actually inspired me to make a One Layer Card. Well, nearly, because I still did prop up the text a bit.
I used a piece of grey cardstock as the base and added the decorations with stencils. More about that a little later in the post. I used Distress Oxide Black Soot to darken the edges of the cardstock a bit. I didn't add the black matting I use on nearly all my cards here on purpose and with the black ink there's at least a bit more of a contrast to the white card base.


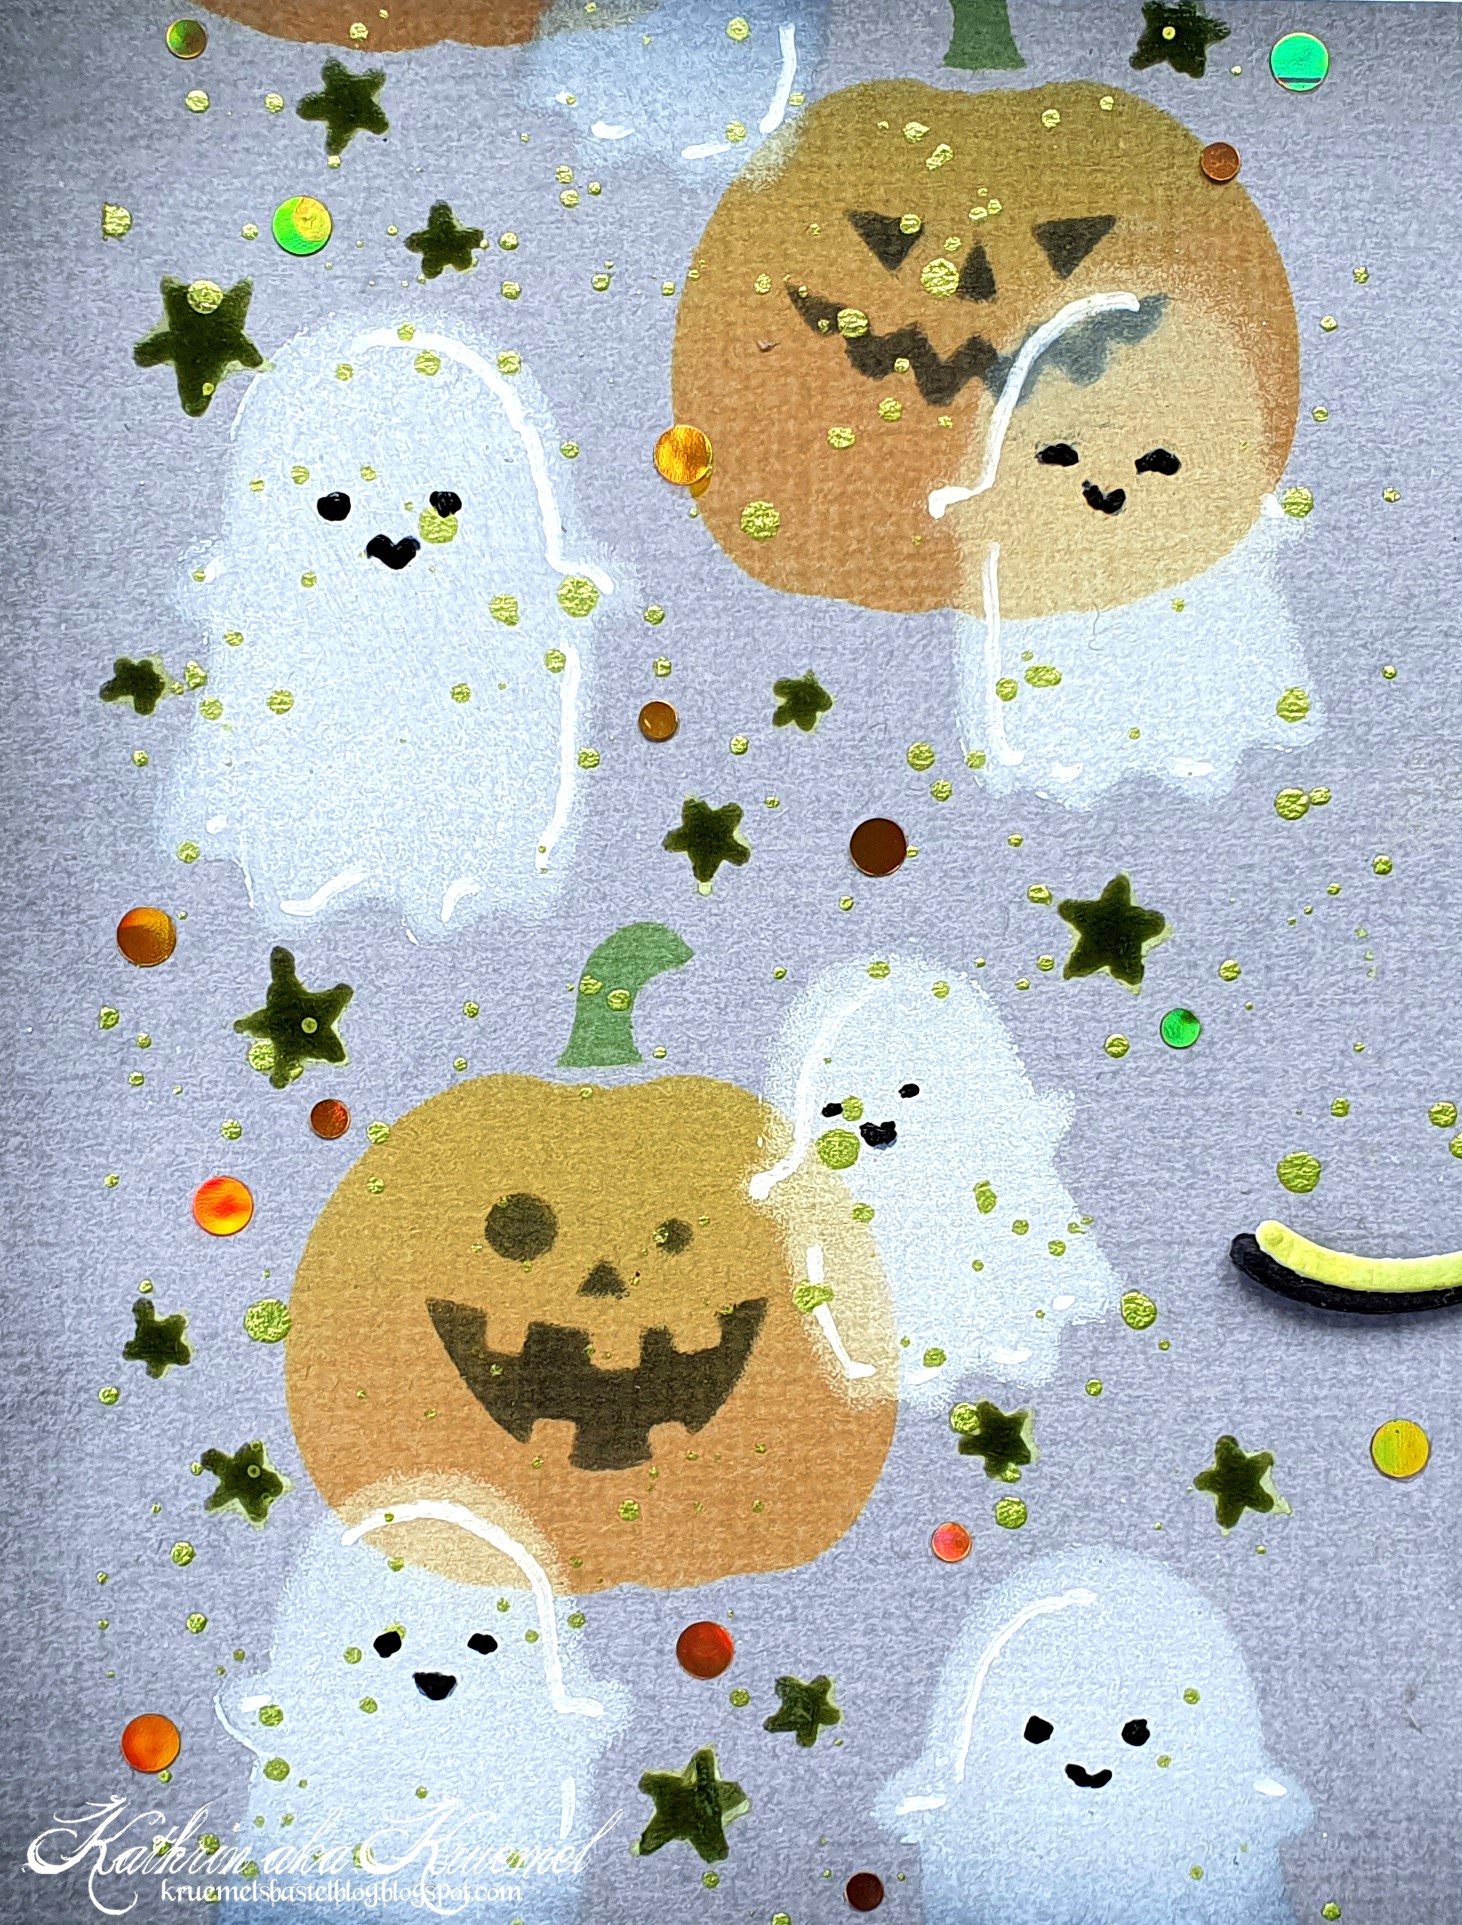
Für den dekorierten Streifen links habe ich zuerst Kürbisse mit Distress Oxide Wild Honey, Spiced Marmalade und Mowed Lawn auf den grauen Cardstock gewischt. Leider weiß ich nicht, von wem der Stencil ist, da ich hier die Verpackung nicht mehr habe. Die Gesichter, die ich dann mit Black Soot aufgewischt habe, sind mit einer Stencil von Taylored Expressions gemacht.
Danach habe ich mit weißer Tinte die Gespenster mit der Layered Ghosts Stencil von PrettyPinkPosh aufgewischt und zwar so, dass einige vor den Kürbissen zu fliegen scheinen. Das Stencilset besteht aus drei Stencils - den Geistern, einer Stencil mit den Gesichtern und einer mit Sternen. Die Sterne habe ich mit Twisted Citron aufgewischt, sie waren aber auf dem grauen Cardstock so schlecht sichtbar, dass ich sie mit einem grünen Glaze Pen nachgemalt habe. Die Gesichter der Geister habe ich mit Black Soot aufgewischt. Anschließend habe ich giftgrüne Metallic Watercolor über den Streifen gespritzt. Da ich dabei an einigen Stellen auch die Gesichter der Geister getroffen habe, habe ich diese dann mit einem schwarzen Glaze Pen nachgemalt. 

For the decorated strip on the left side I first stenciled down the pumpkins with Distress Oxide Wild Honey, Spiced Marmalade and Mowed Lawn. I have no idea what brand this stencil is because I didn't keep the original packaging. The faces, that I added with Black Soot, are made with a stencil by Taylored Expressions.
Then I used white ink to add the ghosts, using the Layered Ghosts stencil by PrettyPinkPosh. I made sure, that some of the ghosts went on top of the pumpkins. This stencil set contains three stencils - one with the ghosts, one with their faces and one with stars. I added a few stars with Twisted Citron, but those were hardly visible on the grey cardstock so I used a green Glaze pen to re-draw them. The faces of the ghosts are added with Black Soot. Then I spritzed some bright green metallic watercolor over the cardstock. I ended up with some speckles on the ghosts' faces and so I used a black Glaze pen to re-draw them.


Auf der rechten Seite der Karte, auf der im Sketch der Text eingezeichnet ist, habe ich einen weiteren Kürbis und Geist sowie drei weitere Sterne aufgestencilt. 
Darauf kam dann der Text. Das Boo habe ich mit der Boo Script Stanze von PrettyPinkPosh gestanzt - viermal aus schwarzem, einmal aus weißem Cardstock. Das weiße Stanzteil habe ich dann mit Distress Oxide Twisted Citron und Mowed Lawn eingeärbt, alle Stanzteile aufeinander und auf die Karte geklebt. 
Das To You darunter ist Teil eines Stempels aus dem Set Here's to You von MFT. Ich habe es weiß auf schwarzen Cardstock embosst und mit 3D Tape unter dem Boo aufgeklebt.

On the right side of the card, where the text is drawn in the sketch, I stenciled down another pumpkin, ghosts and three stars.
Then I glued the text down, partly covering the pumpkin. I've die cut the word boo with the Boo Script die by PrettyPinkPosh - four times from black and once from white cardstock. I colored the white one with Distress Oxide Twisted Citron and Mowed Lawn, glued the black pieces under it and then attached the word to the card.
The small to you under it is made with part of a stamp from the Here's to You stamp set by MFT. I've white heat embossed it onto black cardstock and glued it down with foam tape.


Und da mir fast etwas zu wenig orange auf der Karte war, habe ich noch einige kleine orangefarbene Pailetten zwischen den Motiven verteilt.

And since there was a bit too little orange on this card I added a few tiny orange sequins between the images.

Samstag, 27. August 2022

Stempeleinmaleins - Ausgabe vom 27. August 2022


Hallo Ihr Lieben!
Die Sommerpause ist vorbei, deswegen startet das Stempeleinmaleins heute wieder mit einem neuen Sketch. Und das ist meine Umsetzung.
 
Hello everyone!
Summer break is over, so Stempeleinmaleins is back with a new sketch for you today. And this is the card I made after it.
 
 Wir legen die Themen und vor allem Sketche meist einige Zeit im Voraus fest, und so ist diese Karte bereits Ende Juni entstanden. Damals kam die geniale Jungs-Serie von PrettyPinkPosh auf den Markt. Bagger, Autos, Dinos - alles, was die Herzen kleiner Jungs höher schlagen lässt. Und da mein Enkel and keinem Bagger, Bus oder Auto vorbei kann, ohne begeistert schauen zu müssen, war diese Serie für mich ein Must Have. Und die wollten dann auch gleich eingeweiht werden.
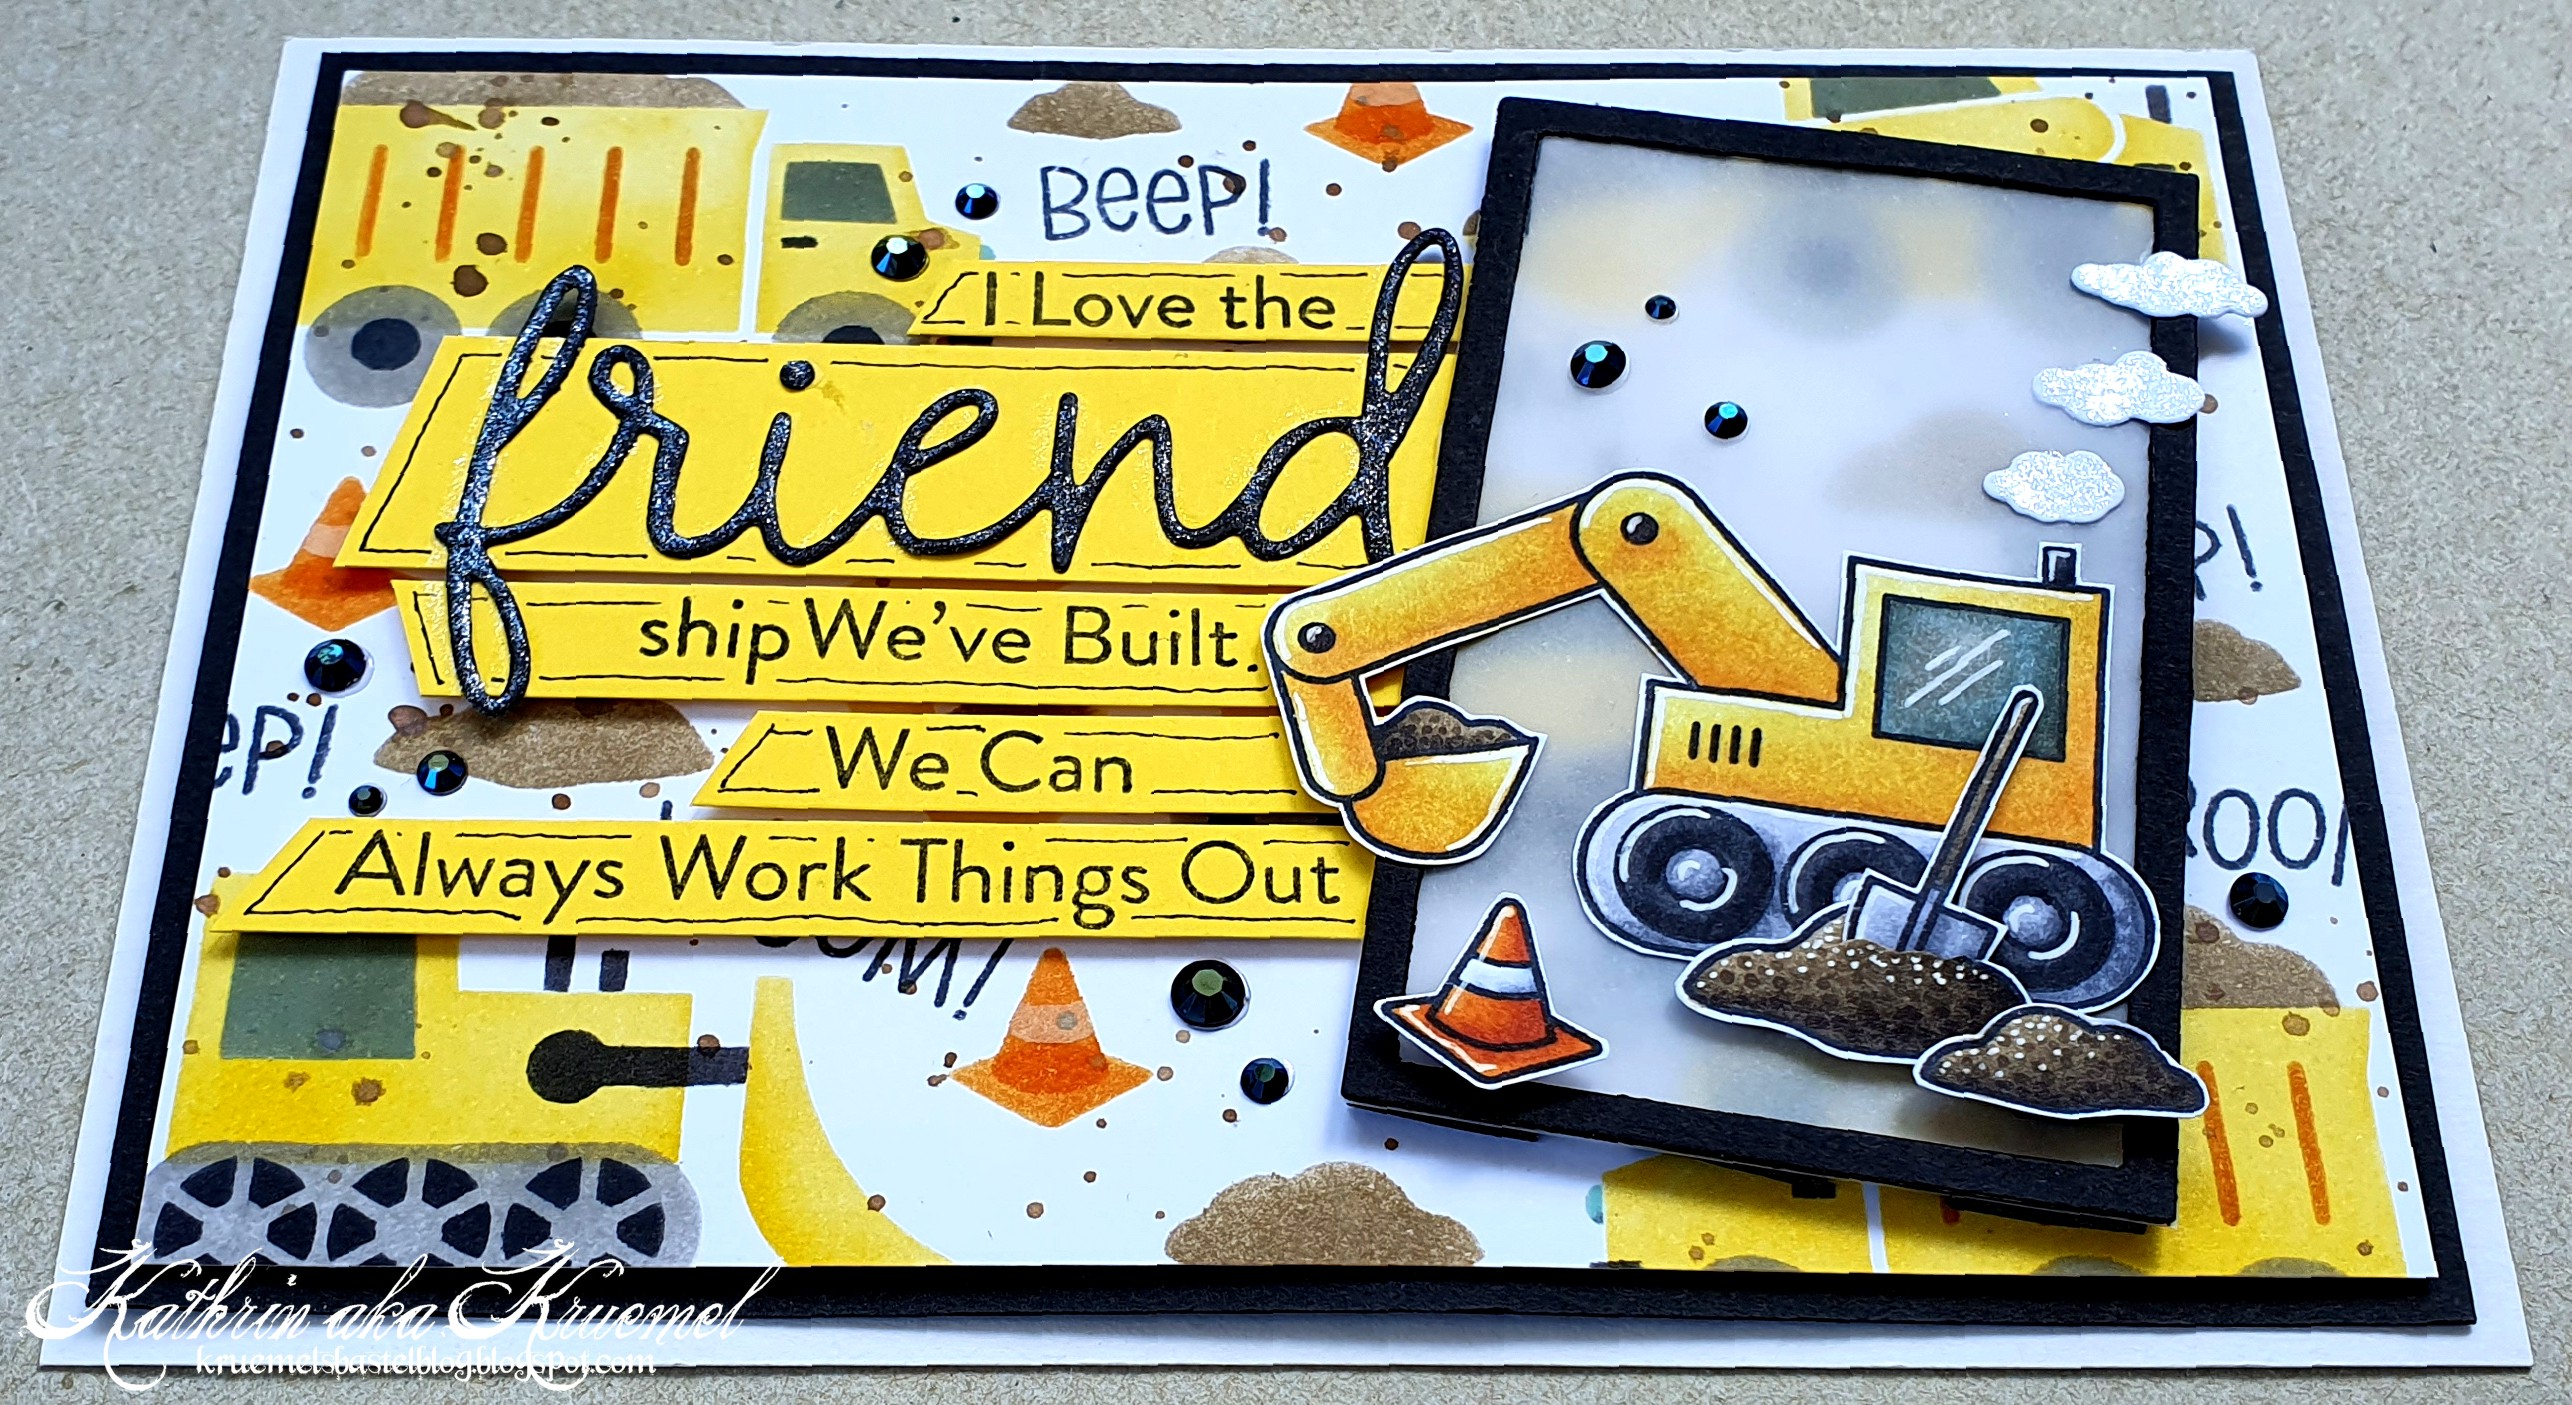
In dem Release gibt es mehrere dreilagige Stencils, den Layered Construction Trucks Stencil habe ich hier gleich mal für den Hintergrund eingeweiht. Ich habe die verschidenen Baufahrzeuge, Erde und Pylonen mit einer Mitschung aus Distress Ink und Distress Oxide eingefärbt. Zum Einsatz kamen Spiced Marmalade, Mustard Seed, Pumice Stone, Hickory Smoke, Black Soot, Frayed Burlap und Salvaged Patina. Den weißen Streifen auf der Pylone habe ich mit weißer Stempeltinte auf die orangefarben gewischte Pylone aufgetragen. Anschließend habe ich aus dem Stempelset Across the Miles, ebenfalls von PrettyPinkPosh, die Worte Beep und Vroom einige Male mit schwarzer Tinte in die Zwischenräume gestempelt und ein wenig Distress Ink Frayed Burlap, gemischt mit etwas Wasser, über den Hintergrund gespritzt.

Usually we pick our themes and especially sketches some time ahead, and so this card was already made end of june. That's when PrettyPinkPosh released their great boys' series. Constructions trucks, cars, dinosaurs - it includes so much that makes little boys happy. Since my little grandson can't pass a bus, excavator or car withouth squealing from joy of course this release was a must have for me. And I just had to use them right away. 
In this release there are also several 3 layer stencils, I used the Layered Construction Trucks stencil for the background of this card. I've inked the different trucks, the piles of dirt and the pylons with a combination of Distress Ink and Distress Oxide. I used Spiced Marmalade, Mustard Seed, Pumice Stone, Hickory Smoke, Black Soot, Frayed Burlap and Salvaged Patina. In Germany pylons are orange with a white band. So I added the band with white ink after I had done the whole pylons in orange. Then I used the beep and vroom stamps from the Across the Miles stamp set, also by PrettyPinkPosh, and stamped the words into the open spaces of the background, then mixed some Distress Ink Frayed Burlap with a bit of water and spritzed it onto the cardstock.


Als Motiv für die Karte habe ich den Bagger sowie zwei Erdhaufen, die Schaufe und eine weitere Pylone, alle aus dem Set Construction Trucks, verwendet. Sie sind mit Copics coloriert, ausgeschnitten und mit 3D Tape auf ein Stück Vellum geklebt, um das ich einen schmalen Rahmen aus schwarzem Cardstock geklebt habe. Dann habe ich alles wiederum mit 3D Tape auf den Kartenhintergrund geklebt. Das Vellum tönt den Hintergrund hier ein wenig runter, so dass die Motive nicht untergehen.
Vom Auspuffrohr - ich denke mal, das ist es - habe ich noch drei kleine weiße Wölkchen aufsteigen lassen.

As the image for this card I've picked the excavator, two piles of soil, a shovel and another pylon from the Construction Trucks stamp set. All images are colored with Copics, cut out and then glued with foam tape onto a piece of vellum. Before I had put a thin frame, cut from black cardstock, onto the vellum. The vellum tones the background down a bit so the individual images don't get lost in the quite busy background.
I decided to glue three tiny clouds to the exhaust pipe - I think that's what this piece on the roof of the excavator is.


Den Text für die Karte habe ich auf mehrere Streifen gelben Cardstocks verteilt. Ich habe hier Stempel aus dem Set Let's Work Together von MFT verwendet und sie mit schwarzer Tinte aufgestempelt. Dabei habe ich den Wortteil friend von friendship durch ein aus schwarzem Cardstock gestanztes Wort friend ersetzt. 
Die Streifen sind mit dünnerem 3D Tape auf den Hintergrund geklebt, die Enden habe ich unter dem schwarzen Rahmen um das Vellum versteckt. 
Da die gelben Streifen allein fast ein wenig Kontrast hatten, habe ich noch jeweils einen Rahmen mit einem schwarzen Fineliner aufgemalt.

The text for this card is put onto several strips cut from yellow cardstock. I used stamps from the Let's Work Together stamp set by MFT here and stamped them with black ink. I replaced the word part friend from the word friendship with a die cut friend, cut from black cardstock.
The strips are glued onto the background with some thinner foam tape, the right ends are hidden under the frame on top of the vellum.
Since the yellow strips didn't have enough contrast I decided to also use a black fineliner and draw a thin frame onto each strip.


Den kompletten Cardstock habe ich dann schwarz gemattet und auf einen weißen Kartenrohlig geklebt. Als Deko habe ich ein paar schwarze Glitzersteine aufgeklebt, außerdem habe ich das gestanzte Wort friend sowie die Abgaswölkchen über dem Bagger mit einem Nuvo Glitter Aqua Marker beglitzert.

I matted the complete cardstock black and glued it onto a white note card. 
To decorate my card I added a few black rhinestones and used a Nuvo Glitter Aqua Marker on the die cut word friend and the tiny exhaust clouds.