

Hallo Ihr Lieben!
Heute startet eine neue Create a Smile Challenge mit einem wirklich farbenfrohen und fröhlichem Moodboard als Inspiration:
Hello everyone!
The new Create a Smile Challenge is starting today with a really fun and colorful moodboard as inspiration:

Nun, ich denke, es ist ziemlich offensichtlich, welches Bild des Moodboards mich sofort inspiriert hat. Aber das Geburtstagsthema habe ich dann auch noch mit eingebaut.
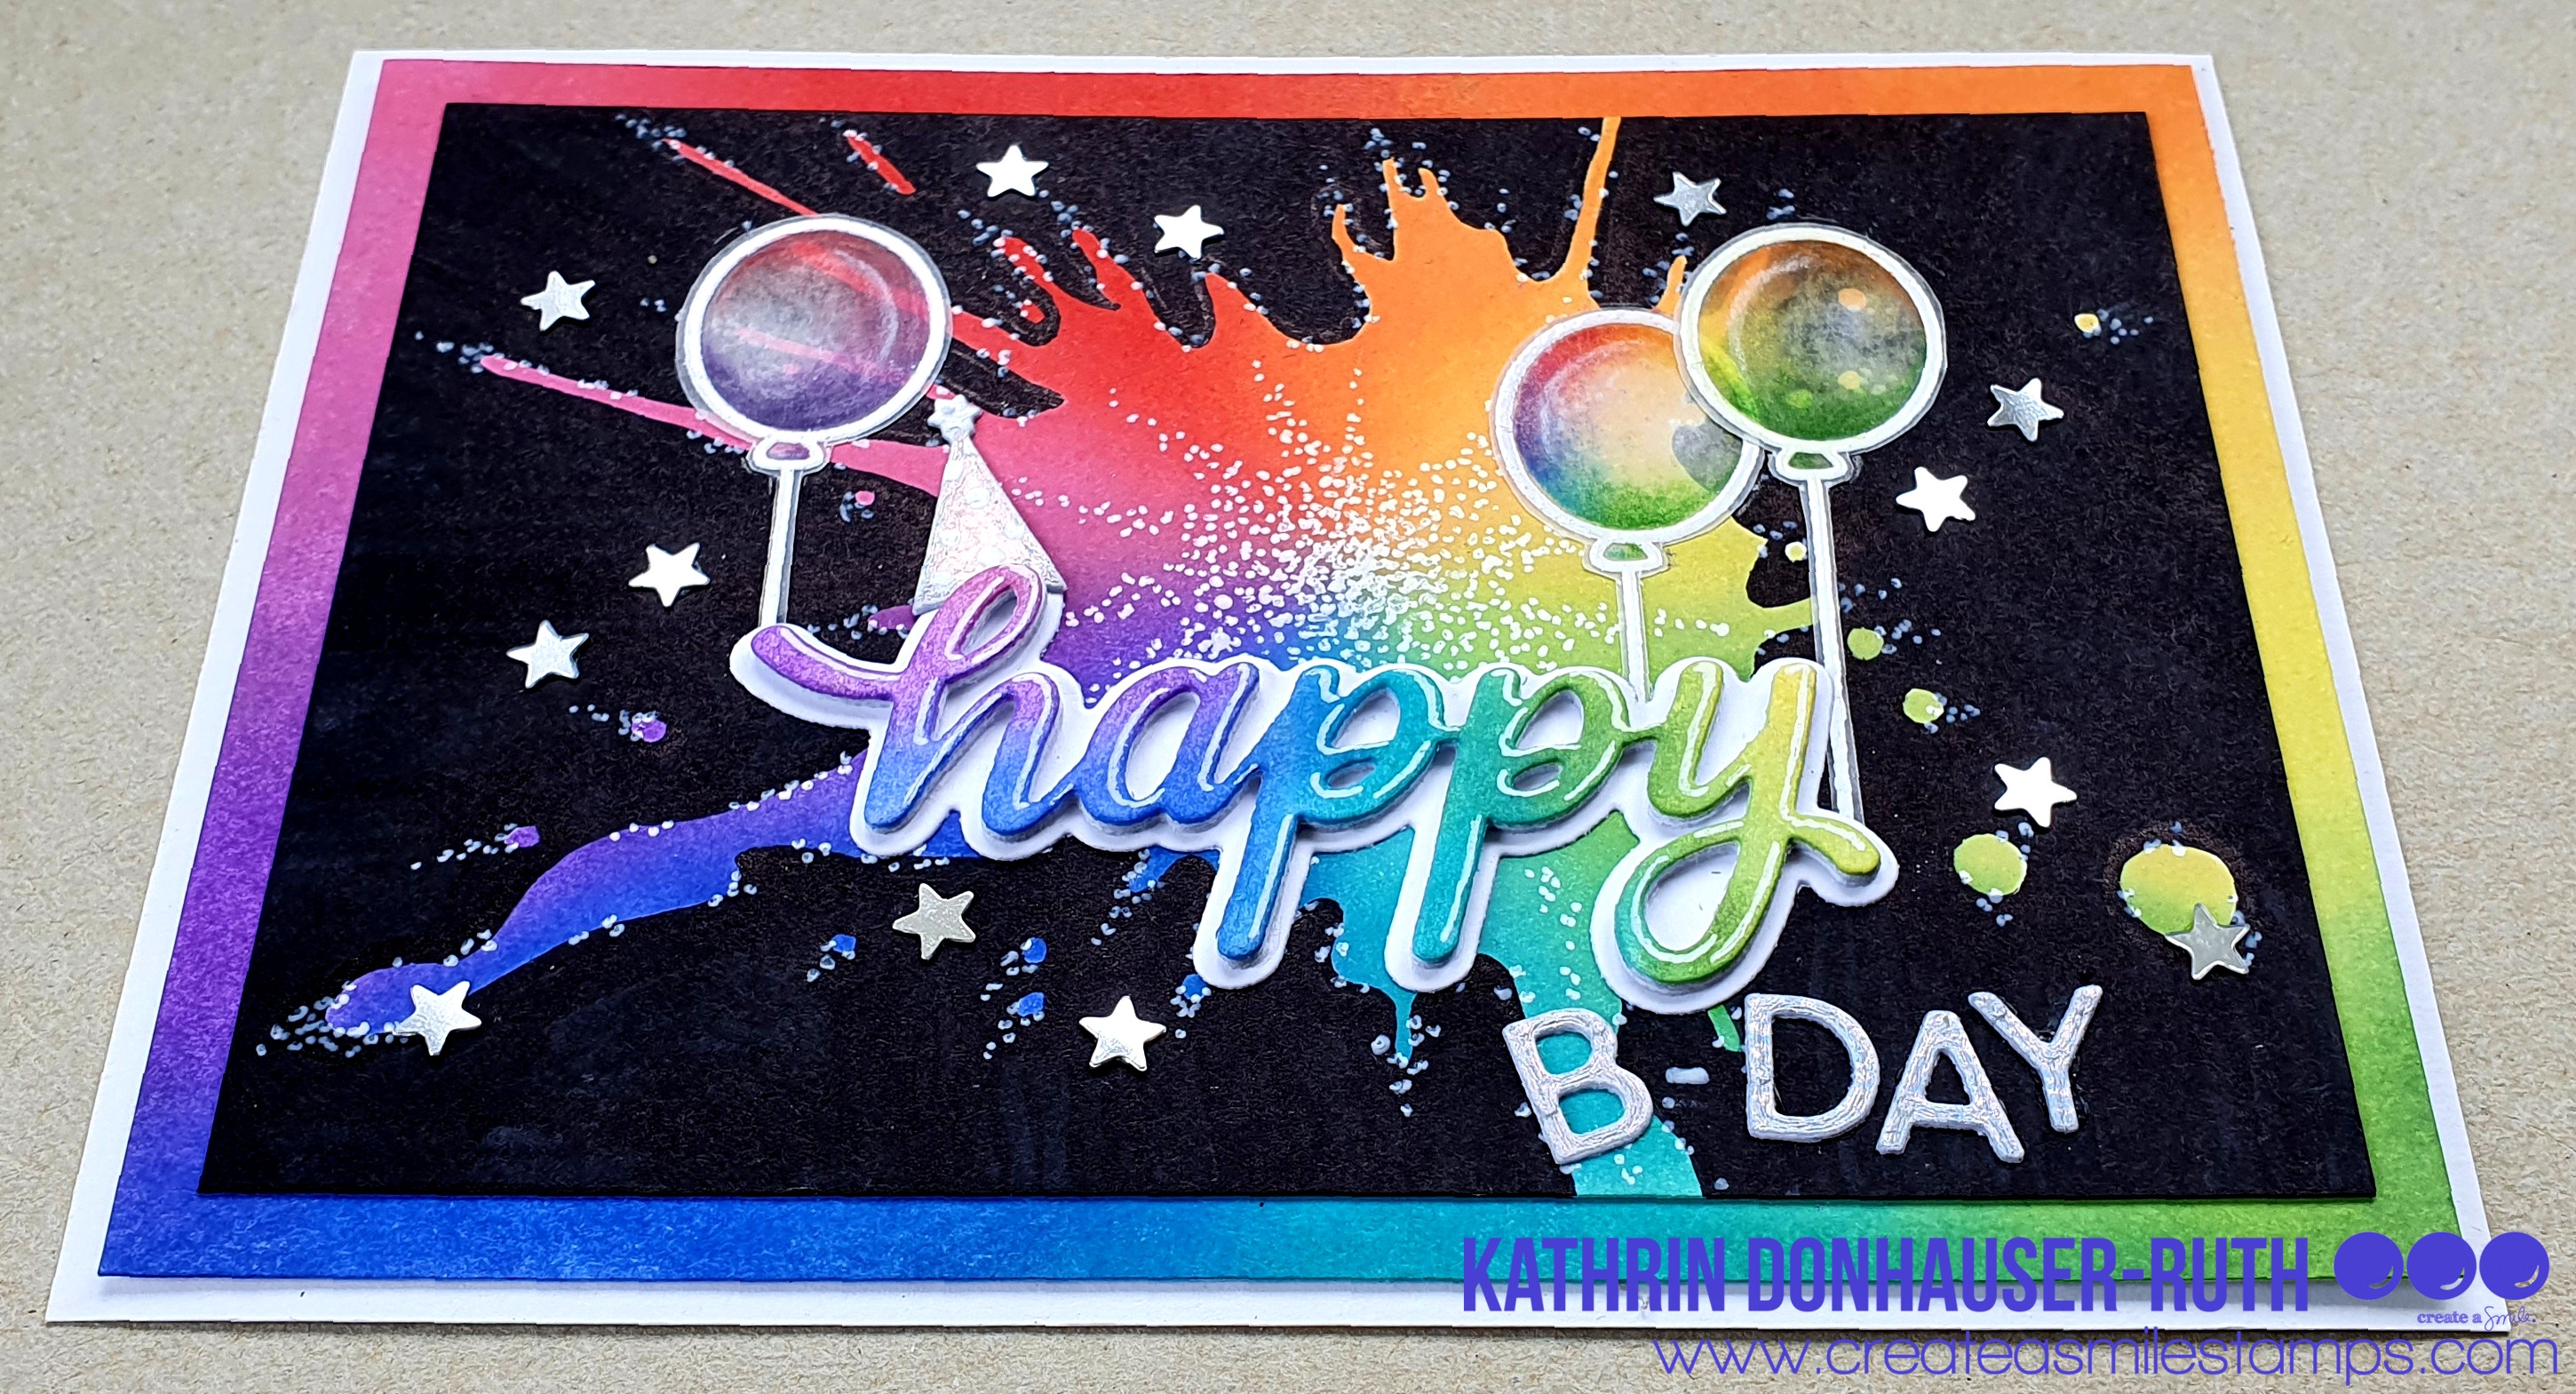
I guess it's pretty obvious which of the pictures inspired me immediately. But I also included the birthday theme into my card.

Das Bild mit der Farbexplosion in Regenbogenfarben erinnerte mich sofort an ein Holi Festival. Und ich hatte sofort eine Idee, wie ich das Bild auf eine Karte bringen könnte.
Ich habe ein Stück weißen Cardstock und die Splotch Stencil genommen und dann den Riesen-Farbklecks in Regenbogenfarben gewischt. Dafür habe ich Distress Oxide Squeezed Lemonade, Carved Pumpkin, Candied Apple, Picked Raspberry, Wilted Violet, Blueprint Sketch, Peacock Feathers und Mowed Lawn verwendet. Mit kleinen Brushes ging es auch super, den Regenbogenverlauf auf der dannn doch begrenzten Fläche hinzukriegen.
Anschließend habe ich alle noch weißen Bereiche mit einem schwarzen Copicmarker eingefärbt, das bringt die Farben besonders gut zum Leuchten.
Da die Farbexplosion auf dem Bild im Moodboard ja einige Strahlen hat, habe ich einen weißen Gelstift verwendet und in die Mitte des Farbklecks strahlenförmig kleine Punkte angeordnet. Außerdem habe ich am Rand und an den Ausläufern des Kleckses ebenfalls einige Punkte aufgemalt.
Als Hintergrund habe ich ein weiteres, etwas größeres Stück weißen Cardstock genommen und dort den Rand ebenfalls Regenbogenfarben eingefärbt, jeweils passend zur Position der Farben im Klecks. Die beiden Cardstockstücke habe ich aufeinander und dann auf einen weißen Kartenrohling geklebt.
The picture with the color explosion in rainbow colors reminded me of those Holi festivals. And I had an idea right away how to bring this picture onto a card.
I've used a piece of white cardstock and the Splotch stencil and then colored the splotch in rainbow colors. I used Distress Oxide Squeezed Lemonade, Carved Pumpkin, Candied Apple, Picked Raspberry, Wilted Violet, Blueprint Sketch, Peacock Feathers and Mowed Lawn to ink up the splotch. I used some small brushes and with those it wasn't as hard as I had expected to get the rainbow into the quite limited space.
Then I used a black Copic marker to fill in all the areas that had remained white, the black background really makes the colors pop.
Since the color explosion on the picture in the moodboard has some kind of rays in the colors I used a white gel pen to add a lot of tiny dots to the center of the splotch, letting them turn into rays into different directions. I also added some more small dots to the edge of the splotch and the end of the splashes.
For the matting of my cardstock I took another piece of white cardstock, cut a bit larger than the one I put on the splotch, and inked up the edges, again in rainbow colors, making the positions of the colors on the matting and the splotch match. Then I glued both cardstock pieces on top of each other and onto a white note card.

Nun wollte ich noch das Geburtstagsthema mit einbringen.
Dafür habe ich die Happy Stanze verwendet und sowohl den Schatten - einmal - als auch das Wort an sich - viermal - aus weißem Cardstock gestanzt. Dann habe ich auch die oberste Lage des Wortes happy in Regenbogenfarben gewischt. Da ich zuvor die geplante Position meines Wortes festgelegt hatte, konnte ich auch hier die Farben passend zum Farbklecks aufwischen. So sind auch die Farben, die eigentlich durch den Text mit Schatten doch ziemlich verdeckt worden wären, wieder ausreichend vertreten.
Ich habe die vier Lagen des Worts aufeinander- und anschließend auf den Schatten des Wortes geklebt. Am H habe ich noch eine Partyhut mit aufgeklebt. Den habe ich aus silberfarbenem Hologramm-Cardstock mit einer der Stanzen aus dem Set Magical Frame gestanzt und mit einem weißen Gelstift einige Punkte als Deko darauf gemalt. Das sieht man auf dem Bild nur nicht wirklich gut.
Aus dem selben Cardstock habe ich noch die Buchstaben für das B-Day ausgestanzt. Dafür habe ich die Lemon Alphas Stanzen benutzt, der Bindestrich ist per Hand dazugemalt.
Und ein paar Luftballons für die Partystimmung habe ich auch noch hinzugefügt. Dafür habe ich den Luftballon aus dem Set Verrücktes Huhn dreimal weiß auf Vellum embosst und mit einem weißen Gelpen bei einem der Ballons die Schnur verlängert. Dann habe ich Polychromos verwendet, um die Luftballons ein wenig zu colorieren. Wieder habe ich mich an der Position der Luftballons und der Farben, die sich dort in den Ballons spiegeln würden, orientiert. Der Ballon in der Mitte sollte eigentlich etwas weiter nach links, das hat mir dann aber doch nicht so gefallen. Deswegen passen die Farben hier nicht hunderprozentig zur Position. Um die Ballons aufzukleben, habe ich sie durch meine Xyron gedreht und so flächig Kleber auf die Rückseite aufgetragen. So kann auch Vellum problemlos aufgeklebt werden. Durch das Vellum kann man nach wie vor den Farbklecks darunter/dahinter sehen, was meiner Meinung nach nochmal ein toller Effekt ist.
Zum Schluss habe ich noch einige kleine, silberfarbene Pailettensterne auf dem schwarzen Bereich der Karte verteilt.
Now I wanted to include the birthday theme.
I used the Happy die and cut the shadow once, the word itself four times from white cardstock. Then I used my Distress Oxides again to also ink up the top layer of the words in rainbow colors. Since I had already planned where I wanted my word to be I was able again to make the colors match the ones of the splotch underneath. Now also those colors, that would get covered by the word and its shadow pretty much, are showing in the rainbow theme.
I glued the four layers of the on top of each other and thenonto the shadow layer. I added a little party hat to the h. I've cut it from silver holographic cardstock using a dies from the Magical Frame die set and also added some dots to it with a white gel pen. Those don't really show on the picture.
I used the same holographic cardstock and the Lemon Alphas die set to cut the letters for the word b-day, drawing the line between the letters by hand.
I also added some balloons for a bit more of a party feeling. I've white heat embossed the balloon image from the Crazy Chicks stamp set three times onto vellum and used a white gel pen again to make the string of one of the balloons a bit longer. Then I used my Polychromos to color the ballons. Again I had already chosen the positions of the ballons and colored them in the colors that they would reflect in that position. I had planned to put the middle balloon more to the left, but didn't like that later so I moved it to the right, which meant that the colors don't match perfectly the balloon's position. To glue the balloons to my card I've run them through my Xyron and covered the complete back with glue. This way also glueing down Vellum invisibly is easy. Through the vellum you can still see the splotch behind/underneath and I think this adds a great effect.
In the end I added a few small, silver, star shaped sequins to the black areas of the card.
Und hier habe ich noch ein Bild für Euch, auf dem man den Glanz der Sterne und des Hologramm-Cardstocks besser sehen kann.
And here I have another picture that shows the shine of the stars and the holographic cardstock a bit better.