

Hallo Ihr Lieben!
Eine gute Freundin ist 50 geworden. Als Geschenk gab es von - und mit! - der "Weibergruppe" einen Kurztrip. Und der musste natürlich passend verpackt werden.
Hello everyone!
A good friend turned 50. So we as her she-mates gave her a trip as a gift - of course with us. And of course that needed a nice packaging.
Ich habe diesen Koffer als Geschenkverpackung und gleichzeitig Kartenhalter gestaltet. Dafür habe ich die Kofferstanze von JM Creation zum Ausstanzen aus kraftfarbenem Cardstock verwendet. Allerdings habe ich ihn durch Partial Diecutting länger gemacht - die Seitenverhältnisse waren mir sonst zu wenig kofferähnlich. Außerdem habe ich den Tragegriff, der eigentlich wirklich lang ist, um einiges gekürzt, so passt auch der von der Größe her besser.
I made this suitcase as a packaging for the gift and also to hold the card. I've used the suitcase die by JM Creation to cut it from craft colored cardstock. But I did some partial diecutting to make it wider - the sides didn't look like a suitcase to me. I also changed the handle, which is really a lot deeper originally, way shorter to make it fit the size of the suitcase.
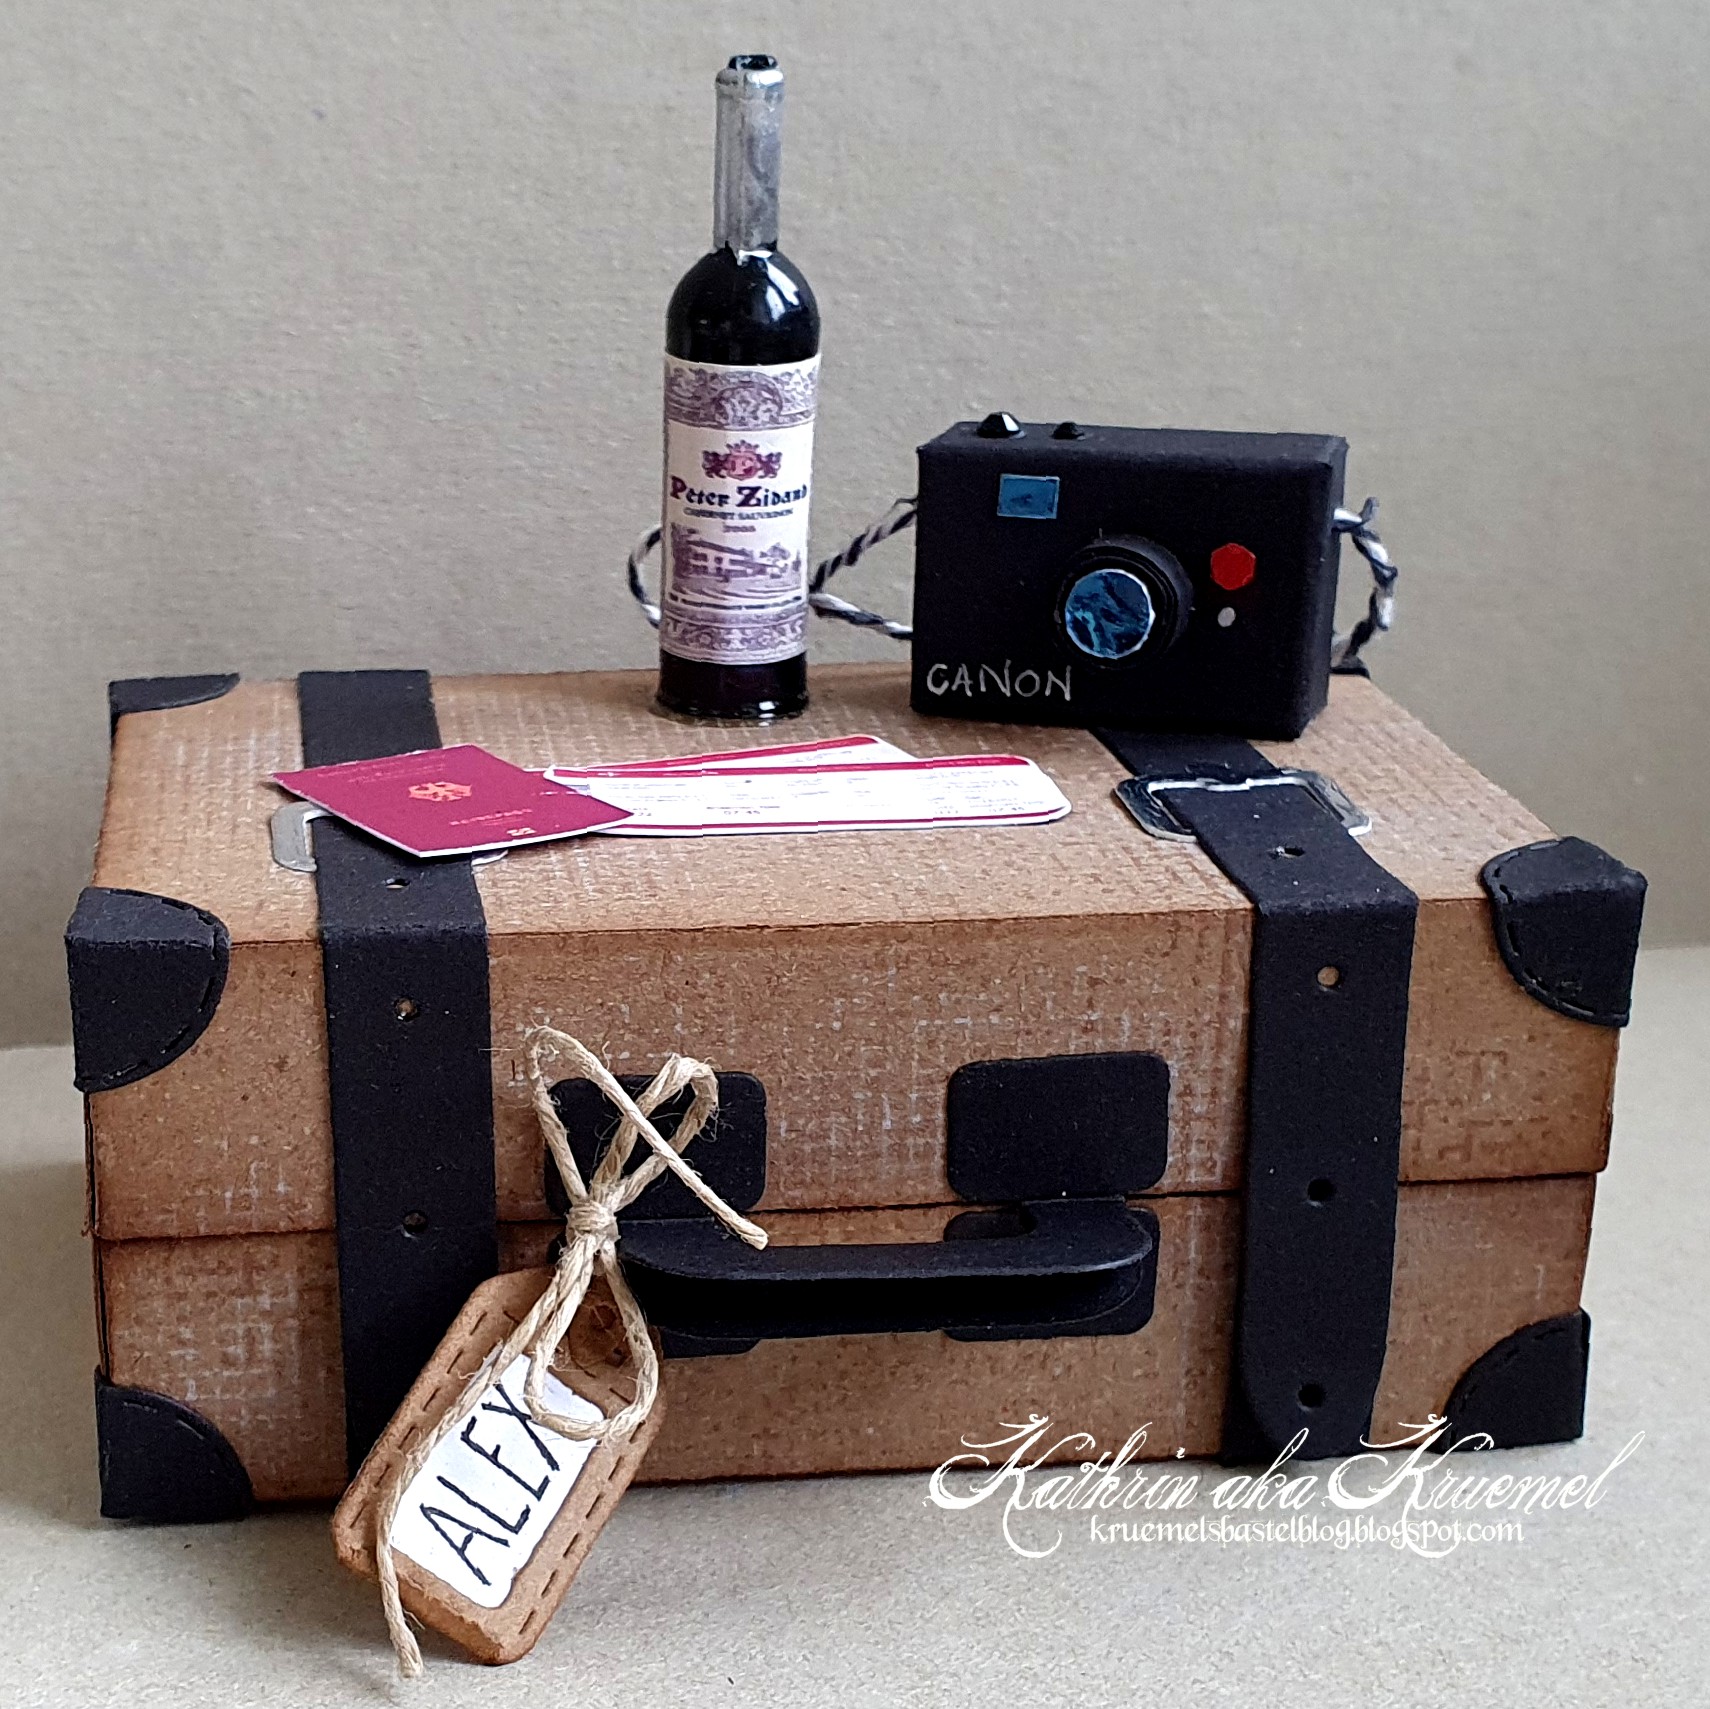
Vor dem Zusammenbau habe ich die Kofferteile mit dem Grunge Hintergrundstempel von Stampcorner bestempelt - einmal mit weißer Stempeltinte und einmal mit Hickory Smoke Distress Oxide. Zwischen den beiden Stempelabdrücken habe ich die Kofferteile minimal verschoben, so dass die Linien-Schnittstellen des einen Abdrucks nun mittig in den kleinen Quadraten liegen. Ich finde, so sieht es aus wie ein alter Koffer.
Die Dekoteile sind aus schwarzem Cardstock bzw. die Schnallen aus silberfarbenem Spiegelcardstock gestanzt. An den Enden der Gurte sowie darunter habe ich jeweils einen kleinen Magneten angebracht, die den Koffer geschlossen halten.
Vorne am Tragegriff habe ich einen Kofferanhänger angebracht, den ich mit einer Stanze von Magnolia gemacht und mit Twine an den Griff gebunden habe.
Before putting the suitcase together I used the Grunge background stamp by Stampcorner to stamp the pattern onto it - once with white ink and once with Distress Oxide Hickory Smoke. Between the stamping I slightly moved the cardstock pieces, trying to get the areas where the lines meet into the tiny squares stamped with the first color. I think, this really gives it the look of an old suitcase.
The decorations are die cut from black cardstock and silver mirror cardstock. I put little magnets at the ends of the belts - and the area underneath - that hold the suitase closed.
To the handle I've tied a little tag, made with a die by Magnolia and tied to the handle with a piece of twine.

Oben auf dem Koffer liegen schon der Pass und die Flugtickets bereit. Auch eine Kamera - einfach aus schwarzem Cardstock frei hand gemacht - steht dort, damit sie nicht vergessen wird. Naja, und weil es bei einem Mädelstrip eher feucht-fröhlich zugeht, habe ich hier auch schon mal die erste Flasche Rotwein bereitgestellt....
On top of the suitcase are placed the passport and tickets. Also a camera - simply done free hand from black cardstock - is placed there so it doesn't get left behind. Well, and since there will be some liquid involved in a girls' trip I also placed the first bottle of wine there, ready to be uncorked....
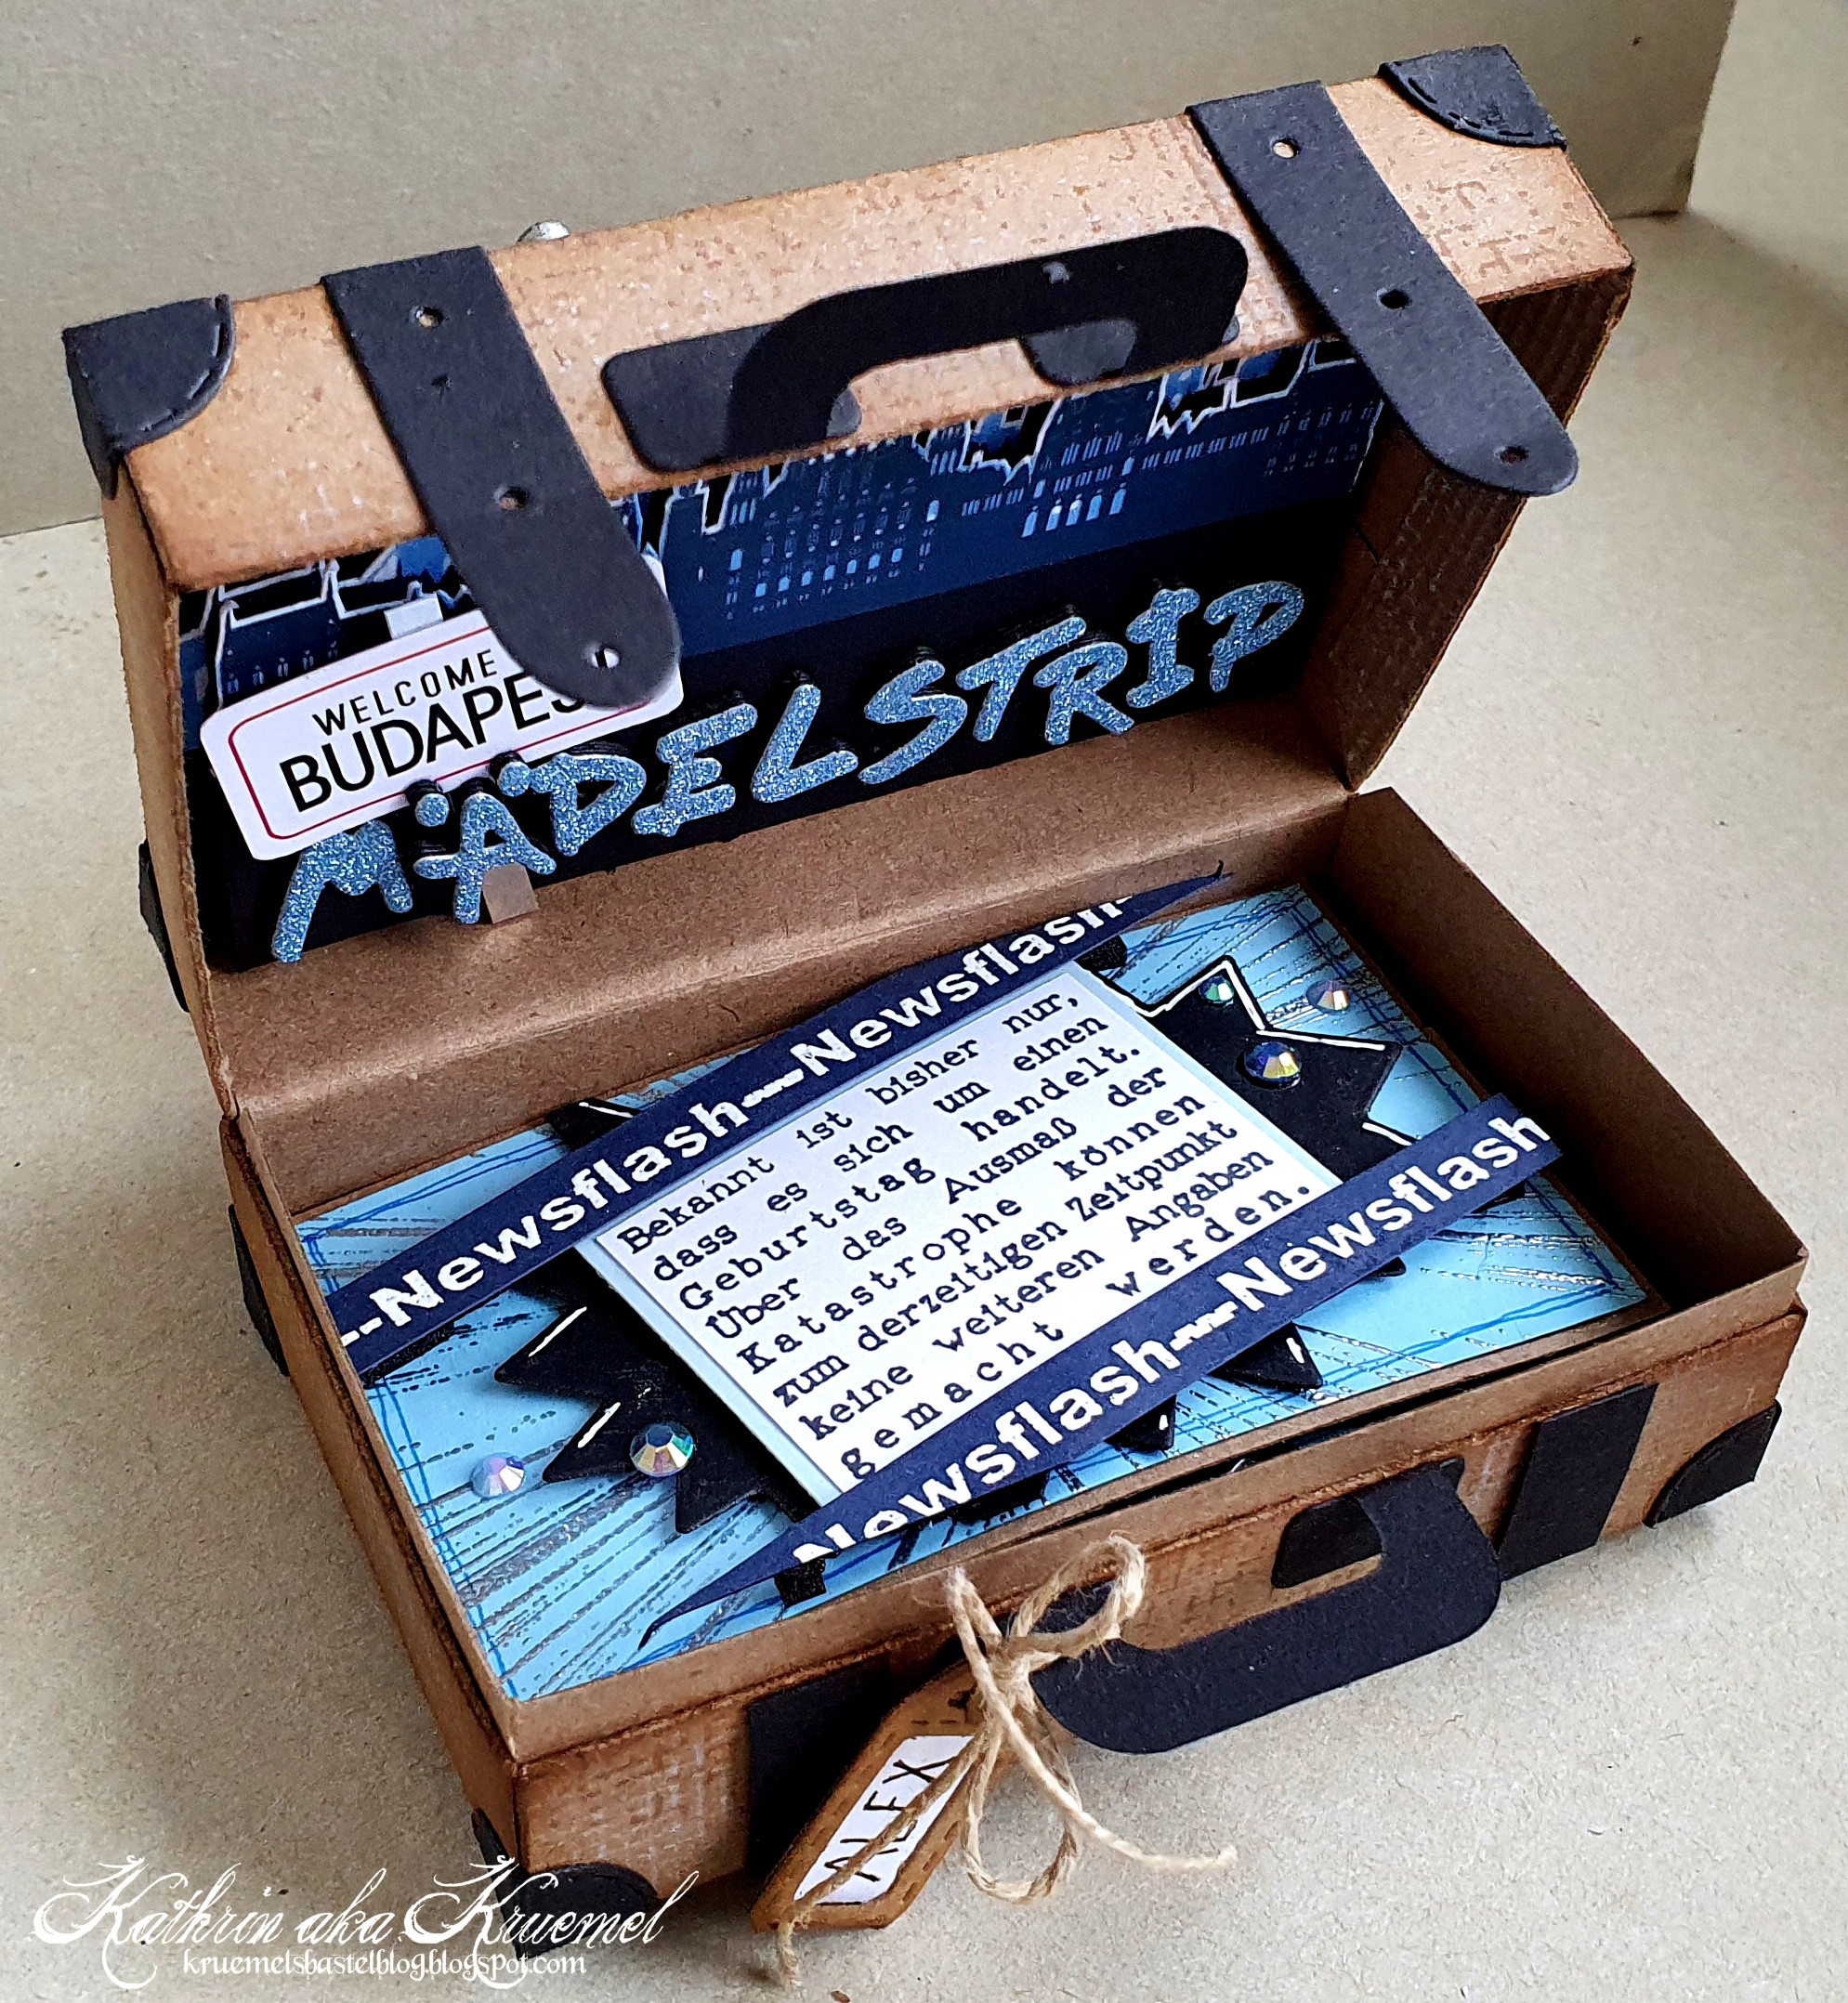
Öffnet man den Koffer, befindet sich im unteren Teil die Geburtstagskarte - im Deckel ist dann der Hinweis auf die Reise und das Reiseziel.
Damit die Kofferteile nicht aufeinander verrutschen, habe ich ins Innere des Unterteils noch einen leicht über den Rand überstehenden Cardstockstreifen eingeklebt, der beim Schließen in den Deckel greift.
When you open the suitcase, there's the birthday card in the one compartment - in the lid there's a hint about the gift and also the destination of the trip.
To avoid the two parts of the suitcase move to the left or right, I've glued a strip of cardstock into one of the case parts, making it a bit taller than the suitcase box. When you close it, this goes into the lid and fixes the lid in place.

Im Deckel habe ich erst ein Stück schwarzen Cardstock, bespritzt mit weißer Acrylfarbe und goldener Metallic Watercolor, als Hintergrund aufgeklebt. Davor kam die Skyline von Budapest - hier aufgeteilt auf zwei Reihen, die mit 3D Tape aufeinander und auf den Hintergrund geklebt sind.
Das Ortsschild habe ich am PC geschrieben und ausgedruckt.
Für das Wort Mädelstrip habe ich die einzelnen Buchstaben mit dem Wild Boys Solid Alphabet Stanzenset von Yvonne Creations gestanzt - einige Male aus schwarzem Cardstock und für die oberste Lage aus hellblauem Glitzercardstock.
Inside the lid I first glued down a piece of black cardstock, that I spritzed some white acrylic paint and some golden metallic watercolor onto. Onto that I've glued the skyline of Budapest - here separated into two lines that I've glued on top of each other - and onto the sky - with foam tape.
The city sign is written on my computer and printed out.
For the word girls' trip I've die cut the individual letters with the Wild Boys Solid Alphabet die set by Yvonne Creations - several times from black cardstock and for the top layer from light blue glitter cardstock.
Und dann kommen wir zur Karte - es ist eine Trifold-Card. Da der Koffer ja nicht allzu groß ist, sollte zumindest genug Platz auf der Karte für Deko etc. sein.
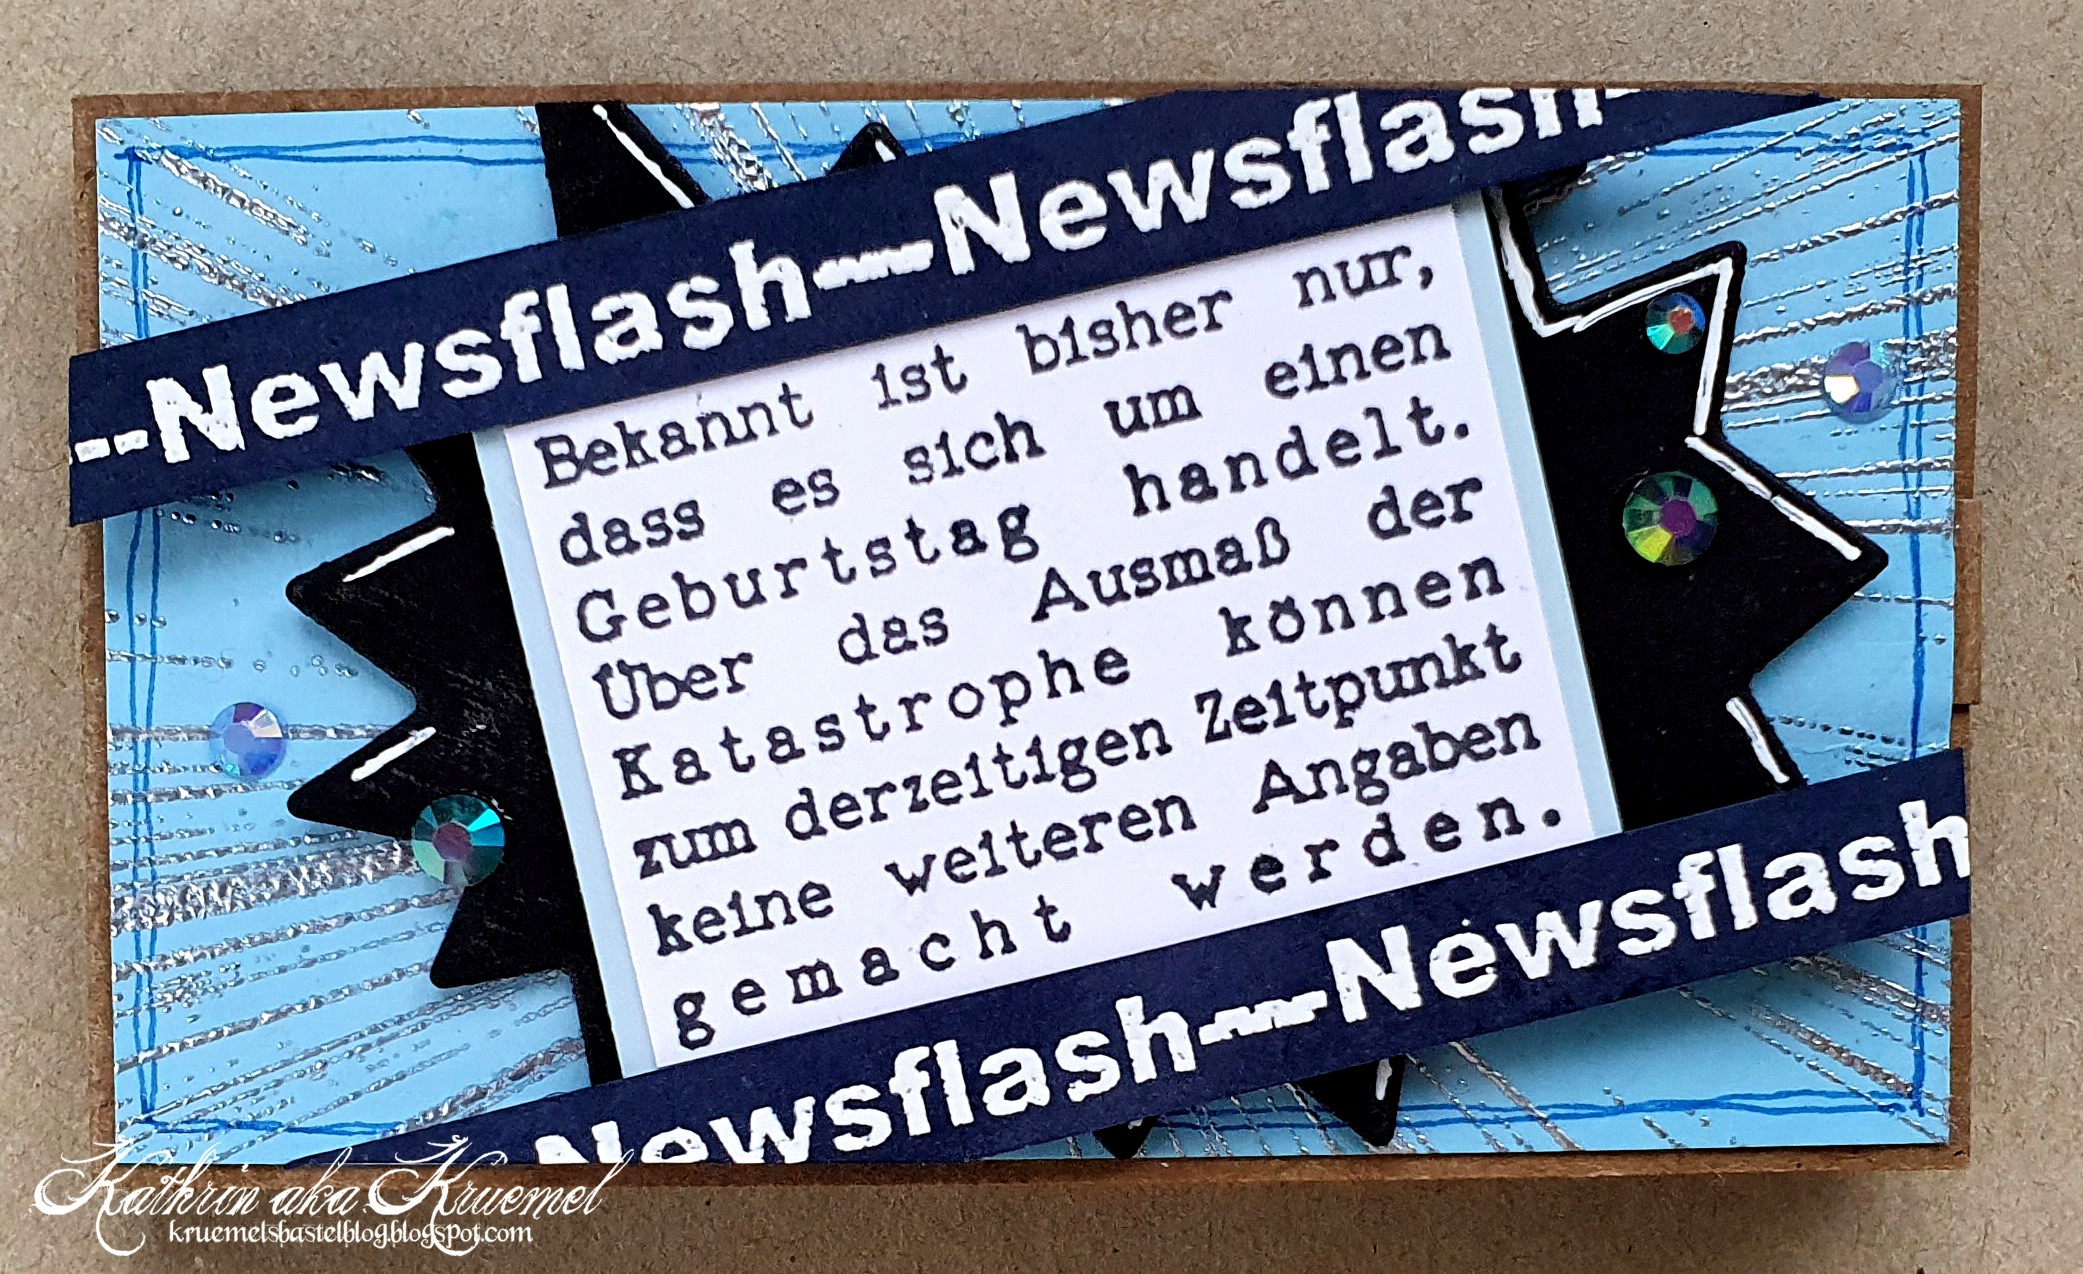
Ich habe die Karte aus kraftfarbenem Cardstock gemacht. Die Oberseite habe ich dann mit hellblauem Cardstock beklebt, auf den ich mit silbernem Embossingpulver den Rays Slimline Hintergrund von ImpressionObsession aufembosst habe.
Darauf kamen dann die "neusten Nachrichten" - gemacht mit einem wirklich alten Stempel, den ich mir vor Jahren gelasert habe. Das Newsflash ist weiß auf dunkelblauen Cardstock embosst, der restliche Text schwarz auf weißen Cardstock gestempelt. Den weißen Cardstock habe ich hellblau gemattet und dann noch eine aus schwarzem Cardstock gestanzte gezackte "Sprechblase" dahinter geklebt.
Alle Lagen sind jeweils mit 3D Tape aufeinander geklebt - hoch genug ist das Kofferteil ja - und also Deko habe ich noch ein paar hellblaue-irisierende Glitzersteine aufgeklebt.
And now let's talk about the card - it's a trifold card. The suitcase isn't that large and I needed some room on the card for decorations etc.
I've made the card from craft colored cardstock. Onto the top I've glued some light blue cardstock onto which I've silver heat embossed the Rays Slimline background by ImpressionObsession.
On top of that I've added the "hottest news" - the inner text means "by now we only know that a birthday happened. We don't have any further informations about the dimensions of the catastrophe at that moment". The newsflash is white heat embossed onto dark blue cardstock, the rest of the text stamped black onto white cardstock. I've matted that light blue and then glued some kind of "speechblubble", cut from black carstock behind it.
All layers are glued on top of each other with foam tape - the suitcase is really tall enough for that - and I added a few light blue iridescent rhinestones as embellishments.

Beim Öffnen klappt die oberste Lage nach links und gibt den Blick auf zwei dekorierte Innenseiten frei.
When opening the card the top flap goes to the left and gives sight to these two decorated inner pages.

Hier habe ich wieder hellblauen Cardstock aufgeklebt, darauf kam der Strahlenhintergrund mit dem quer verlaufenden Streifen mit mittigem Kreis, gestanzt aus mattsilberfarbenem Metallic Cardstock mit der Sun Shine Panel Stanze von Waffle Flower. Auf den hellblauen Cardstock habe ich zuvor weiße Acrylfarbe aufgespritzt.
Quer über den silberfarbenen Cardstock habe ich einen Text aus dem Echt Jetzt Stempelset von Stampcorner, schwarz auf weißen Cardstock gestempelt und schwarz gemattet, aufgeklebt. Ich habe die Worte weiter auseinander gestempelt, so dass dazwischen ein kleinerer Kreis, gestanzt aus dunkelblauem Cardstock, Platz hat. Der ist der Hintergrund für die gestanzte Zahl 50. Die habe ich mit den Impact Numbers von MFT aus hellblauem Glitzercardstock gestanzt und mit einem Schatten aus schwarzem Cardstock hinterlegt.
Außerdem war hier noch Platz für eine WTF und eine OMG Sprechblase aus dem Slim Comic Strip Stanzenset von MamaElephant. Die habe ich aus schwarzem Cardstock gestanzt und die Worte weiß hinterlegt.
Auch hier sind alle Lagen wieder mit 3D Tape aufeinander geklebt - und Platz für ein paar dunkelblau-irisierende Glitzersteine war ebenfalls.
Damit sich die Karte trotz der Höhe dieser Lage noch problemlos schließen lässt, habe ich einen etwa 1 cm hohen Extrastreifen beim Falzen mit eingerechnet.
Again I glued some light blue cardstock onto the craftcolored cardstock, then glued the ray background with the middle strip and a circle, cut from matte silver metallic cardstock using the Sun Shine Panel die by Waffle Flower, on top. Before I had spritzed some white paint onto the light blue cardstock.
On top of the silver strip I've added a text, meaning something like "is this real", stamped with black ink onto white cardstock and matted black. I stamped the words a bit apart of each other to have room for the smaller circle, cut from dark blue cardstock, between the words. This dark blue circle is the background for the die cut 50. I've cut the numbers with the Impact Numbers die set by MFT from light blue cardstock and added a shadow layer cut from black cardstock behind the numbers.
There was also room for a WTF and a OMG speech bubble from the Slim Comic Strip die set by MamaElephant. I've cut those from black cardstock and put some white cardstock behind the cut out letters.
Again all layers are glued on top of each other with foam tape - and there was also room for some dark blue iridescent pearls.
To make sure the card still closes correctly, even with the extra hight of this layer, I added a strip of about 1 cm when scoring the card base.

Und so sieht die Karte dann komplett geöffnet aus.
And this is the card opened completly.


Die beiden Teile links und rechts sind, bis auf den Text, identisch gestaltet.
Ich habe hier jeweils dunkelblauen Cardstock aufgeklebt, auf den ich zuvor wieder die Strahlen von ImpressionsObsessions silber aufembosst habe.
Darauf kamen zwei Lagen brennender Geburtstagkerzen, einmal aus hellblauem, einmal aus etwas dunkler blauem Cardstock gestanzt. Die Muster habe ich mit einem weißen Gelpen aufgemalt.
Die Kerzenflammen sowie deren Schein im Hintergrund sind mit gelb-goldener Kreide gemacht, außerdem habe ich goldene Stickles auf die Flammen aufgetragen.
Die Texte sind aus dem Stempelset Bitty Birthday Wishes von MFT. Ich habe sie jeweils weiß auf dunkelblauen Cardstock embosst und über die Kerzen geklebt.
Auf den oberen Bereich habe ich noch einige silberfarbene Sternchen verteilt.
The two flaps on the left and right are decorated identically, except for the text.
Here I glued some dark blue cardstock, onto that I've silver heat embossed the rays by ImpressionsObssessions again, onto the card base.
On top of the background I glued two rows of birthday candles, once cut from light blue, once cut from a slightly darker blue cardstock. I added the patterns with a white gel pen.
The flames and the shine behind them are made with golden-yellow chalk, I also covered the flames with some golden Stickles.
The texts are from the Bitty Birthday Wishes stamp set by MFT. I white heat embossed those onto strips cut from dark blue cardstock, then glued them across the candles.
To the upper area I added a few silver stars.

Auf dem mittleren Innenbereich der Karte war dann Platz für unsere Unterschriften.
Hier habe ich erst dunkelblauen Cardstock auf die Karte geklebt, darauf dann ein Rechteck aus weißem Cardstock. Auf den habe ich oben mittig ein happy, happy, happy aus dem Itty Bitty Birthdays Stempelset von MFT schwarz aufgestempelt. Darunter habe ich ein gestanztes Birthday, gemacht mit einer Stanze aus dem Big Scripty Words Stanzenset von LawnFawn und schwarzem Cardstock, aufgeklebt. Mit einem weißen Gelstift habe ich einige Highlights aufgemalt und daneben noch ein paar weitere silberne Sterne aufgeklebt.
The inner middle part of the card held room for all of us to sign the card.
Here I first glued down some dark blue cardstock, then put a piece of white cardstock on top. Onto that I had black stamped a happy, happy, happy from the Itty Bitty Birthdays stamp set by MFT in the top center. Under the stamped words I've glued a die cut birthday. I've cut it from black cardstock using one of the dies from the Big Scripty Words die set by LawnFawn. I added a few highlights with a white gel pen and glued some more silver stars above the text.