

Hallo Ihr Lieben!
Der Oktober nähert sich seinem Ende - und da musste ich einfach noch eine weitere Halloweenkarte machen, bevor ich meine makabere Bastelseite wieder bis nächstes Jahr wegpacken muss. Und diese Karte zeige ich heute auf dem Stampcorner Blog.
Hello everyone!
October is coming to an end - so I just had to make another Halloween card, before I have to put my spooky craft side away until next year. And this card I'm sharing over at the Stampcorner Blog today.
Zum Posttitel gleich mal so viel: ich wollte wirklich einen Text auf die Karte stempeln. Aber als dann alle Elemente untergebracht waren, war einfach kein Platz mehr übrig! Wenn ich das RIP auf dem Grabstein ein wenig höher gesetzt hätte, wäre darunter noch Platz gewesen, aber das habe ich nicht. Und sind wir doch mal ehrlich: es gibt Karten, die kommen auch gut ohne Text aus. Und eine Halloweenkarte gehört da für mich definitiv dazu.
Für den Hintergrund habe ich die Nighttime Sky Stencil von LawnFawn benutzt. Zuerst habe ich den kompletten Kreis auf ein Stück weißen Cardstock gelegt und den Himmel mit Distress Oxide Iced Spruce, Broken China, Uncharted Mariner und Black Soot gewischt. Das Broken China sieht man so gut wie nicht mehr, da ich es mit den beiden anderen Blautönen quasi komplett überwischt habe. Aber dadurch war das Verblenden der doch recht unterschiedlichen Töne Iced Spruce und Uncharted Mariner sehr viel einfacher. Anschließend habe ich ein wenig Wasser sowie weißes Copic Opaque White, vermischt mit Wasser, auf den Himmel aufgespritzt.
Anschließend habe ich die Stencil mit dem runden Ausschnitt aufgelegt und den Mond mit Pumice Stone gewischt. In meinem Pinsel war noch ein kleiner Rest Antique Linen, deswegen wirkt der Mond etwas gelblich, das gefiel mir aber super. Zum Schluss habe ich wieder mit Pumice Stone, diesmal intensiver, die Mondkrater aufgewischt. Natürlich könnt Ihr auch einen normalen runden Stencil benutzen, dann ist der Mond eben ohne Krater.
The title of this post means: a Halloween card doesn't need a text. Well, to explain that: I really had planned to add a text to my card. But once I had all the elements put down there simply wasn't room for it left. If I had put the RIP a bit higher on the gravestone, there would have been room under that. But I didn't. And to be honest - there are cards that don't necessarily need a text, and a Halloween card is one of those, in my opinion.
For the background I used the Nighttime Sky stencil by LawnFawn. First I put the solid circle onto a piece of white cardstock and inked the sky with Distress Oxide Iced Spruce, Broken China, Uncharted Mariner and Black Soot. The Broken China is kind of invisible since I completly blended the other two blues over it, but that mid blue color made blending the pretty different Iced Spruce and Uncharted Mariner a lot easier. Then I spritzed some water and some Copic Opaque White, mixed with a bit of water, onto the sky.
Next I used the stencil with the cut out circle and inked the sky with Pumice Stone. I had a bit of yellow left in my blender brush so my moon got a slightly yellow touch, but I really liked that. In the end I used Pumice Stone again, this time putting it down heavier, to add the craters to the moon. Of course you could use a solid circle stencil instead of the Nighttime Sky one, a moon without the craters for sure would look as nice.
Ich musste einfach nochmal die Motive aus dem Stempelset Süßes oder Saures benutzen, die finde ich so klasse!
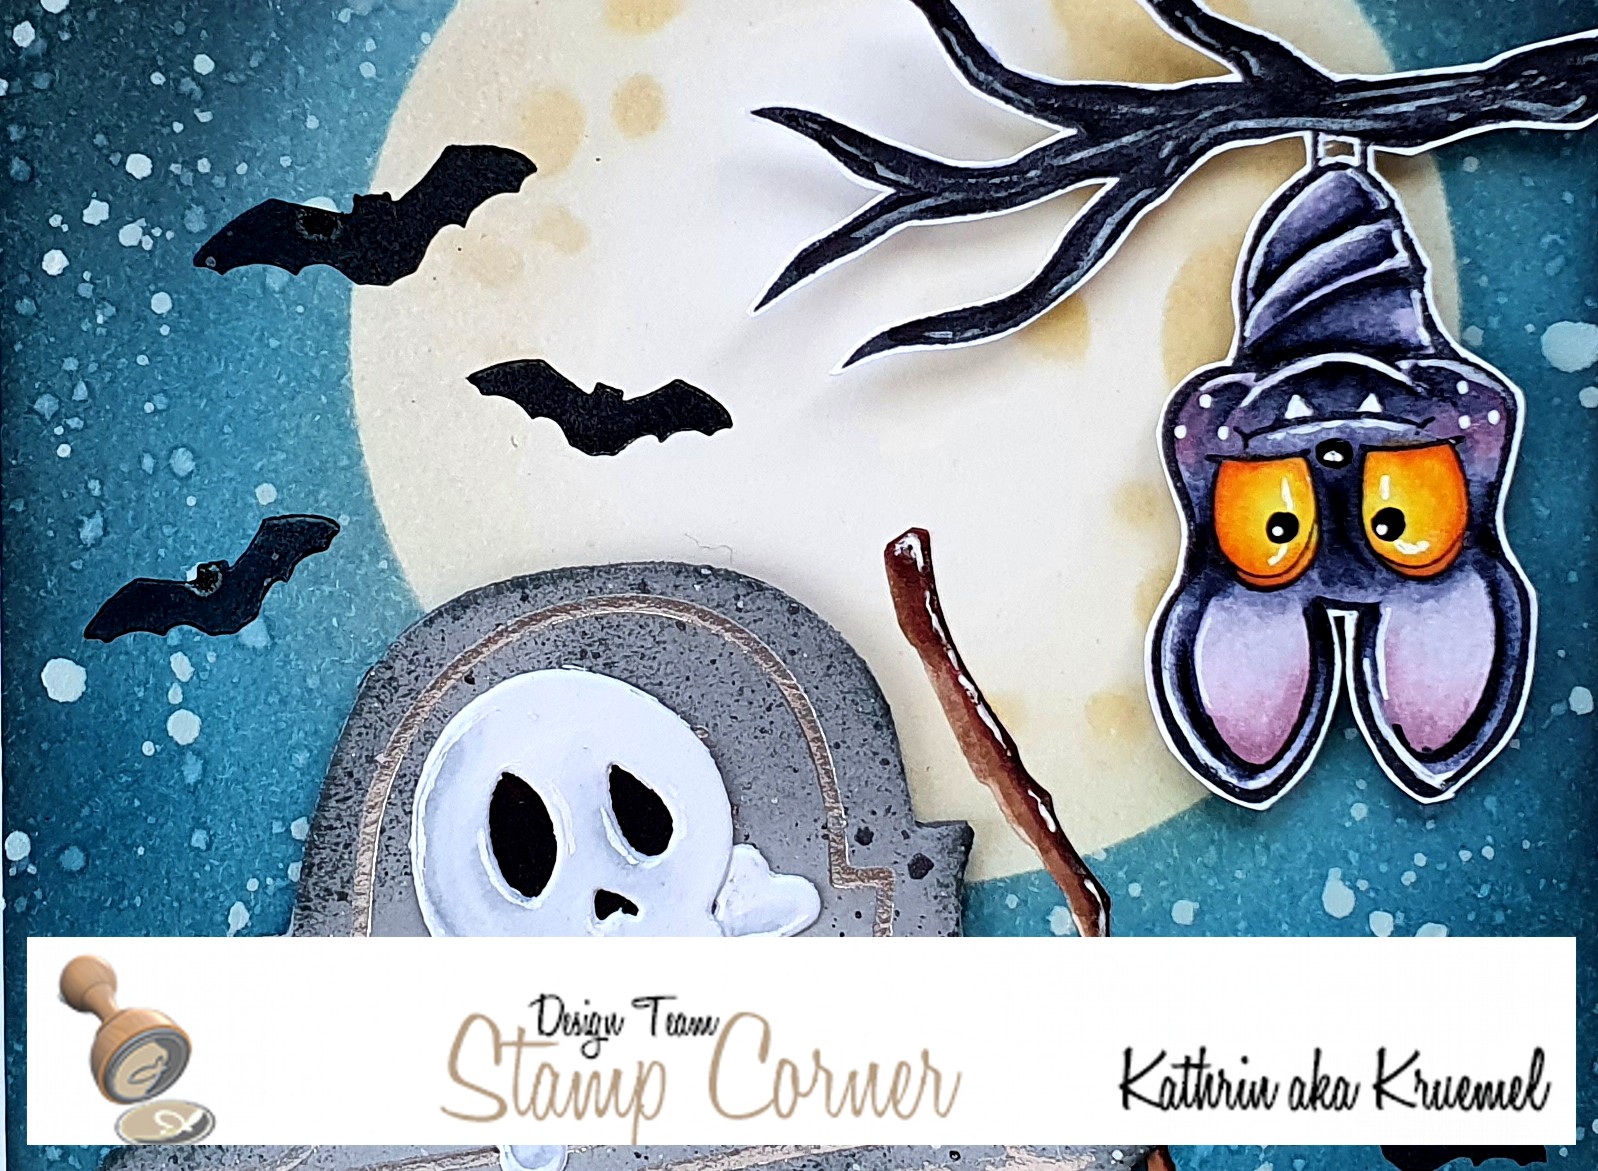
Die Fledermaus am Ast ist - wie alle anderen Motive auf der Karte - mit Copics coloriert, die Highlights sind mit einem weißen Gelpen gemacht. Dann habe ich sie ausgeschnitten und mit 3D Tape auf die Karte geklebt.
I really wanted to use the images from the Süßes oder Saures stamp set again, I just love those!
The bat hanging from the branch - and all the other images on my card - is colored with Copics, adding highlights with a white gel pen. Then I cut it out and glued it onto the card with foam tape.
.jpg)
Und dann konnte ich einfach nicht an der Slimline Decrepit Grave Stanze von WhimsyStamps vorbei. Wie gesagt, eigentlich ist es eine Slimline Stanze und der Grabstein sehr viel höher. Aber man kann ihn ja einfach kürzer schneiden - und das habe ich hier getan.
Ich habe den Grabstein einmal aus dunkelgrauem, einmal aus hellgrauem Cardstock und aus dem dunkleren Grau auch die Sockel gestanzt und aus dem helleren die etwas kleinere rechteckige Stanze ausgestanzt. Dann habe ich alle Teile mit Distress Oxide Black Soot ein wenig - und bewusst fleckig - schattiert und feine Sprenkel mit schwarzer Farbe und dem weißen Copic Opaque White aufgespritzt.
Im Stanzenset sind zwei Prägestanzen enthalten. Ich dachte mir, ich versuche mal, die zu folieren. Es hat geklappt, ich brauchte nur eine extra Lage Cardstock in meiner Hotfoil Maschine. So habe ich das Muster oben auf dem hellenren Grabsteinteil sowie da RIP silber auffoliert. Den Grabstein habe ich dann mit 3D Tape zusammengeklebt und oben noch den Totenkopf mit den gekreuzten Knochen aus demselben Stanzenset aufgeklebt.
Ich habe den Grabstein zwischen zwei Lagen gestanztem Gras, gestanzt aus schwarzem Cardstock, gesetzt und alles auf die Karte geklebt.
Kürbis und Hexenhut sind wieder aus dem Süßes oder Saures Stempelset. Die Katze, die den Hexenhut eigentlich trägt, habe ich hier einfach weggeschnitten.
Nun, zu dem Hexenhut wollte ich so gerne einen Hexenbesen setzen. Da hatte ich aber keine in Größe und Stil passende Stanze - also war Um-die-Ecke-Denken angesagt. Ich habe jeweils aus weißem Cardstock einen Ast sowie zwei Blätter in unterschiedlicher Größe und von der Form her Birken-Blättern ähnelnd ausgestanzt und mit Copics coloriert. Das dünnere Ende des Astes habe ich dann zwischen die Blätter - das kleinere obenauf - geklebt und fertig war der Hexenbesen! Den habe ich dann an den Grabstein angelehnt aufgeklebt. Ich bin sicher, jeder von uns hat etwas passendes in seinem Bestand.
And then I couldn't resist the Slimline Decrepit Grave die by WhimsyStamps. Well, it's a slimline sized die and the grave stone is way taller. But it can easily be cut down - and that's what I did here.
I've die cut the grave stone once from light and once from dark grey cardstock and also cut the base of the grave from the dark grey. Then I cut the smaller rectangle die from the center of the lighter grave stone, inked all pieces a bit - and on purpose a bit blotchy - with Distress Oxide Black Soot and covered all pieces with tiny speckles of black color and the white Copic Opaque White.
There are also two dies included in the set, that can be used to deboss some details. Well, I thought those might work for hotfoiling as well. It worked, I just needed to add an extra cardstock shim to my hotfoil sandwich. So I hotfoiled the details on the head of the grave stone and the RIP using silver foil. I put the grave stone together with foam tape and then added the skull with the crossed bones, also from this die sest, to the top of the stone.
I put the grave stone between two layers of grass, cut from black cardstock, and glued it onto my background.
The pumpkin and witch's hat are again from the Süßes oder Saures stamp set. I cut off the cat, that is originally wearing the hat, for this card.
And then I really wanted to add a broom since it would look perfect with the hat. But I didn't have a die the right size and the look I was after - so I had to do some thinking outside the box. From white cardstock I've cut a branch and two leaves - similar to a birch leaf in shape and a larger and smaller one - and colored them with Copics. Then I glued the thinner end of the branch between the two leaves and my broom was done! I glued that down, leaning it against the grave stone. I'm sure you can find something similar in your stash to create your own broom.

An das Band am Hexenhut habe ich noch ein kupferfarbenes Sternchen aufgeklebt. Außerdem habe ich den Himmel noch mit einigen kleineren Fledermäusen aus dem Süßes oder Saures Set, gestempelt mit Versafine Clair Nocturne, gefüllt.
Und hier könnt Ihr die silberne Folierung auf dem Grabstein noch besser sehen. Es hat mich wirklich gefreut, dass das so geklappt hat! Das nächste Mal werde ich noch versuchen, das Muster erst in den Cardstock zu prägen und dann zu folieren. Ich glaube, das wirkt dann noch besser, habe aber ein wenig Angst, dass ich Folienabdrücke auch auf den erhabenen Stellen rund um das Muster haben werde. Wir werden sehen, ob das klappt.
I glued a small copper colored star onto the witch's hat and stamped a few flying bats with Versafine Clair Nocturne ink into the sky.
And here you can also see the silver foiling on the grave stone. I am really happy that that worked out! And next time I'll try debossing the pattern into the cardstock first and then add some foiling on top. I think, that might look even better, but am a bit afraid of over foiling on the raised areas around the pattern. We'll see how that goes!