
Hallo Ihr Lieben!
Heute habe ich ein weiteres Sneak auf das März-Release von Stampcorner für Euch. Und die ist so richtig bunt geworden.
Hello everyone!
Today I have another sneak of the march release by Stampcorner to share. And I made a really bright and colorful card.
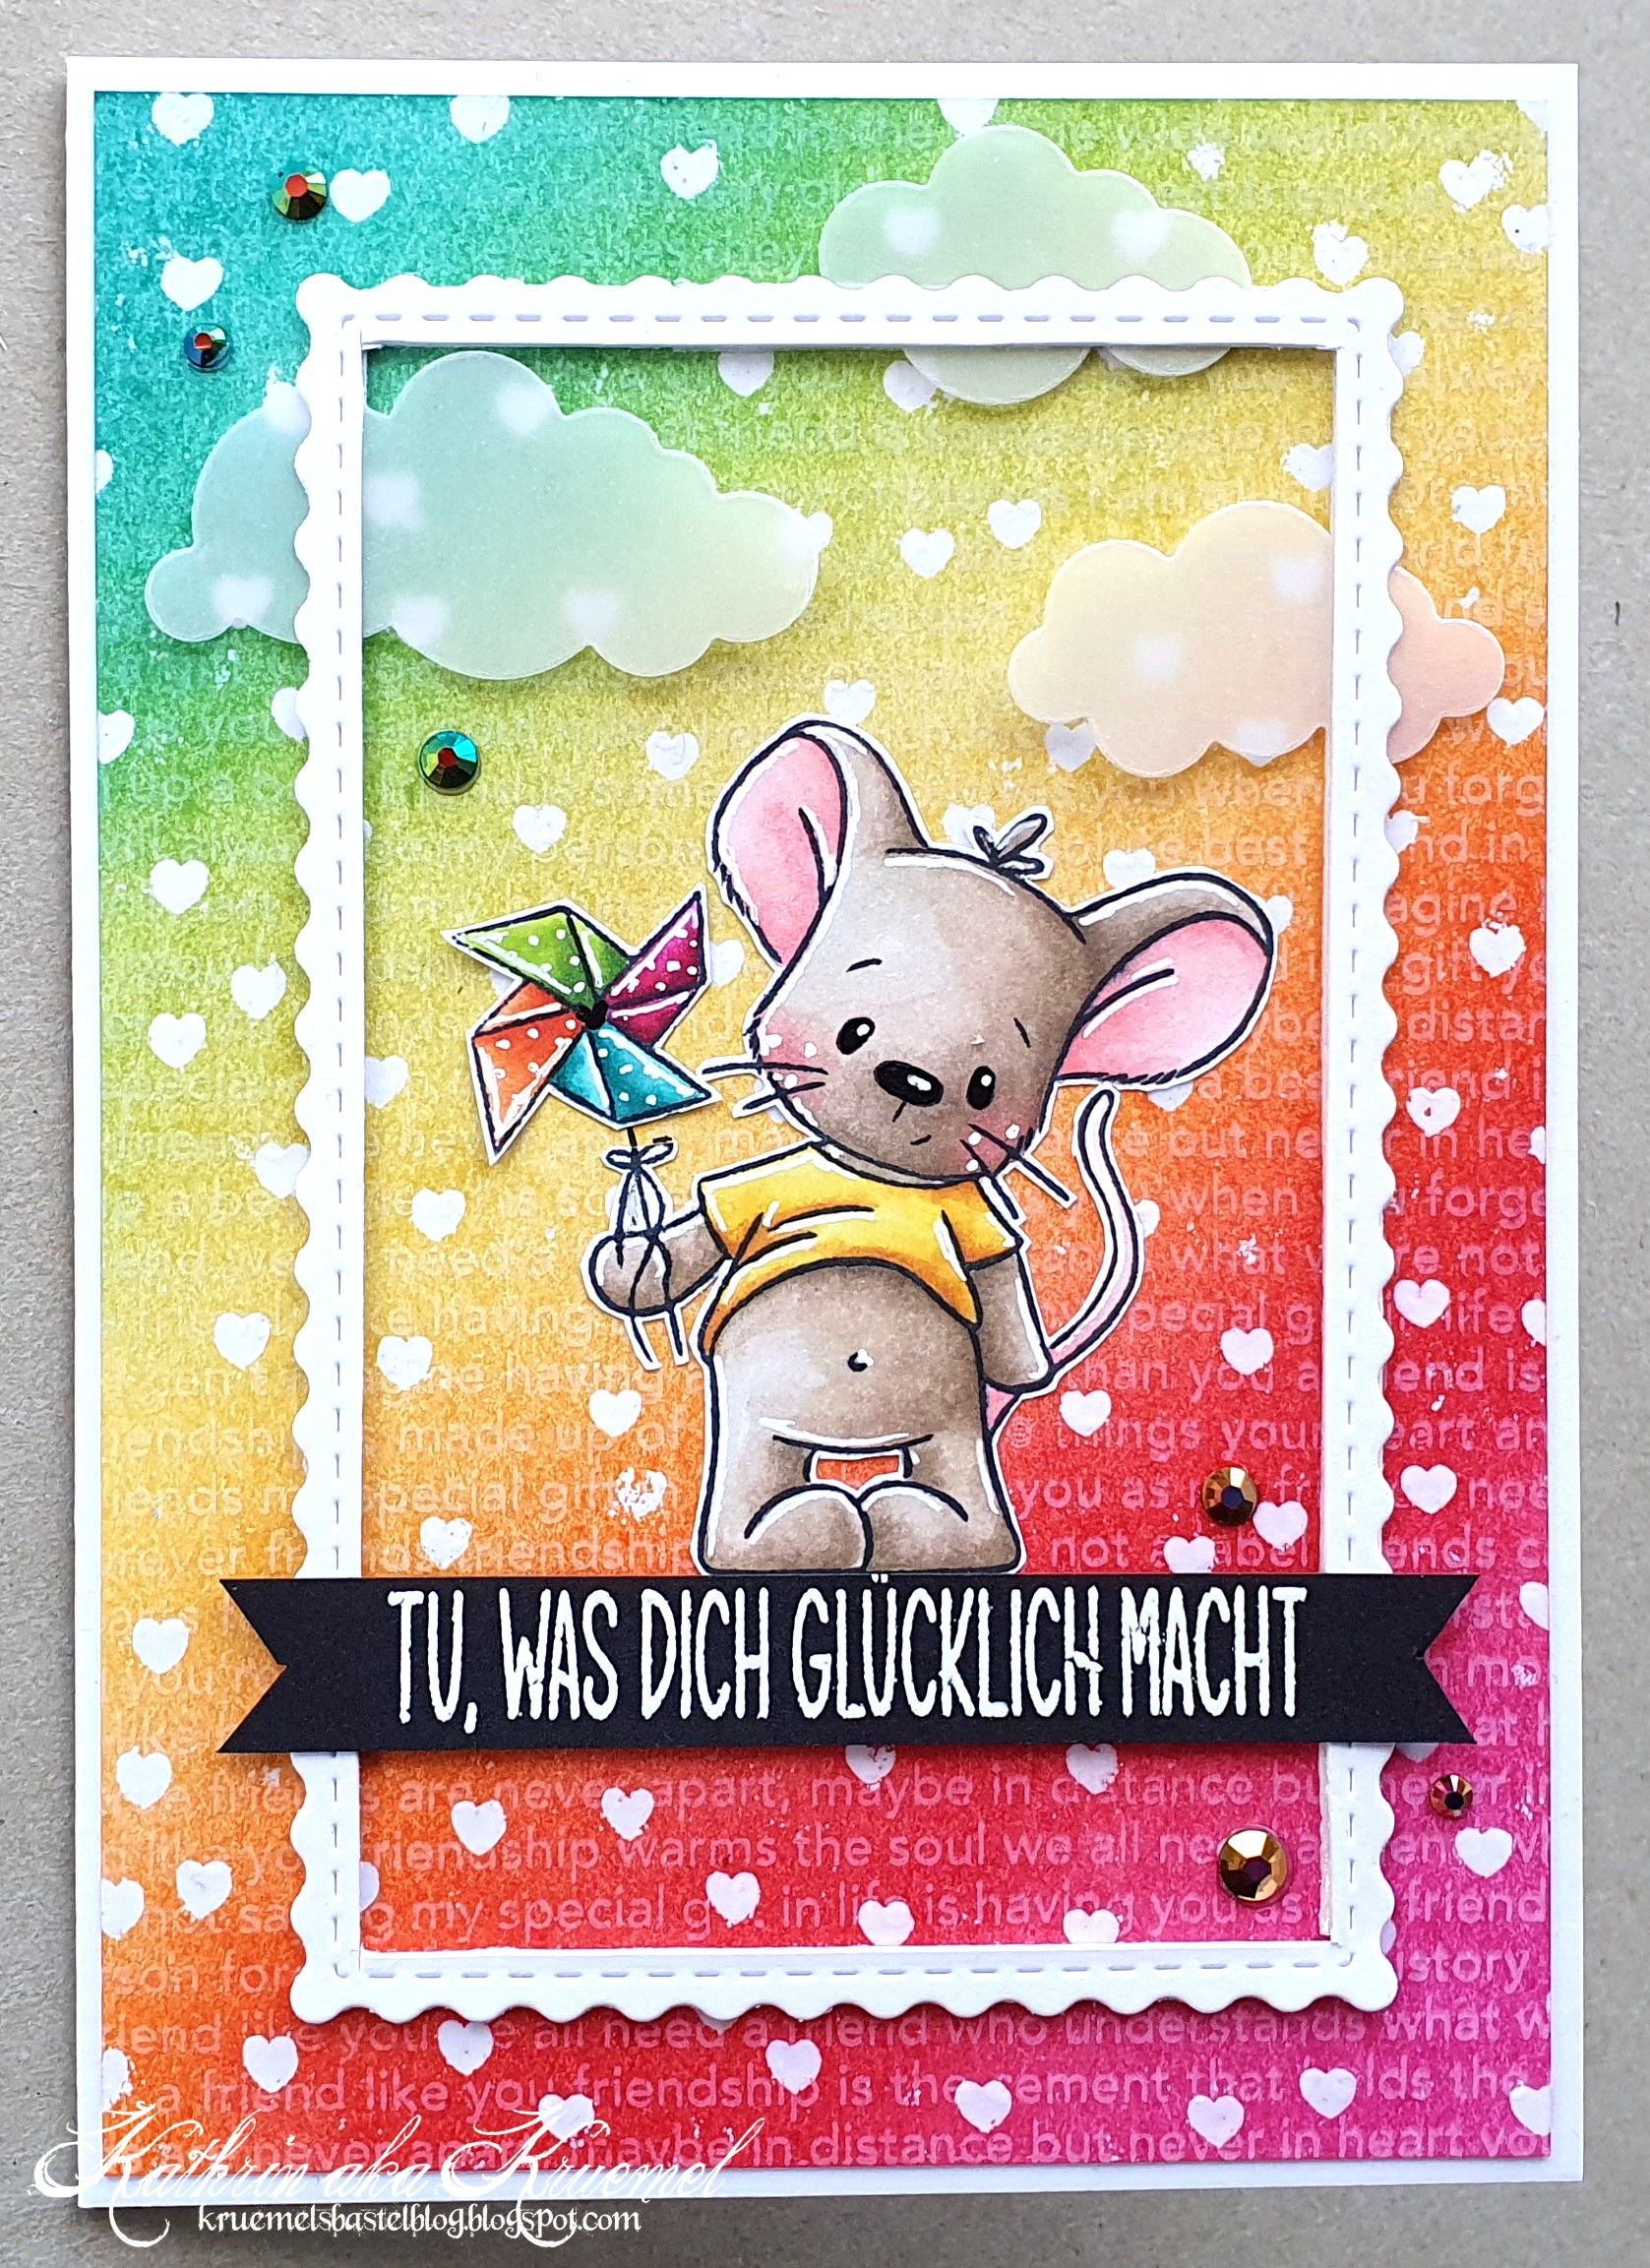
Für den Hintergrund habe ich erst mit klarem Embossingpulver den Herzhintergrund mit einem Stempel von MFT auf weißen Cardstock embosst. Dann habe ich den Cardstock schräg in Streifen in Regenbogenverlauf mit Distress Ink Picked Raspberry, Festive Berries, Carved Pumpkin, Squeezed Lemonade, Twisted Citron und Mermaid Lagoon gewischt.
Nachdem die Farbe komplett trocken war, habe ich den Best Friends Background von MFT mit weißer Stempeltinte auf den kompletten Cardstock gestempelt. Die Schrift ist kaum lesbar, aber so wirkt der Hintergrund so viel interessanter.
For the background I first clear heat embossed the hearts onto a piece of white cardstock, using a stamp by MFT. Then I inked it up in diagonal stripes in rainbow order with Distress Ink Picked Raspberry, Festive Berries, Carved Pumpkin, Squeezed Lemonade, Twisted Citron and Mermaid Lagoon.
After the color had dried completly I stamped the Best Friends Background by MFT over the whole panel using white pigment ink. The text is nearly not legable, but it makes the background so much more interesting.

Aus weißem Cardstock habe ich dann eine der Wave Stanzen von Stampcorner ausgestanzt und mittig mit dem Cutter ein Rechteck herausgeschnitten, um einen dünnen Rahmen zu erhalten.
Die Wolken, mit den Puffy Clouds Stanzen von MFT aus Vellum gestanzt, habe ich von hinten gegen den Rahmen geklebt und den dann mit dünnem 3D Tape auf dem Hintergrund befestigt.
In den Rahmen kam dann mein Motiv. Die süße Maus mit dem Windrad ist mit Copics coloriert, auf das Windrad habe ich einige weiße Punkte mit einem Gelstift aufgemalt. Dann habe ich das Motiv ausgeschnitten und in den Rahmen geklebt.
Aber ich konnte einfach nicht anders und habe das Windrad in ein interaktive Element verwandelt:
I cut one of the Wave dies by Stampcorner from white cardstock and then used my paper cutter to cut a rectangle from the center to end up with a thin frame.
I attached the clouds, die cut from vellum with the Puffy Clouds dies by MFT, to the back of the frame and then used thin foam tape to adhere it to the background.
Into the frame I put the image. The little mouse with the pinwheel is colored with Copics, I added some white dots to the pinwheel with a gel pen. Then I cut the image out and glued it inside the frame.
But I just couldn't resist and turned the pinwheel into an interactive element:

Ist das nicht einfach süß? Und es ist gar nicht schwer, diesen Effekt zu erstellen. Wir hatten dazu vor einiger Zeit eine Anleitung bei Stempeleinmaleins HIER.
Damit meine Maus nicht so in der Luft schwebt, habe ich noch einen der Texte aus dem Stempelset Sei Mutig weiß auf einen Streifen schwarzen Cardstocks embosst und denn direkt unter den Füßen der Maus quer über den Rahmen geklebt.
Als Deko habe ich dann noch einige holografisch-irisierende Metallic-Glitzersteine aufgeklebt.
Isn't that too cute? And it actually isn't hard to create this effect. We from Stempeleinmaleins had a tutorial quite some time ago on how to do it, you can find it HERE.
Since my mouse was kind of floating in the air, I white heat embossed a "do what makes you happy" text onto a strip of black cardstock and glued it across the frame, right under the mouse's feet.
To decorate the card I added a few holographic iridescent metallic rhinestones to it.
Und zu guter letzt habe ich noch ein Video von dem sich drehenden Windrad für Euch.
And last I also have a video from the turning pinwheel for you.