Montag, 12. März 2018

Best Friends


Hallo Ihr Lieben!
Heute zeige ich Euch eine weitere Karte, die ich für den Vildastamps Blog gemacht habe. Auch hier habe ich einen der neuen Stempel benutzt.

Hello everyone!
Today I am sharing another card that I made for the Vildastamps Blog. Here I used another one of the new stamps, too.

Ich habe mich hier als Basis für eine gewellte Karte entschieden und ein große ausgestanztes Herz schräg darübergelegt. Und weil man nie genug Herzen haben kann, kam auch hier der Hintergrund mit den kleinen Herzen zum Einsatz.

I went with a scalloped card base and put a large die cut heart on top. And since you can never have enough hearts I went with the hearts background again.


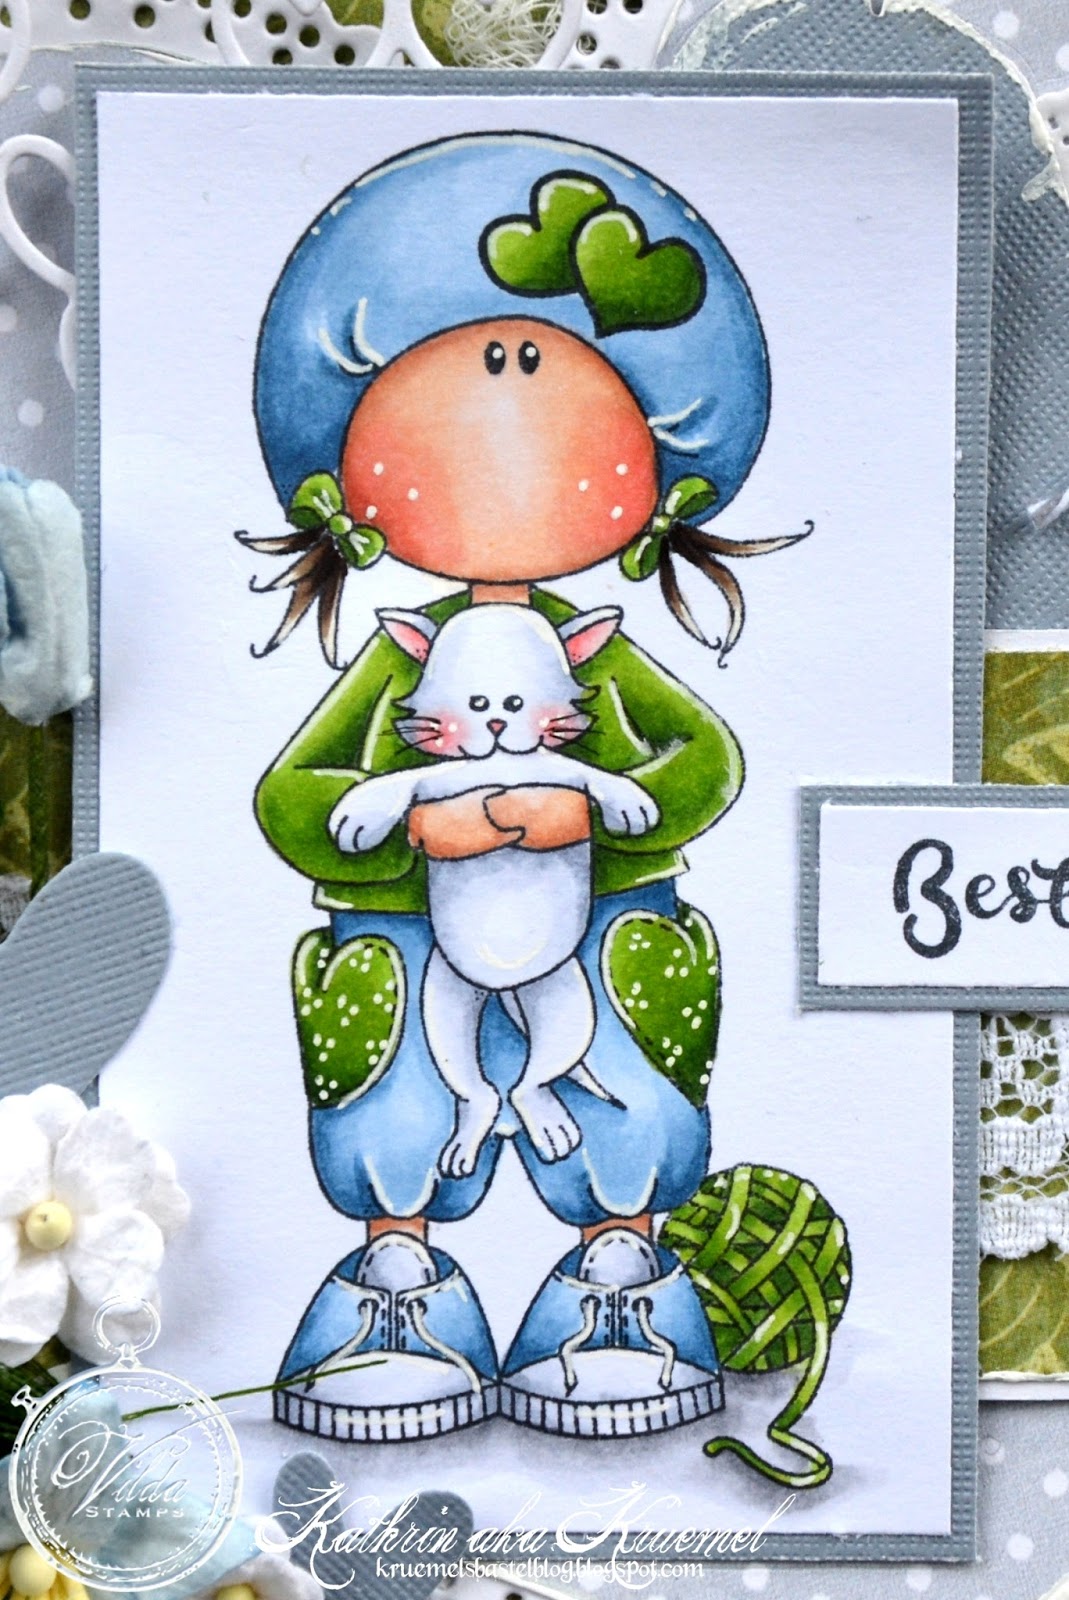
Hier ist eines der süßen Motive aus dem Stempelset Best Friends. Ich musste sofort an eine meiner Töchter denken, die Katzen so sehr liebt... Wenn unsere erste Katze es mit sich hätte machen lassen, dann könnten wir genau so ein Foto von ihr haben. Coloriert habe ich wieder mit Copics.

Here is one of the cute images from the Best Friends stamp set. I had to think of one of my daughters when I saw the image, she really loves cats. And if our first cat would have been a little friendlier for sure we'd have a photo like this of the two of them. Coloring was done with Copics again.


Der Text kommt zusammen mit den Motiven im Set. Und ja, da ist noch ein Herz auf der Karte, hier ein Tag, durch das ich etwas Twine gezogen habe.

The saying comes with the images in a set. And yes, there is another heart on my card. Here I used a heart shaped tag to which I've added a bow from twine.


Als Deko habe ich einige Blumen in blau und weiß sowie einen dieser Perlensträuße in grün verwendet. Und ja, ich weiß, da ist noch ein Herz... ;)

For decorations I went with some flowers in blue and white and one of those pearl sprays in green. And yes, I know, there's another heart... ;)


Sonntag, 11. März 2018

Eine Frühlingskarte


Hallo Ihr Lieben!
Vildastamps wurde ja vor kurzem von Engströms Artstudio übernommen - und es gibt bereits die ersten neuen Motive. Und da musste ich einfach eine Karte, die Frühling ruft, mit machen. Die Adresse des Blogs hat sich übrigens nicht geändert... ;)

Hello everyone!
As you know Vildastamps has be taken over by Engströms Artstudio a little ago - and there are the first new stamps already. So I had to make a spring-ish card using them. By the way, the blog adress hasn't changed... ;)

Für meine Karte habe ich den Schreibschrift-Hintergrund Letter Context verwendet und auf die Mitte eines großen Doilies gestempelt. Das habe ich dann mit Spitze - breit und schmal - auf das Designpapier geklebt. Oben habe ich noch ein ausgestanztes Herz hinter das Doily geschoben.
Der Text, der mit den Rosen im Set kommt, ist auf einen Blumenstecker gestempelt, passend zum Thema der Karte.

For my card I used the beautiful Letter Context background and stamped it on the middle of a large doily. Then I've glued the doily with lace - wide and small - onto designer's paper. I also put a die cut heart behind the doily in the top left corner.
The saying, that comes with the flowers, is stamped on a flower pick, matching the theme of my card.


Und hier ist einer der tollen Stempel aus dem Stempelset Flowers Geranium and Roses. Ich wusste sofort, dass ich sie von recht dunkel nach ganz hell mit Streifen colorieren wollte. Und wenn ich sie so ansehe, kann ich fast den Duft riechen... Ach, was freue ich mich auf den Sommer! Der kleine Schmetterling, der ebenfalls aus diesem Set ist, ist mit denselben Farben coloriert.

And here is one of the beautiful stamps from the stamp set Flowers Geranium and Roses. When I saw it I knew immediately that I wanted to color it from very dark to very light with stripes. And looking at it I can nearly smell it.... Oh, I am so looking forward to summer! The little butterfly, that comes in the same set, is colored with the same colors.


Samstag, 10. März 2018

Stempeleinmaleins - Ausgabe vom 10. März 2018


Hallo Ihr Lieben!
Heute zeigen wir Euch beim Stempeleinmaleins eine einfache Box, die ganz ohne Kleben auskommt. Ich habe die Maße etwas abgewandelt, aber alle Boxen sind nach dem gleichen Prinzip gemacht.

Hello everyone!
Over at Stempeleinmaleins we are sharing an easy box today, that is made without any glue. I changed the measurements but they are all made the same way.


Auf meiner Box habe ich, passend zum Text von Kulricke, diesen süßen Bär verwendet. Er steht vor einem oval aus Wellpappe, hinter das ich ein gewelltes Oval gelegt habe. Im Hintergrund habe ich noch die Herzenstanze benutzt.
Als Deko kamen Blumen, Spitze, Pins und Cheesecloth zum Einsatz.

On my box I used this cute bear with the large heart because it goes great with the saying that means "chocolat is love that we love to give away".  The bear is standing in front of an oval cut from corrugated paper which I've matted with an scalloped oval. Behind those I also added a heart background.
For decorations I went with flowers, lace, pins and cheesecloth.


Und hier sieht man, warum ich die Maße geändert habe - und die für mich unüblichen Farben gewählt habe. Ich wollte eine der praktisch-quadratischen Schokoladentafeln verpacken und habe die Farben der Tafel aufgegriffen.

And here you see why I changed the measurements and went with those - for me - untypical colors. I wanted to wrap one of the square chocolates and picked up the colors from the packing.


Donnerstag, 8. März 2018

Eine Shadowbox


Hallo Ihr Lieben!
Auf dem Kulricke-Blog zeige ich heute eine weitere Shadowbox. Mit der dazugehörigen Stanze ist die wirkich schnell gemacht...

Hello everyone!
Over at the Kulricke-Blog I am sharing another shadow box card today. With their die this card is really done quickly...

Ich habe mich für eine Bühne entschieden - die Ballerina Line wollte ihren großen Auftritt. Die Box selbst ist aus schwarzem Cardstock gestanzt, die vordere innere Lage habe ich oben gerade abgeschnitten und dahinter die Ballerina geklebt. Die Ballerina habe ich einmal aus hautfarbenem und einmal aus rosafarbenem Cardstock ausgestanzt. Aus dem rosafarbenen Cardstock habe ich dann ihr Kostüm geschnitten und das Tutu mit Glitzer überzogen.
Für die seitlichen Vorhänge habe ich ebenfalls die inneren Lagen aus rotem Cardstock ausgestanzt, die Klebelaschen weggeschnitten und sie auch in der Breite ein wenig gekürzt. Mit ein paar Schatten und etwas Band versehen sind die  Vorhänge schon fertig. 

I made a stage this time - the Ballerina wanted to finally do her premiere. The box itself has been cut from black cardstock, the front one of the inner parts has been cut straight at the top and then I've glued the ballerina  to its back. The ballerina was cut twice - once from flesh colored cardstock and once from pink cardstock. Then I've cut her dress from the pink ballerina and added glitter to her Tutu.
For the curtains I also used the dies for the inner parts of the box. I've cut them from red cardstock, cut off the flaps and also made them a little less wide. I added a few shadows and some twine and the curtains were done.

Die Box zu fotografieren war eine ganz schöne Herausforderung - irgendwie war innen alles zu dunkel und wenn man das erkennen konnte, dann war der Rest zu hell. Ihr müsst also leider mit den Bildern zufrieden sein....
Für das Bühnenbild habe ich hinten dunkelgrauen Cardstock auf die Rückseite der Box geklebt, aus dem ich ein paar kleine Sterne ausgestanzt und mit silbernem Glitzerpapier hinterlegt habe. Auf die hintere innere Lage habe ich den Tannenbaum sowie das längliche Blatt - hier als Zypresse missbraucht - aus dem Stanzenset Baum und Blatt geklebt. 
Von einer weiteren inneren Lage, die ich zu einem schmalen Streifen geschnitten und oben an der Box angeklebt habe, hängt eine Art Riesen-Mond, auf den ich einen der Texte aus dem Stempelset Freundschaft aufgestempelt habe. Darum musste er auch so groß sein. Für ein wenig mehr Kontrast habe ich ihn rot hinterlegt. Und den Kometen aus dem Stanzenset Sternglanz habe ich auch noch darüber befestigt.

Taking pictures of this box was a real task - everything inside was too dark and when I got this visible all the other parts were too light. So you have to be happy with these kind of bad pics. 
For the scene I used a piece of dark grey cardstock from which I've punched a few small stars. Then I've put silver glitter paper behind the stars and glued the cardstock to the back of the box. There's also another inner part to which I've glued a tree and a leave - here used as another tree - from the Baum und Blatt die set.
There's even a third inner layer - it was cut to a thin strip and glued to the top of the box. Then I've added some kind of super moon to it. The saying on it means "you have to dance your life" - and this saying was why I've chosen such a big circle. For a bit more contrast I've put a larger circle from red cardstock behind it. And I also added a comet here.


Dienstag, 6. März 2018

Eine Geburtstagskarte


Hallo Ihr Lieben!
Heute zeige ich auf dem Stamping-Fairies Blog eine Karte, mit der ich bei den Creative Olympics bei MFT Stamps teilgenommen habe. Diese Kategorie hieß "Stamping Biathlon", es ging darum, zwei von verschiedenen vorgegebenen Themen zu kombinieren. Ich hatte mich für Stamping Resis Technik und Slider Card entschieden.

Hello everyone!
Today I am sharing this card over at the Stamping-Fairies Blog. It's one of the cards I made to join the Creative Olympics over at MFT. This one was for Stamping Biathlon - it was about combining two of different given themes or techniques. I went with Embossing Resist and Slider Card. 

Im Hintergrund habe ich den Marble Background klar auf weißen Cardstock klar embosst und mit Distress Ink Tumbled Glass darübergewischt, so dass die nicht embossten Stellen eingefärbt wurden. Aus diesem Hintergrund habe ich dann die Slider Karte gestaltet.

In the background I used the Marble Background and heat embossed it with clear embossing powder. Then I used Distress Ink Tumbled Glass to ink up the not embossed areas. Then I used this paper to create the slider element.


Dekoriert habe ich dann zuerst mit dem Stern und dem gelben, per Hand geschnittenen Banner. Darauf kamen die Birthday Candle Kerzen sowie der hooray Text. Die Flammen der Kerzen habe ich mit Copics ein wenig eingefärbt. Vorne durfte dann noch eines der süßen Birthday Chicks auf die Karte hüpfen. Die 18 aus schwarzem Cardstock habe ich erst später hinzugefügt - erstens, weil  bei der Challenge nur Stanzen und Stempel von MFT erlaubt waren und zweitens, weil ich erst nachdem sie fertig war um eine Karte zum 18. Geburtstag gebeten wurde.
Alle Teile sind natürlich nur am unteren Teil des Sliders festgeklebt.

First I decorated my card with the star and a hand cut yellow banner. Then I added the Birthday Candles and the hooray saying. I used my Copics on the flames of the candles to make them look more real. One of the cute Birthday Chicks hoped onto the card last. The numbers, cut from black cardstock, was added later - first because for the challenge only stamps and dies by MFT were allowed and second because I was asked for a card for an 18th birthday a few days later and thought this one would be perfect.
All parts are only glued to the lower part of the slider to keep it working.


Zieht man am Slider - vorsichtshalber habe ich dort das Wort Pull aus dem Interactive Labels Stempelset aufgestempelt - stellt sich der Slider auf und darunter kommt noch ein weiteres Küken zum Vorschein. Es hat einen Luftballon dabei und einen Text habe ich auch noch daneben gestempelt.

If you pull the tab - I added a stamped pull from the Interactive Labels here - the slider stands and in the area that shows up another chicken is hidden. It brings a balloon for the party. And I also added a saying here.


Montag, 5. März 2018

Schön, dass es Dich gibt


Hallo Ihr Lieben!
Manchmal möchte man jemandem - einfach so - sagen, "schön, dass es dich gibt". Und natürlich geht das mit einer kleinen Karte prima.

Hello everyone!
Sometimes you want to say "happy you are there", just without a cause. And of course a little card is a perfect way to do that.

Mit einer Schablone und Distress Inks habe ich die Herzen im Hintergrund auf weißen Cardstock aufgewischt. Darauf kam erst ein weißer Rahmen und Cheesecloth und dann mittig auf die Karte ein aus rotem Cardstock gestanztes Herz. 
Der Text ist auf ein Banner gestempelt und quer über die Karte geklebt.

I used a stencil and Distress Ink to create the hearts background onto some white cardstock. Then I added some cheesecloth and on top of that a heart, cut from red cardstock, in the middle of the card.
The saying is stamped on a banner and glued across the card.


Und hier habe ich einen weiteren der süßen Pandas von Scrapbook Forever benutzt. Für mich sieht er so aus, als würde er sich gleichzeitig wahnsinnig freuen und die Arme für eine Umarmung ausstrecken - also ist er doch perfekt für diese Karte. Daneben habe ich noch zwei Röschchen und eine kleine Blume aufgeklebt.

And here I used another one of the panda bears by Scrapbook Forever. To me he looks like he's really happy about something and at the same time has his arms open ready for a hug. So he's just the perfect pick for my card. Next to him I've glued two roses and a little flower.


Samstag, 3. März 2018

Stempeleinmaleins - Ausgabe vom 3. März 2018


Hallo Ihr Lieben!
Beim Stempeleinmaleins zeigen wir Euch heute eine Hidden Message Card. Ich kann mich daran erinnern, so eine schon vor Jahren mal gemacht zu haben. Ach, es gibt so viele tolle Anleitungen/Ideen, die man ausprobiert und dann einfach wieder vergisst... Aber es hat Spaß gemacht, diese wiederzuentdecken.

Hello everyone!
Over at Stempeleimaleins we are sharing a tutorial for a Hidden Message Card today. I can remember making one of these years ago. Well, there are so many great tutorials/ideas out there, you try them out and then totally forget about them... But it was fun re-discovering this one.

Meine Grundkarte ist aus weißem Cardstock, darauf kam rot-weißes Designpapier mit rotem Matting. Und dann habe ich endlich mal die Stempel und Stanzen aus dem Halloween-Kalender von Magnolia eingeweiht. Da ja immer noch die Grippewelle kursiert, passen sie gerade aber auch perfekt.

My base card is made from white cardstock, then I've put red and white designer's paper with a red matting on top of it. And then I finally used the stamps and dies from Magnolia's Halloween calendar for the first time. But since it's still the season for colds it was the perfect time.

 
Hier kam die süße Krankenschwester-Tilda mit passender Hauben-Stanze zum Einsatz. Darunter befindet sich ein weiteres Stück Designpapier, etwas Cheesecloth und ein Label aus Wellpappe. Oben quer über die Ecke habe ich das Pflaster geklebt. Und unten links die Flasche mit Herz-Medizin, die ich in einen kleinen Shaker verwandelt habe, sowie das Stethoskop.

Here I used the cute nurse Tilda with the matching die for her hat. Underneath htere is another piece of designer's paper, some cheesecloth and a label die cut from corrugated paper. Across one of the top corners I've put the band aid. At the bottom left I've added the medicine bottle filled with hearts that I've turned into a little shaker here and the stethoscope also.


Rechts vom Motiv habe ich das Kreuz, das Notepad, ein paar Blümchen, Spitze und ein weißes Herz, das aus der Mitte des Stethoskopes stammt, aufgeklebt. Und für eine kleine Schleife aus Garn war auch noch Platz.

To the right of the image I've added the die cut cross, the note pad, a few flowers, lace and a white heart which is from the middle of the stethoscope. And there was also room for a little bow made from twine.


Und das ist die versteckte Message, die nach dem Öffnen der Karte den Text, der auf der Vorderseite zu sehen ist, auf magische Weise ersetzt. Die Texte sind von MFT. Um den Ausschnitt innen habe ich einen gewellten Kranz geklebt und ein schwarzes Enamel Dot mit aufgeklebt. Den Rest der Innenseite möchte ich für einen handgeschriebenen Text nutzen können.

And this is the hidden message that magically replaces the one that can be seen on the front when the card gets opened. The sayings are by MFT. I've glued a die cut salloped circle frame to the inside and added a single black Enamel Dot. I want to use the rest of the inside for a handwritten message.


Donnerstag, 1. März 2018

März-Challenge bei Stamping-Fairies


Hallo Ihr Lieben!
Heute starten wir die neue Challenge auf dem Stamping-Fairies Blog. Und weil wir sicher alle bereit dafür sind, haben wir uns das Thema "Frühling" ausgesucht.

Hello everyone!
Today we are starting our new challenge over at Stamping-Fairies Blog. And since I guess we're all more than ready or it we picked the theme of spring this time.

Ich habe diese Karte dafür gemacht. Im Hintergrund habe ich den Honeycomb Background mit weißem Embossingpulver auf grünen Cardstock embosst. Dann habe ich mit dem Spritzing Tool und dem Distress Marker Mowed Lawn noch ein paar kleine Spritzer darauf verteilt. 

I came up with this card. In the background I heat embossed the Honeycomb Background with white embossing powder onto green cardstock. Then I used the spritzing tool and the Distress Marker Mowed Lawn to add a few speckles.


In der Mitte der Karte habe ich diese kleine Szene angebracht. Dafür habe ich den Hasen und den Schmetterling aus dem Forest Friends Stempelset abgestempelt und mit Masking Tape abgedeckt. Dann habe ich zuerst die Grashügel aufgewischt. Dazu habe ich die Drifts and Hills Schablone und Distress Ink Mowed Lawn benutzt. Anschließend habe ich den Himmel mit der Mini Cloud Edges Schablone und Distress Ink Tumbled Glass aufgewischt. Zum Schluss dann habe ich die Bäume aus dem Modern Trees Stempelset abgestempelt. Für die Blätter habe ich zuerst Sour Apple verwendet und anschließend ein paar Ränder mit Green Room darübergestempelt. So sind sie nicht so einheitlich.
Die ausgeschnittene Szene habe ich dann weiß gemattet und darüber einen der Stitched Square Scallop Frames als Rahmen darübergelegt. 
Unter das Motiv habe ich ein Fähnchen geklebt. Für das Spring - das ich aus weißem Cardstock gestanzt und dann ebenfalls zweifarbig gewischt habe - habe ich das Inside Out Alphabet von Tim Holtz verwendet. Daneben habe ich einen Teil eines Textes aus dem Stempelset Up in the Air abgestempelt.

In the middle of the card I've put this little scene. First I stamped the bunny and the butterfly from the Forest Friends stamp set and covered them with masking tape. Then I added the grassy hills first. I used the Drifts and Hills stencil and Distress Ink Mowed Lawn. Then I added the sky using the Mini Cloud Edges stencil and Distress Ink Tumbled Glass. In the end I added the trees from the Modern Trees stamp set. I used the Sour Apple Ink Pad for the leaves and then inked up just the edges of some of the leaves with Green Room to add some shading.
I've cut the scene out and added some white matting. For the frame on top of the scene I used one of the Stitched Square Scallop Frames dies.
Underneath the image I've added a banner. To die cut the word SPRING I used the Inside Out Alphabet by Tim Holtz. It was cut from white cardstock and then inked up in two colors as well. Next to it I stamped a part of one of the sayings from the Up in the Air stamp set onto the banner.


Mittwoch, 28. Februar 2018

Eine Box mit Hase


Hallo Ihr Lieben!
Heute zeige ich auf dem Kulricke-Blog diese Osterbox mit Hase.

Hello everyone!
Over at the Kulricke Blog I am sharing this easter box with bunny today.


Für die Box habe ich die Take-Away-Box verwendet und die oberen Teile abgeschnitten. Dann habe ich sie mit Designpapier beklebt und einen Einsatz gebastelt. Der ist 4,5 cm hoch und hat 6 "Erdlöcher" für die Schokoladenmöhren.

For the box I used the Take-Away-Box die and cut off the top parts. Then I've covered it with designer's paper and created an insert. It's 4,5 cm high and has 6 die cut wholes to "plant" the chocolat carrots in.


Der süße Hase - hier konnte ich mal die größte Größe verwenden - hat sich aus dem Beet schon mal eine Möhre geklaut und mümmelt nun genüsslich daran herum. Die Möhre habe ich einfach per Hand dazugemalt - die Pfotenstellung ist ja perfekt dafür geeignet.
Den Text aus dem Stempelset Osterei habe ich mit brauner Tinte auf kraftfarbenen Cardstock gestempelt, bannerförmig zugeschnitten und die Schrift für mehr Kontrast innen noch mit weißem Gelmarker gefüllt.
Hinter den Bannern ist noch ein ausgestanztes Herz.

The cute bunny - here I was able to use the biggest size - already sneaked a carrott from the field and is now enjoying his treat. I simply handdrew the carrott - the way his hands are drawn is just perfect for that.
I stamped the saying - happy easter in german - onto craft colored cardstock using brown ink and then cut it into a banner shape. To add some contrast I used a white gelly marker to fill the font.
Behind the banners I've added a die cut heart.


Und natürlich muss so ein Beet auch beschriftet werden - damit man auch weiß, was man dort ausgesät hat. Ich habe das mittlere der Nesting Labels 5 verwendet und den oberen Teil oval/rund zugeschnitten. Darauf kam dann der Text "lecker Schokolade", den ich aus Stempeln der Schokolade 2 und Schokolade 3 Stempelsets zusammengesetzt habe. Der Pfeil ist aus dem Plan Stanzenset. Ich habe einfach nur die Spitze verwendet.

And of course a field  needs a sign so you know what you've planted there in spring. I used the middle sized Nesting Labels 5 and cut the top part into a round/oval shape. Then I added a "yummy chocolat" saying and added an arrow from the Plan die set.


Dienstag, 27. Februar 2018

Noch eine Babykarte


Hallo Ihr Lieben!
Bereits vor einiger Zeit habe ich Euch ja schon eine Babykarte mit dem Baby-Set von Scrapbook Forever gezeigt. Ich finde es immer gut, ein paar Babykarten auf Lager zu haben. Aber oft passiert es mir dann, dass ich eine Mädchenkarte brauche und nur Jungskarten da sind - oder umgekehrt. Darum habe ich heute mal eine Karte gemacht, die für beide Geschlechter passend sind, nämlich richtig bunt.

Hello everyone!
A little time ago I've already shared a baby card using the baby stamp set by Scrapbook Forever. I love to have a few baby cards at hand. But most times when I need a girls' card all I have are boys' - or vice versa. So today I made a card that fits both genders - using really bright colors.

Im Hintergrund habe ich zwei Sechsecke aus Designpapier sowie zwei Sterne aus dunkelblauem Cardtsock sowie eine blaue Bordüre aufgeklebt. Teilweise sind die verschiedenen Lagen mit 3D Tape aufeinander gesetzt.

In the background I used two die cut hexagons cut from designer's paper and two stars and a border cut from dark blue cardstock. A few of the layers were adhered using dimensional tape.

Und dass auf einer Babykarte nicht zwingend ein Baby zu sehen sein muss, sieht man hier. Ich habe alle Baby-Accessoires aus dem Stempelset auf-, neben- bzw. hintereinander maskiert und coloriert. Dann habe ich diese Szene - kann man das hier dann so nennen? - ausgeschnitten und oben auf ein Banner gesetzt, auf das ich den Text aus dem Baby-Set gestempelt habe. Das Cheesecloth hinter den Spielsachen sorgt für etwas mehr Kontrast.

And that you don't have to use a baby on a baby card can be seen here. I stamped all the accessoires from the stamp set next to and behind each other. Then I've cut this scene - can you call it a scene here? - out and glued it onto a banner on which I've stamped the saying "hello word - here I am". The cheesecloth behind the toys is used to created a more neutral background behind the toys.


Sonntag, 25. Februar 2018

Eine Karte zum 40. Geburtstag


 Hallo Ihr Lieben!
Vor kurzem war ich auf einen 40. Geburtstag eingeladen - und so ein Tag gehört natürlich gefeiert. Zum Feiern gehört in so einem Fall Champagner - und so habe ich meine Karte gleich in Form einer Champagnerflasche gemacht. Nachdem der Geburtstag nun vorüber ist, kann ich die Karte auf dem Noor!Design UK Blog zeigen.

Hello everyone!
Little time ago I've been invited to a 40th birthay - and days like this have to be celebrated. And it wouldn't be a real celebreation without champagne. So I've decided to make my card in the shape of a champagne bottle. Since the birthday is over now I can share my card over at the Noor!Design UK Blog.

Die Flasche habe ich mit meiner Cameo geschnitten und mit Designpapieren von Mintay und Lemoncraft dekoriert.

I've cut the bottle using my Cameo and coverd it with papers by Mintay and Lemoncraft.


Man glaubt ja gar nicht, was man selbst auf einer nur 10 cm breiten Flasche als Deko alles unterbringt. Ich habe die Zahl 40 auf ein Ticket aufgeklebt und mit einem Pin an der Karte befestigt. Darunter habe ich ein ausgestanztes Cheers aufgeklebt, unter dem sich ein Schnörkel befindet.

You won't believe how many embellishments you can put on a card that is only 10 cm wide. I've glued the die cut number 40 onto a ticket and used a pin to attach it my card. Under it I've put a die cut cheers and a flourish.


Die Wein trinkende Tilda war perfekt für meine Flaschen-Karte. Sie ist mit Copics coloriert. Und ich weiß, man soll Alkohol nicht mit Strohhalmen trinken - aber als Deko passten sie hier einfach zu gut, darum habe ich zwei Stück davon mit aufgeklebt. Darunter ist ein weiterer Schnörkel und ein ausgestanzter Zweig. Rundherum habe ich ein paar Rosen und eine wunderschöne Stoffblüte, die ich aus einem Stück Spitze ausgeschnitten habe, aufgeklebt.

Wine tasting Tilda was perfect again for my bottle card. She's been colored in with Copics. And I know, you shouldn't drink alcohol using paper straws - but for decorations they were just perfect so I've added two of them. Under the straws there is another flourish and a die cut branch. I also glued some roses on the card an a beautiful white flower that was cut from a piece of lace.


Am Flaschenhals - sozusagen als Etikett - habe ich einen runden Text angebracht, den ich mit Cardstock hinterlegt habe. In die Mitte kam ein kleines ausgestanztes Herz, darunter etwas Baker's Twine und eine Halbperle.

At the top of the bottle - as the label - I've stamped some round birthday greetings and used some plain cardstock to mat it. In the middle I've put a small heart. I also added some Baker's Twine and a half pearl here.


Samstag, 24. Februar 2018

Stempeleinmaleins - Ausgabe vom 24. Februar 2018


 Hallo Ihr Lieben!
Heute startet die neue Challenge beim Stempeleinmaleins. Ich habe den Sketch wie oben zu sehen umgesetzt - und dabei die Kreise, die auf dem Sketch eingezeichnet sind, durch Motive ersetzt.

Hello everyone!
We are starting our new challenge over at Stempeleinmaleins today. I used the sketch to make this card - and replaced the circles, that are drawn in the sketch - with images.

Den Hintergrund habe ich mit der Cloud Stencil von MFT gewischt, der grüne Streifen unten ist einfach ein Stück Cardstock. Für den Rahmen habe ich ebenfalls eine Stanze von MFT verwendet und beim Stanzen nach unten verlängert. Und quer über die Karte habe ich eine Häuserzeile - oder Stadt-Silhouette - geklebt, die passte so schön dazu, wie ich die Karte im Kopf hatte.

For the background I used the Cloud Stencil by MFT, the green strip at the bottom is simply a strip cut from green cardstock. For the frame I also used a die by MFT and while cutting it making it longer. Across the card I've placed these houses or town silhouette since I fit perfectly with what I had in mind.


Der süße Elefant im Heißluftballon macht sich gerade auf eine große Reise. "I'll miss you" hätte mir als Text auch gefallen, aber in der Zukunfts-Form hatte ich keinen passenden Stempel. Also habe ich mir mit einem anderen Text beholfen. Hinter dem Ballon sind zwei Wolken angebracht.

This cute elephant in his balloon is starting off for a lon trip. "I'll miss you" would have been the saying I had in mind, but didn't have any with the future used. So I went with another text. Behind the balloon I've placed two clouds.


Und da im Ballon ein kleines Elefant sitzt, habe ich auch vor die Stadt einen Elefanten gestellt. Außerdem schaut der so schön passend in den Himmel...

And since there is a small elephant in the balloon I also used an elephant to stand in front of the town. He also looks up in the sky which was perfect for my card as well.


Freitag, 23. Februar 2018

My kind of weird


Hallo Ihr Lieben!
Heute habe auf dem Stamping-Fairies Blog nochmal eine Karte mit den süßen Monstern von MFT zu zeigen. Die sind aber auch knuffig!

Hello everyone!
Today I have another card made using the cute monsters by MFT that I am sharing over at the Stamping-Fairies Blog today. Those are so cute!

Auf Aquarellpapier habe ich zuerst den Mini Hearts Background gestempelt und weiß embosst. Dann habe ich einen Teil mit Distress Ink Candied Apple eingefärbt. Darauf kam dann die Deko.

I stamped the Mini Hearts Background onto watercolor paper and heat embossed it with white embossing powder. Then I inked up a part of the background using Distress Ink Candied Apple and then added the decorations.


Aus dem Hintergrund habe ich ein rundes Fenster ausgestanzt und in sowie auf den Ausschnitt die Stanzen des Peek-a-Boo Circle Windows gesetzt, die ich aus weißem bzw. schwarzem Cardstock ausgestanzt habe. Hinter das Fenster habe ich hellgrau-weiß gestreiftes Designpapier gesetzt. Und dann kam das Monster aus dem Monster Sized Stempelset zum Einsatz. Es ist mit Copics rosa coloriert - und auch die Sterne sind aus diesem Set und mit Stickles überzogen.
Dem Monster habe ich kleine Wackelaugen aufgesetzt.
Für den Text habe ich zwei Stempel aus dem Yeti-Stempelset Beast Friends kombiniert und ebenfalls weiß embosst. Ich finde, so passt der Text perfekt zum Monster.
Alle Teile der Karte sind mit 3D Tape zusammengesetzt, das sorgt für noch mehr Tiefe.
Ganz zum Schluss kamen ein paar schwarze Punkte, gemacht mit den Enamel Dots Black Tie, auf die Karte.

I've die cut a circle from the background and then put the Peek-a-Boo Circle Window dies, cut from white and black cardstock, onto/on top of the cut out circle. I've put some grey and white striped designer's paper behind the cut out. And then the monster from the Monster Sized stamp set came in. It's colored in with Copics, using pinks. The stars are from the same stamp set and covered with Stickles.
I've added some goggling eyes to the monster.
For the saying I've combined two different stamps from the Beast Friends stamp set and also heat embossed it in white. I think, now the saying goes perfectly with the monster.
All parts of the card were attached using dimensional tape to add more depth.
In the end I've added a few black dots using Enamel Dots Black Tie.