Samstag, 20. Mai 2017

Stempeleinmaleins - Ausgabe vom 20. Mai 2017


Hallo Ihr Lieben!
Heute haben wir beim Stempeleinmaleins eine Z-Gate-Fold Tag Card für Euch. Komplizierter Name, aber wirklich toll zu machen!

Hello everyone!
Today we are sharing a Z-Gate-Fold Tag Card over at Stempeleinmaleins. What a name - but really fun to make!

Ich muss langsam an die Geburtstagskarte für meine Mom denken, und da kam mir diese Kartenart genau recht. 

For me it's time to think about my mom's birthday card and so this card came in handy.


Die Karte ist mit einer Banderole verschlossen, die ich mit dieser süßen Tilda dekoriert habe. Begonnen hatte ich die Karte innen - und das Motiv passte prima dazu und auch zum Designpapier. 
Ich habe das Motiv auf einen Rahmen gesetzt und dazu etwas Spitze, Cheesecloth, Blumen und Ranken kombiniert. Auf die "Blüten" der hellen Pflanze habe ich hellblaue Stickles verteilt.

The card is closed with a banderole, that I decorated with this cute Tilda. I'd started with the inside of my card - and this image went great with the inside and my designer's paper.
I've put the image on a die cut frame and added some lace, cheesecloth, flowers and vine. I also added some light blue Stickles to the tops of the light vine/flower.


Und hier sieht man, warum die Karte heißt, wie sie heißt. War wirklich blöd zu fotografieren so - darum sorry für die Heizung und die Gardine im Hintergrund. ;)

And here you see what this card got its name from. It was hard to take a pic of opened up completly - so sorry for the radiator in the background. ;)


Das ist meine dekorierte Innenseite. Meine Mutter liebt Hortensien. Auf der Stempelmesse Süd habe ich mir daher gleich zwei Sets Hortensien-Stempel gekauft. Dieses ist von Craft Emotions. Ich habe denselben Stempel mit der Maskiertechnik hintereinander gestempelt. Außerdem habe ich hier wieder die Bookpage Technik verwendet, die finde ich toll! Der kleine Text ist auf das blaue Hintergrundpapier gestempelt und durch einen Rahmenausschnitt lesbar. 

This is the decorated inside. My mom loves hydrangeas. So when at the latest stamp fair I got myself not one, but two sets of hydrangea stamps. This one is by Craft Emotions. I did some masking to stamp the same stamp twice. I also did the book page technique again here. The small saying is stamped onto the blue background and can be seen through a die cut window frame.


Auf den inneren Seitenteilen habe ich jeweils etwas Spitze und diese Blumen-Stanze aus dem Osterkalender von Magnolia gesetzt. Auf die linke Seite kam zusätzlich noch dieser Text.

The both inner pages are decorated with lace and these flower die cuts from one of the Easter Boxes by Magnolia. On the left side I also added this saying "birthdays are good for you, the more you have the longer you live". 


Und das ist dann noch die Karte, die aus der Tasche hinten in der Karte gezogen werden kann. Ich habe mir gerade diese süße Katze von Magnolia gegönnt, die hier happy birthday singt....

And this is the card that can be pulled out from the pocket in the card. I just got myself this cute cat stamp by Magnolia and let her sing happy birthday for my mom...


Freitag, 19. Mai 2017

Eine Geburtstagskarte


Hallo Ihr Lieben!
Heute darf ich wieder eine Karte auf dem Blog von Stamping-Fairies zeigen. Ich liebe ja interaktive Karten. Das muss nichts extrem aufwändiges sein - aber wenn man irgendwo Ziehen, Drücken oder Drehen kann, dann finde ich das klasse. Und die Stempelsets von MFT eignen sich dafür super! Und so habe ich hier wieder das Stempelset Up in the Air verwendet.

Hello everyone!
It's my turn again to post over at the Stamping-Fairies Blog. I love interactive cards. They don't have to be super complicated - but if there's something to pull, push or turn I am happy. And those stamp sets by MFT are great for this kind of cards. So I used the Up in the Air stamp set again for today's card.


Für die Karte habe ich erst Wolken aus Masking Tape auf weißen Cardstock geklebt und den Himmel dann mit Distress Oxide Broken China gewischt. Dann habe ich den Schlitz mit einer der Stanzen aus dem Surf & Turf Stanzenset in den Hintergrund gestanzt.
Der "Mechanismus" dahinter ist mit den Slider Channel Builder Dies gemacht. Auf den Tag habe ich nochmal den Hintergrund aufgetragen, damit man bei geschlossenem Zustand keinen weißen Schlitz längs am Himmel hat.
Anschließend habe ich die Motive gestempelt, coloriert und ausgeschnitten.
Für den Rahmen habe ich die Stitched Rounded Rectangle Stax verwendet. Damit habe ich den inneren Rahme gestanzt, dann mit dem Cutter im Abstand von 1 cm herumgeschnitten und die Ecken abgerundet. Auf den Rahmen kamen dann noch die Häuser, aufgeklebt mit 3D Tape.

For the card I've die cut some clouds from masking tape, put them on white cardstock and then used Distress Oxide Broken China to color in the sky. Then I've cut one of the dies from the Surf & Turf die set to cut the slider channel.
The "mechanism" has been made using the Slider Channel Builder dies. I made the same background on the tag so you don't see a white strip all over the sky when the mechanism is "closed".
Then I stamped the images, colored them in and cut them out.
For the frame I used one of the Stitched Rounded Rectangle Stax to cut the inner frame, then used my paper cutter to cut around it with  a 1 cm distance and rounded the corners. Onto the frame I added the houses, that are attached with 3D tape.


Zieht man nun am Tab oben an der Karte, fliegt die kleine Katze in ihrem Heißluftballon davon.
Aus dem roten Cardstock im Hintergrund habe ich an der passenden Stelle ebenfalls den Schlitz ausgestanzt und die weiße Grundkarte dahinter ebenfalls mit Distress Oxide eingefärbt.

If you pull the tab on top of the card now the little cat in its balloon is flying up in the air.
I've used the same slider die again to cut a strip from the red cardstock in the exactly same position and then colored this area on the white card base with Distress Oxide again.


Unten auf der Karte habe ich dann mit den Stitched Oval Word Window Frames aus dem roten Cardstock ausgestanzt, die weiße Karte auch in diesem Bereich blau eingefärbt und darauf den Text gestempelt.

At the bottom of the card I used the Stitched Oval Word Window Frames to cut the window into the red cardstock, colored in this area on the white card base also and stamped the saying onto it.

Mittwoch, 17. Mai 2017

Eine Einhornkarte


Hallo Ihr Lieben!
Ja, dem Einhornhype entkommt man momentan nicht. Und bei Kulricke gibt es jetzt dieses süße Einhorn - mit Felix. Der ist ein extra Stempel, so dass man das Einhorn - oder Felix - auch getrennt verwenden kann. Und damit zeige ich heute diese Karte auf dem Blog von Kulricke.

Hello everyone!
Yes, it's hard to not have a unicorn stamp at the moment. Kulricke made this new stamp, that comes with this cute little Felix. It's an extra stamp so you can use both stamps individually also. And so I am sharing this card over at the Kulricke Blog today.

Auf die Kartenbasis habe ich diverse Rahmen als Hintergründe gesetzt. Darauf kam dann das Motiv. Den Text habe ich mir schnell selbst erstellt. ;)

I've put different frames as backgrounds on a white card base. Then I've added the image on top of them. The saying is one I quickly made myself. ;)


Und hier sind Einhorn und Felix. Sie sind mit Copics coloriert und natürich brauchte das Einhorn auf Horn, Mähne und Schweif eine Portion Glitzer!

Für den Regenbogen habe ich die Nesting Stitched Circles verwendet, so passen die Bögen perfekt ineinander und haben zudem noch tolle Stiche.
Davor und dahinter habe ich ein paar Wolken gesetzt.

And here are unicorn and Felix. They've been colored in with Copics and of course the unicorn needed some glitter on the horn and hair.
For the rainbow I've used the Nesting Stitched Circles. With the die the arches fit together perfectly and also have a nice stitching.
In front and behind of the rainbow I've added a few clouds.

Montag, 15. Mai 2017

Challenge #4 bei AltairArt


Hallo Ihr Lieben!
Heute startet wieder eine neue Challenge bei AltairArt. Für diesen Monat haben wir das Thema "Butterflies" ausgewählt. Von AltairArt gibt es zwar auch Designpapiere mit Schmetterlingen, ich habe mich aber für verschiedene rosafarbene Papiere entschieden und das Thema eher bei der Deko, dem Motiv und dem Text umgesetzt.

Hello everyone!
Today we are starting a new challenge over at AltairArt. For this month we picked the theme of butterflies. There are papers with a butterflies print by AltairArt but I went with different pink papers and followed the theme with my image, decorations and saying.

Für den Hintergrund habe ich mich für ein pink-weiß kariertes Papier aus dem 15 x 15 cm Block Signs of Love entschieden. Das Papier mit dem schön dezenten Rosendruck ist das Body &  Soul Papier #07, darüber kam noch ein Stück des Foggy Dew Papiers Wild Geese. Der Druck sieht fast aus wie Schmetterlinge... Und zum Matten habe ich dann noch einen Bogen aus dem Blue Rose Paperpad verwendet.

For the background I went with a pink and white checked paper from the 15 x 15 Signs of Love paperpad. The paper with the nice and soft roses print is the Body & Soul # 7 sheet, on top of that I've added a piece of the Foggy Dew Wild Geese paper. The print on this one nearly looks like butterflies... And for the matting I used a sheet from the Blue Rose paperpad.


Das Motiv von Elisabeth Bell passte perfekt. Es ist mit Copics coloriert. Neben dem Motiv hat neben ein paar Blumen und ausgestanzten Zweigen noch ein großer Schmetterling Platz gefunden. Der sieht auf dem Foto etwas schmutzig aus. Ich habe ihn mit Kreide leicht eingefärbt und anschließend den klaren Wink of Stella darüber verteilt, so dass er in echt schön glitzert.

The image by Elisabeth Bell goes great with the theme. It's colored in with Copics. Beside the image there was room for not only  a few flowers and die cut branches but also a large butterfly. It looks kind of dirty on the picture. I've inked it in slightly with some chalks and then covered it with the clear Wink of Stella so in real life it has a nice shine.


Rechts habe ich dann noch ein Stück Schmetterling-Bordüre sowie den Text von SU aufgebracht.

On the right side I added a piece of a butterflies border and this saying by SU. It means "luck is like a butterfly. If you try to catch it, it flies away. So sit down and it will come to sit on your shoulder".


Samstag, 13. Mai 2017

Stempeleinmaleins - Ausgabe vom 13. Mai 2017


Hallo Ihr Lieben!
Heute zeigen wir Euch beim Stempeleinmaleins die Bookpage Technique. Hierbei wird auf eine alte Buchseite gestempelt und das dann weiterverarbeitet.

Hello everyone!
Over at Stempeleinmaleins we are sharing the Bookpage Technique today. The image gets stamped on the page of an old book and then worked on with it.


Ich hatte kein Buch da, aus dem ich eine Seite herausreißen wollte, und auch keine Zeitung (die lesen sowohl mein Mann als auch ich in der Arbeit, darum haben wir zu Hause keine). Also habe ich mir ein helles Designpapier mit Textdruck gesucht und damit gearbeitet. Geht auch prima! 
Das Motiv von Magnolia ist auf die Seite gestempelt, mit Copics coloriert und rundherum habe ich dann Distress Inks und ein paar Wasserspritzer verteilt. Um das Motiv habe ich dann noch einen ausgestanzten Rahmen gesetzt. Der ist jetzt leider genau auf dem Übergang von blau zu braun, aber macht nix...

I didn't have an old book I wanted to rip a page out and also no newspaper (my husband and I both read the newspaper at work so we don't have one home). So I used a designer's paper with a text print and it works great!
The image by Magnoia is stamped on the page, colored in with Copics and all around I've added Distress Inks and some water. I also put a die cut frame around the image. It covers the change from blue to brown but it's okay...


Unten in der Ecke habe ich dann noch die Buch-Stanze von Magnolia benutzt. Sie ist aus mittelbraunem Cardstock gestanzt, dann mit Distress Oxide Waltnut Stain überzogen und für den Fleckeneffet - und damit das besondere der Oxide Kissen besser rauskommt - kam wieder Wasser darauf. Ich liebe diese neuen Kissen jetzt schon!

In the bottom right corner I've added this book made using the book die by Magnolia. It's cut from craft colored cardstock, then covered with Distress Oxide Walnut Stain and for the speckles I once again added water. I just love those new inks already!

Ansonsten besteht die Karte wie meist aus mehreren Lagen Designpapier, etwas Cheesecloth und breite Spitze sowie ein paar Blumen und Die Cuts.

For the rest of the card I've used a few layers of designer's paper, some cheesecloth and broad lace and a few flowers and die cuts.


Donnerstag, 11. Mai 2017

Ein Kaffeegeschenk


Hallo Ihr Lieben!
Heute zeige ich auf dem Kulricke Blog dieses kleine Geschenk für einen Kaffeeliebhaber. Gemacht ist es mit der Taschentuchverpackung, die ich kurzerhand zweckentfremdet habe. Da passt ja so viel mehr als "nur" Taschentücher hinein!

Hello everyone!
Today I am sharing this little gift for a coffee lover over at the Kulricke Blog. I used the tissue wrap die for it. There's room for so much more than "just tissues".


Überzogen habe ich die Verpackung mit selbstgemachtem "Designpapier". Dafür habe ich die Sternengirlande aus dem Stempelset Sternglanz einfach so oft wie benötigt untereinander auf cremefarbenen Cardstock gestempelt. Damit nicht alle Sterne genau untereinander sitzen, habe ich den Cardstock vor dem Stempeln immer ein wenig seitlich verschoben.
Aus dem Designpapier habe ich dann das Wort Glück aus dem Stanzenset Inprint Words Small ausgestanzt.

I've covered the wrapper with a handmade "designer's paper". I used the star border from the Sternglanz stamp set and stamped it as often as needed on my paper. To avoid that all the stars are exactly under each other I've put the cardstock a little to the left or right before stamping the border.
The I've cut the word luck out of this paper.

Das Rechteck aus Wellpappe ist mit der zweigrößten der Nesting Rectangles Small gemacht. Da es zu lang gewesen wäre, habe ich die Pappe nach dem Stanzen in der Stanze nach oben geschoben, bis ich die gewünschte Größe hatte, und sie so gekürzt. So habe ich trotzdem oben und unten den gestrichelten Rand.
Obenauf kam dann der Take Away Cup. Um die Banderole habe ich noch feinen Goldfaden gewickelt.

The square has been made using the second biggest die of the Nesting Rectangles Small. Since it would have been to long I simply slid the cut out rectangle up in the die until I had the size needed and then cut it out again. So I still got the stitched lines at the bottom and top.
On top of that I've put the Take Away Cup. I wrapped some fine golden yarn around the banderole.


Dienstag, 9. Mai 2017

Eine sonnige Karte


Hallo Ihr Lieben!
Heute zeige ich Euch diese "sonnige" Karte auf dem Stamping-Fairies Blog
Ich habe wieder Motive von MFT verwendet - und für die gefällt mir in den wenigsten Fällen eine "volle" Karte. Ich finde, da gehen die Motive meist unter. Darum ist diese hier recht einfach gehalten.

Hello everyone!
Today I am sharing this "sunny" card over at the Stamping-Fairies Blog.
Again I've used images by MFT - and for those most times I prefer a CAS style over the "overdone" ones. I just think those images just tend to get lost. So this is a pretty simple one.


Für das Motiv habe ich mit den Distress Oxide Fossilized Amber und der Schablone Radiating Rays Sonnenstrahlen auf hellblauen Cardstock aufgebracht. 
Darauf kam dann das Motiv aus dem Stempelset Up in the Air. Den Bär habe ich in den Heißluftballon maskiert, Wolken und Vogel sind jeweils ausgeschnitten.
Quer oben habe ich dann den Text gestempelt. Der ist eigentlich länger, den zweiten Teil habe ich weiter unten auf der Karte untergebracht.

For the main element I used Distress Oxide Fossilized Amber and the Radiating Rays stencil to bring those sunrays on light blue cardstock.
On top of that I've added the image from the stamp set Up in the Air. I did some masking to put the bear in the basket, clouds and bird have been cut out individually. 
In the end I added the saying in the top area. Originally the saying is longer, I've put the second half to the bottom of the card.


Unten habe ich aus der Karte mit den Oval Word Window Frames einen Ausschnitt gemacht, den Rahmen nochmal aus blauem Cardstock gestanzt und in das Fenster eingesetzt und dahinein dann den zweiten Teil des Textes untergebracht, innerhalb des Fensters direkt auf meinen weißen Kartenrohling gestempelt.
Weil es daneben etwas leer aussah, habe ich noch die Gänseblümchen aus dem Adorable Elephants Stempelset neben das Fenster gestempelt.

At the bottom of the card I've cut out one of the Oval Word Window Frames, then cut the frame again from blue cardstock and put that in the cut out. Then I stamped the second part of the saying into that window, directly onto my white card base.
And since it looked a little plain at the bottom of the card I used the daisy stamps from the Adorable Elephants stamp set and stamped those to the left and right of the cut out window.


Sonntag, 7. Mai 2017

Eine romantische Karte


Hallo Ihr Lieben!
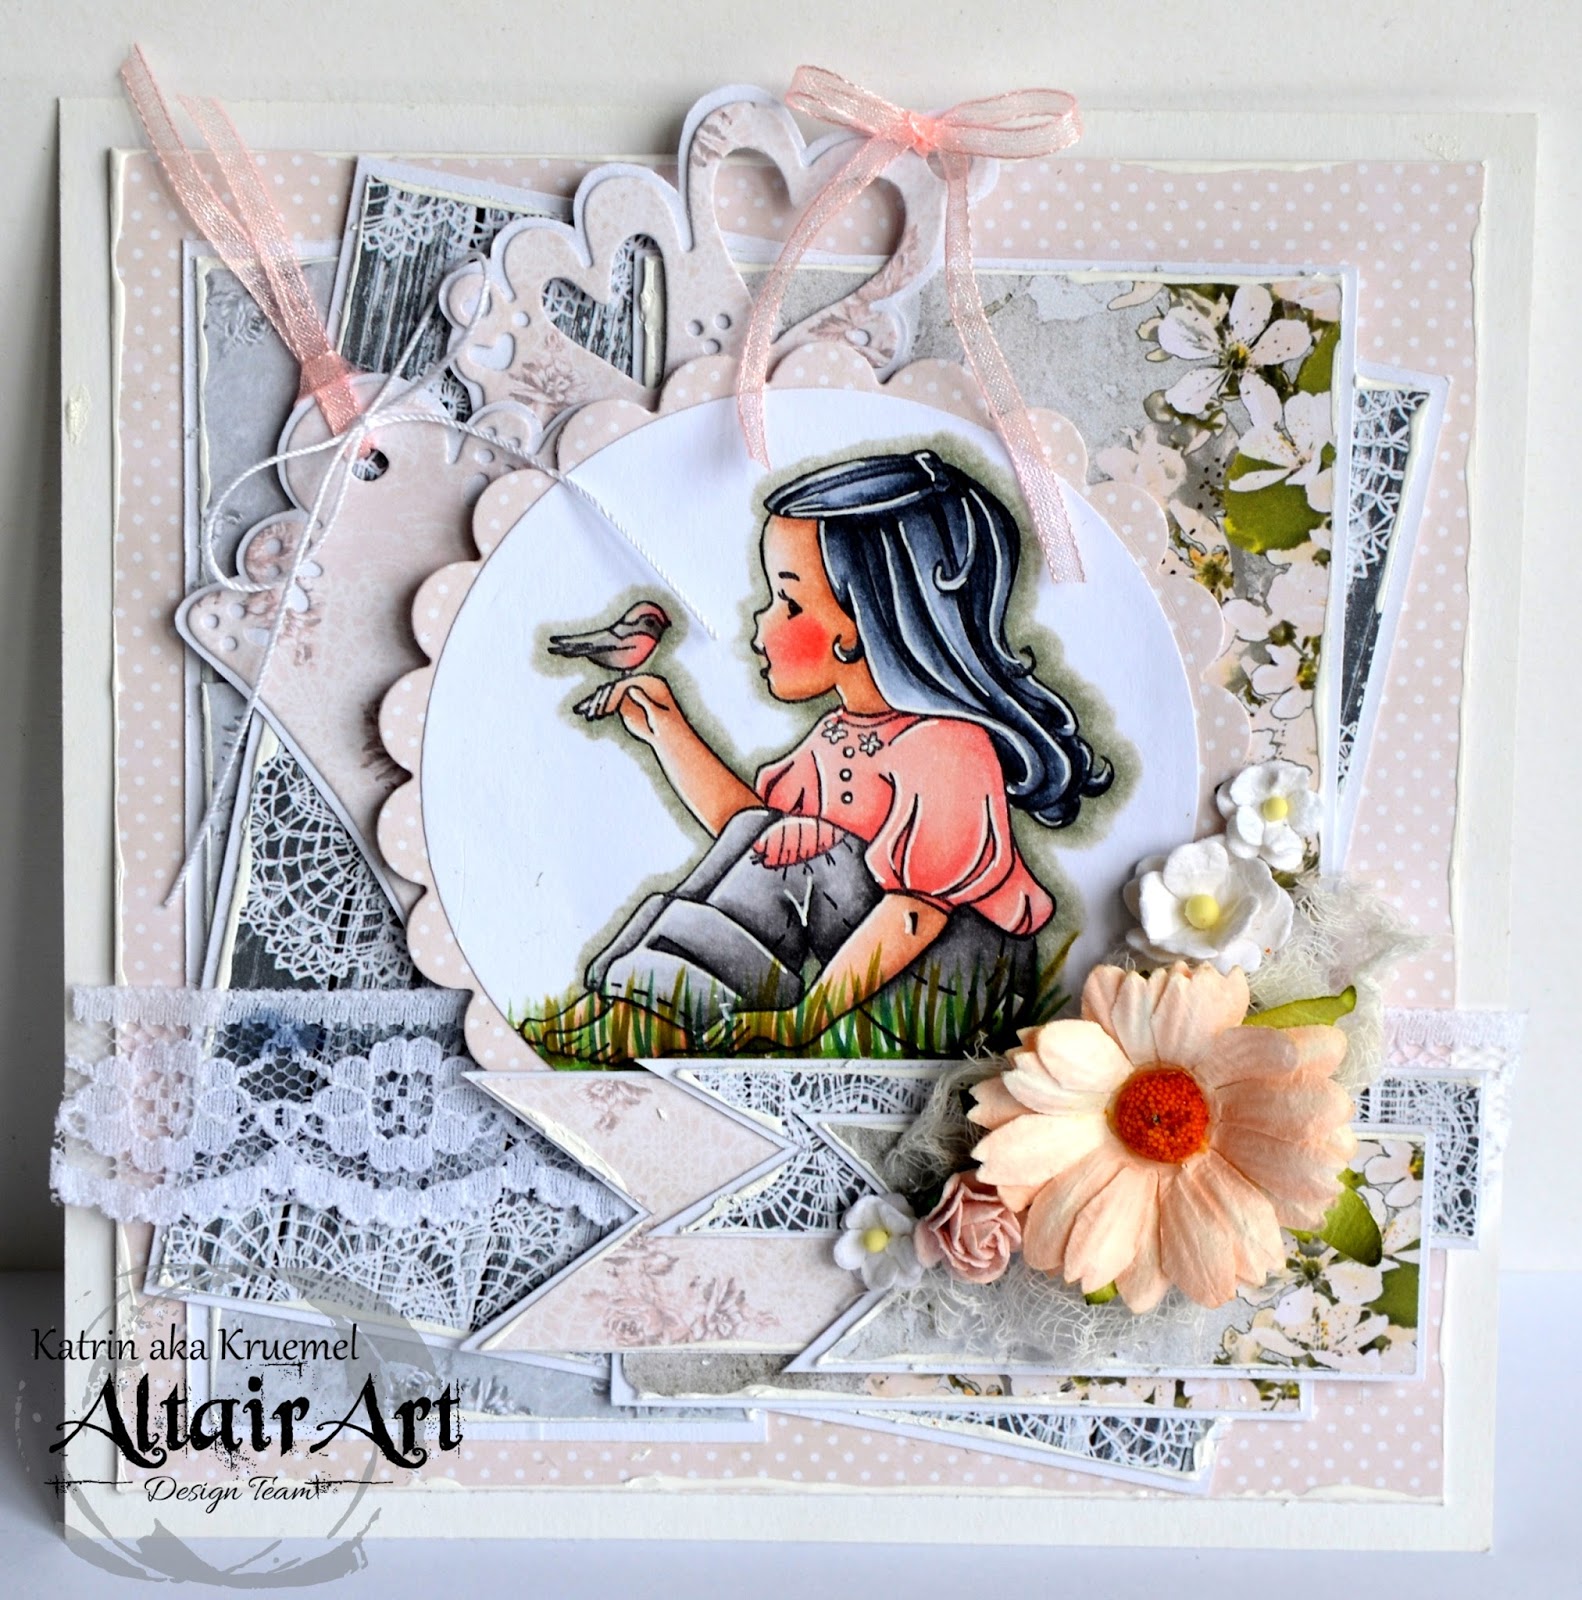
Heute darf ich wieder ein Werk auf dem AltairArt Blog zeigen. Nun beginnt wieder die für mich schwierigste Bastelzeit. Von ein paar Geburtstagen mal abgesehen, ist kein größerer Feiertag in Sicht, für den man basteln könnte. Also habe ich mich einfach meiner Laune hingegeben und diese romantische und schon etwas sommerliche Karte gewerkelt.

Hello everyone!
It's my turn again to share a creation with you over at the AltairArt Blog. Now the hardest time - craftwise - for me is starting. Besides a few birthays there is no big holiday coming up that you could make a bunch of crafts for. So I just went with how I felt and made this romantic and a little summer-ish card.

Ich habe hier ein Grau- und Hellrosè-Töne verwendet. Auf die Idee bin ich gekommen, als ich die Papiere der Tears in the Rain Kollektion angesehen habe. Das mag jetzt nicht unbedingt die Kollektion sein, an die man bei romantisch als erstes denkt. Aber da gibt es dieses hellgraue Papier mit dem tollen Blütenrand. Und damit fing alles an... Ich habe übrigens von allen verwendeten Kollektionen die 15 x 15 cm Variante genommen, einfach weil die Muster kleiner sind, was mir für diese Karte besser gefallen hat.

I went with grey and light pink tones here. I got that idea when I went through the papers in the Tears in the Rain collection. This might not be the first pick when planning a romantic card. But there's this sheet in light grey with the light pink flowers on one edge. And that got me started... From all the collections I used here I used the 15 x 15 cm papers just because the patterns are smaller what I liked better for this card.


Als Motiv habe ich diesen Stempel von SCAD verwendet. Den finde ich einfach so toll sommerlich... Es ist wie immer mit Copics coloriert. Unter das rund ausgestanzte Motiv habe ich noch einen Wellenkreis in hellpink gesetzt. Hierfür habe ich das selbe Papier aus der Ever and Always Kollektion verwendet, das ich auch als Grundlage für meine Karte benutzt habe.

For the image I used this SCAD stamp. It's so beautifully summer-ish... As always it's colored in with Copics. Underneath the cut out image I also put a scalloped circle cut from the same paper from the Ever and Always Collection that I used for my card base as well.


Unter das Motiv habe ich oben links zwei Tags geschoben. Sie sind jeweils aus der Rückseite des "Basispapieres" geschnitten. Damit sie sich besser voneinander abheben, habe ich sie jeweils weiß gemattet. Das schafft ein wenig Kontrast, ist aber trotzdem noch schön soft.
Und hier könnt Ihr auch das tolle Papier aus der Dreams Come True Kollektion sehen. Es ist fast schwarz - und wohl wieder nicht der erste Einfall zu romantisch. Aber die weiß aufgedruckten Doilies machen es viel softer und so passte es perfekt.

In the top left corner I've tucked two tags under the image. I used the back of the paper that I used for my card base here. To add a little contrast inbetween those two tags I've matted them both with white cardstock. The white adds some contrast but still adds to the soft touch of the card.
And here you can also see the great paper from the Dreams Come True Collection. It's nearly black - and again maybe not what you'd pick for a romantic card. But the white doilies printed on it make it so much softer and so it fits perfectly.


Und hier habe ich noch das Papier mit der Blütenkante auf Foto festgehalten. Ich finde das wunderschön!
Als Deko habe ich hier etwas Cheesecloth und ein paar Blüten aufgebracht. Auf einen Text habe ich bewusst verzichtet, so kann ich die Karte universal einsetzen - oder später noch einen Text hinzufügen.

And here you can see the paper with the flower edge I've been talking about earlier in this post. I just love this so much!
For decorations I went with some cheesecloth and a few flowers. I didn't add a text on purpose so I can use this card for any occasion - or simply add a text later.


Samstag, 6. Mai 2017

Stempeleinmaleins - Ausgabe vom 6. Mai 2017


Hallo Ihr Lieben!
Mensch, wie die Zeit rennt! Es kommt mir so vor, als wäre gerade erst Silvester gewesen... Und jetzt geht schon die erste Stempeleinmaleins-Anleitung im Mai online! Heute zeigen wir Euch eine Pop-Up Diorama Card. Eine Karte, die von außen ganz normal aussieht, innen aber noch ein kleines Extra hat....

Hello everyone!
Oh, how time flies! It feels like New Year's Day was just yesterday... Instead the first tutorial of may is going live today at Stempeleinmaleins! We are sharing a Pop-Up Diorama Card today. It looks like a regular card on the outside but there's a little extra on the inside...


In letzter Zeit habe ich ja gerne mal einfacher dekorierte Karten gemacht. Aber hier habe ich mal wieder mehr draufgepackt und bin echt zufrieden damit.
Das Motiv ist von Belles'n'Whistles, coloriert mit Copics. Auf die Karte habe ich, wegen der Kartengröße und der Größe des Motivs, nur zwei Lagen Designpapier unterbekommen, aber es war noch Platz für Cheesecloth und breite Spitze. Unter den Rahmen habe ich ein Tag gepackt, darauf sind Herzen aufgeklebt. Und ein paar Blumen durften natürlich auch nicht fehlen!
Der Text ist aus dem Glück Circle Stempel von Kulricke. Ich habe einfach zum Abstempeln nur auf einen Teil des Stempels Tinte aufgetragen. Bei Clearstamps sieht man ja echt gut, ob da noch irgendwo sonst Farbe ist, so dass man eine Angst haben muss, die Karte bei den letzten Schritten zu ruinieren...

Lately I made more simple cards but here I've put on more again and I really like it.
The image is by Belles'n'Whistles, colored in with Copics. Because of the card size and the size of the image I was only able to put on 2 layers of designer's paper but there was enough room for some cheesecloth and broad lace. I've tucked a tag underneath the die cut frame and glued two hearts on top of it. The saying says "happy birthday to you". 


Und das ist das kleine Extra innen. Beim öffnen bildet sich eine extra Lage mit Fenster, die höher steht als die Rückseite der Karte. So entsteht eine Art Schattenbox.
Für das Fenster habe ich die Nesting Stitched Hearts von Kulricke verwendet.

And this is the little extra inside. When opening the card there is an extra layer with a cut out window that is higher than the back of the card and creates some kind of a shadow box.
I used the Nesting Stitched Hearts by Kulricke for the window cut out.


Ich habe hier einen kleinen Muffin von Kulricke auf Designpapier geklebt, darüber ein Banner mit einem Text. Ein Wellenkreis, zwei Herzen und Cheesecloth fanden auch noch Platz.

I used a small cupcake by Kulricke here and glued it onto some designer's paper. There's also a banner with a saying, a scalloped circle, two hearts and again some cheesecloth.


Mittwoch, 3. Mai 2017

Eine Hochzeitseinladung


Hallo Ihr Lieben!
Ich selbst bin ja glücklich verheiratet, aber als ich die Herzen mit Einstecktasche von Kulricke gesehen habe wusste ich, ich möchte etwas zum Thema Liebe machen. Und weil ich das Ja mit Herz auch noch nicht verwendet habe, habe ich beschlossen, eine Hochzeitseinladung damit zu machen. Und die zeige ich heute auf dem Kulricke Blog.

Hello everyone!
I am happily married but when I saw those hearts with a pocket opening by Kulricke I knew I wanted to do something love related. And since I haven't used the yes with the heart - which is the german way to say I do - I decided to make a wedding invitation. And this I am sharing over at the Kulricke Blog today.

Für meine Karte habe ich das Designpapier aus der Ever and Always Collection von AltairArt passend zugeschnitten und darüber eine Lage Transparentpapier mit goldenen Folienherzen gelegt. Damit man die Klebestellen nicht sieht, habe ich das Transparentpapier oben und unten umgeknickt und auf der Rückseite der Karte festgeklebt. Die beiden Papiere habe ich dann zusammen durch die Big Shot genudelt, so hatte ich beide Herzen an exakt der selben Stelle. Vom Transparentpapier habe ich dann das Herz herausgetrennt - mit einer Schere, damit die Kante sauber ist. So sieht man hier das Designpapier besser.

For my card I've cut some designer's paper from the Ever and Always Collection by AltairArt the size I needed it to be and the put some vellum with golden foil hearts printed on on top of it. To avoid the glue shining through the vellum I've folded it at the top and bottom and glued it to the back of the designer's paper. Then I've run both papers through the Big Shot to have both hearts at the exact same spot and have cut out the heart from the vellum layer, using scissors to have a clear edge. Now you can see the designer's paper in the shape of the heart.


Auf das Herz habe ich dann die Deko aufgebracht. Sie besteht aus Cheesecloth einem gewellten Kreis, einem der Nesting Stitched Circles, den süßen Vögeln auf dem Ast - die erinnern mich an Turteltauben - und obenauf das Ja mit Herz. 
Ich wollte das Herz gerne als Aufreiß-Herz verwenden. Darum habe ich mit einer kleinen Kreisstanze eine Ausstanzung aus dem Herz herausgestanzt, damit das Aufreißen leichter geht.

On the heart I've added some decorations. It's made from Cheesecloth, a scalloped circle, one of the Nesting Stitched Circles, those cute love birds on the branch and on top of it the "I do".
I wanted to use the heart as a tear it open heart. To make the tearing easier I've punched half a circle from the completly cut line.


Unten habe ich quer über die Karte braunen Cardstock gelegt, aus dem ich das Liebe Inprint ausgestanzt habe. Der Streifen ist mit 3D Tape aufgeklebt und ich habe am linken Ende etwas goldenen Faden zur einer Schleife gebunden.

At the bottom I've put some brown cardstock from which I've cut the word love using the Liebe Inprint die. The strip has been attached to the card with 3D tape and I've tied some golden twine to the left edge.


Da meine Karte ja "nur" ein DT-Projekt und keine echte Einladung ist, kann ich Euch auch das geöffnete Herz zeigen. Ich habe den Text auf weißes Papier gedruckt - einfach mit dem Drucker - und es passend hinter den Ausschnitt gekebt. Eigentlich kann das Herz natürlich ganz herausgetrennt werden. Ich hatte etwas Tesa an einer Stelle befestigt, damit die Karte auch auf Messen als Beispiel verwendet werden kann und so kann man das Herz bzw. den Effekt besser sehen. Darum hängt es jetzt an meiner Karte noch fest. 
Da ich doppelseitiges Designpapier verwendet habe, sieht es auch so noch schön aus.

Since my card is "only" a DT project and not a real wedding invitation I can also show you the opened heart. I've printed the text - invitation to our wedding - on some white paper using my printer and glued it behind the designer's paper. Of course you can tear out the heart completely but I've attached some tape to a small area. Now it can be used as a smaple on fairs to show the effect. But that's why it is still attached to my card. Since I've used doublesided paper it still looks nice like this.


Und hier dann nochmal eine Nahaufahme.

And here's another close up.


Montag, 1. Mai 2017

Neue Challenge bei Stamping-Fairies


Hallo Ihr Lieben!
Heute startet die neue Challenge auf dem Stamping-Fairies Blog. Wie immer haben wir einen Sketch für Euch. Und das ist meine Umsetzung....

Hello everyone!
Today we are starting our new challenge over at the Stamping-Fairies Blog. As always we have a sketch for you to follow - and this is my take on it...

Im Hintergrund habe ich die neuen Distress Oxide ausprobiert. Ich habe Wilted Violet und Broken China mit einem Schwämmchen aufgetragen und Wasser darüber gespritzt. Ich wollte keinen zu exremen Hintergrund und so war er ideal!

In the background I've given those new Distress Oxides a go. I used a blending tool to apply Wilted Violet and Broken China and then added water to it. I didn't want a too exreme background and thought it would be perfect like that.

Und was macht der Stern da ganz unten auf dem Foto? Na, so wäre die Karte doch etwas langweilig, oder? Darum...:

And why is there that star at the bottom of the picture. Well, just like that the card would be bit plain, right? So...:


Der Stern ist an einem Stück Folie festgeklebt, an dessen anderem Ende diese süße Monster-Dame klebt! Und schiebt man den Stern nach oben, erscheint das Monster zusammen mit dem Ballon aus dem Karton. Monster, Ballon, Schleife und Karton sind aus dem Stempelset Monsters von Avery Elle. Ich habe rundherum noch ein paar Pailetten aufgeklebt, damit die Karte mit "verstecktem" Monster zumindest ein wenig nach was aussieht.
Der Text ist aus dem Stempelset Adorable Elephants, ausgestanzt mit den Fishtail Flag Frames und quer über die Karte geklebt.

The star is attached to a strip of transparency and on the other end there is this cute little monster girl. When pushing the star upwards the monster with its balloon is coming out of the box. Monster, balloon, bow and box are from the Monsters stamp set by Avery Elle. I've added some sequins onto the designer's paper to make the card look a little better when the monster is hiding.
The saying is from the Adorable Elephants stamp set, cut out using the Fishtail Flag Frames dies and put across the card.


Und hier habe ich noch eine nähere Aufnahme des Monsters. Coloriert ist es, wie immer, mit Copics.

And here's a close up of the monster. As usual it's colored in with Copics.