

Hallo Ihr Lieben!
In der heutigen Ausgabe des Stempeleinmaleins zeigen wir Euch diese Art der Kartendekoration, bei der gestanzte Elemente geteilt und versetzt wieder zusammengesetzt werden. Sicher ist Euch die Kartenart schon begegnet. Aber sie ist so vielseitig einsetzbar, dass wir fanden, sie darf in unserer Sammlung nicht fehlen. Apropos vielseitig - Ihr seht schon, dass ich irgendwie nicht aufhören konnte. Und dabei habe ich hier nur mit Kreisen gearbeitet und andere Formen, die natürlich ebenso möglich sind, noch gar nicht herausgeholt. Da aber immer eine Hälfte der Stanzteile übrigbleibt, geht die Kartenart auch relativ fix (natürlich je nach Dekoration drumherum). Mir ist hier trotzdem dann die Zeit ausgegangen. Bevor ich drei einzelne Posts mache, zeige ich Euch alle meine Karten auf einmal. Und wer weiß, vielleicht zeige ich Euch demnächst dann noch einige der anderen Ideen mit dieser Technik, die mir im Kopf herumschwirren.
Hello everyone!
With today's issue of Stempeleinmaleins we share this way of decorating card fronts, where you cut die cut shapes in half and stack them. I am sure you've already come across this type of card. But it's so versatile that we decided, it just has to become a part of our list of tutorials. Apropos versatile - as you can see I couldn't stop after just one card. And I only used circles here, not bringing out any of those other shapes that of course can be used as well. Since you always have half of your die cuts left, making these cards is kind of quick (of course depending on the additional decorations). Nontheless I ran out of time after three cards. And instead of making three individual posts, I've decided to put them all together in one post. Who knows, maybe I will share some of the other ideas using this technique - and there are a few in my head - sometime soon.
Nun aber endlich mal zu den einzelnen Karte im Detail:
But now let's finally talk about the individual cards:

Ich finde, diese Kartendekoration macht sich besonders gut auf klaren Hintergründen. Trotzdem war mir nur einfarbiger Cardstock einfach zu langweilig. Deswegen habe ich mal wieder einige Embossingfolder herausgeholt. Die nutze ich auch viel zu selten. Für diese Karte habe ich ein Ankermuster auf weißen Cardstock geprägt und anschließend kreisförmig nur in dem Bereich, auf dem später die Deko sein sollte, etwas goldene Metallic Watercolor aufgespritzt.
I think, this kind of card decoration looks best on a clean background. Still, just some plain cardstock would have been too boring. So I brought out some embossing folders. I really don't use those often enough. For this card I dry embossed an anchor pattern onto a piece of white cardstock. Then I flicked some gold metallic watercolor in a circle shape only onto that area of the white cardstock where I wanted to place my decoration later.
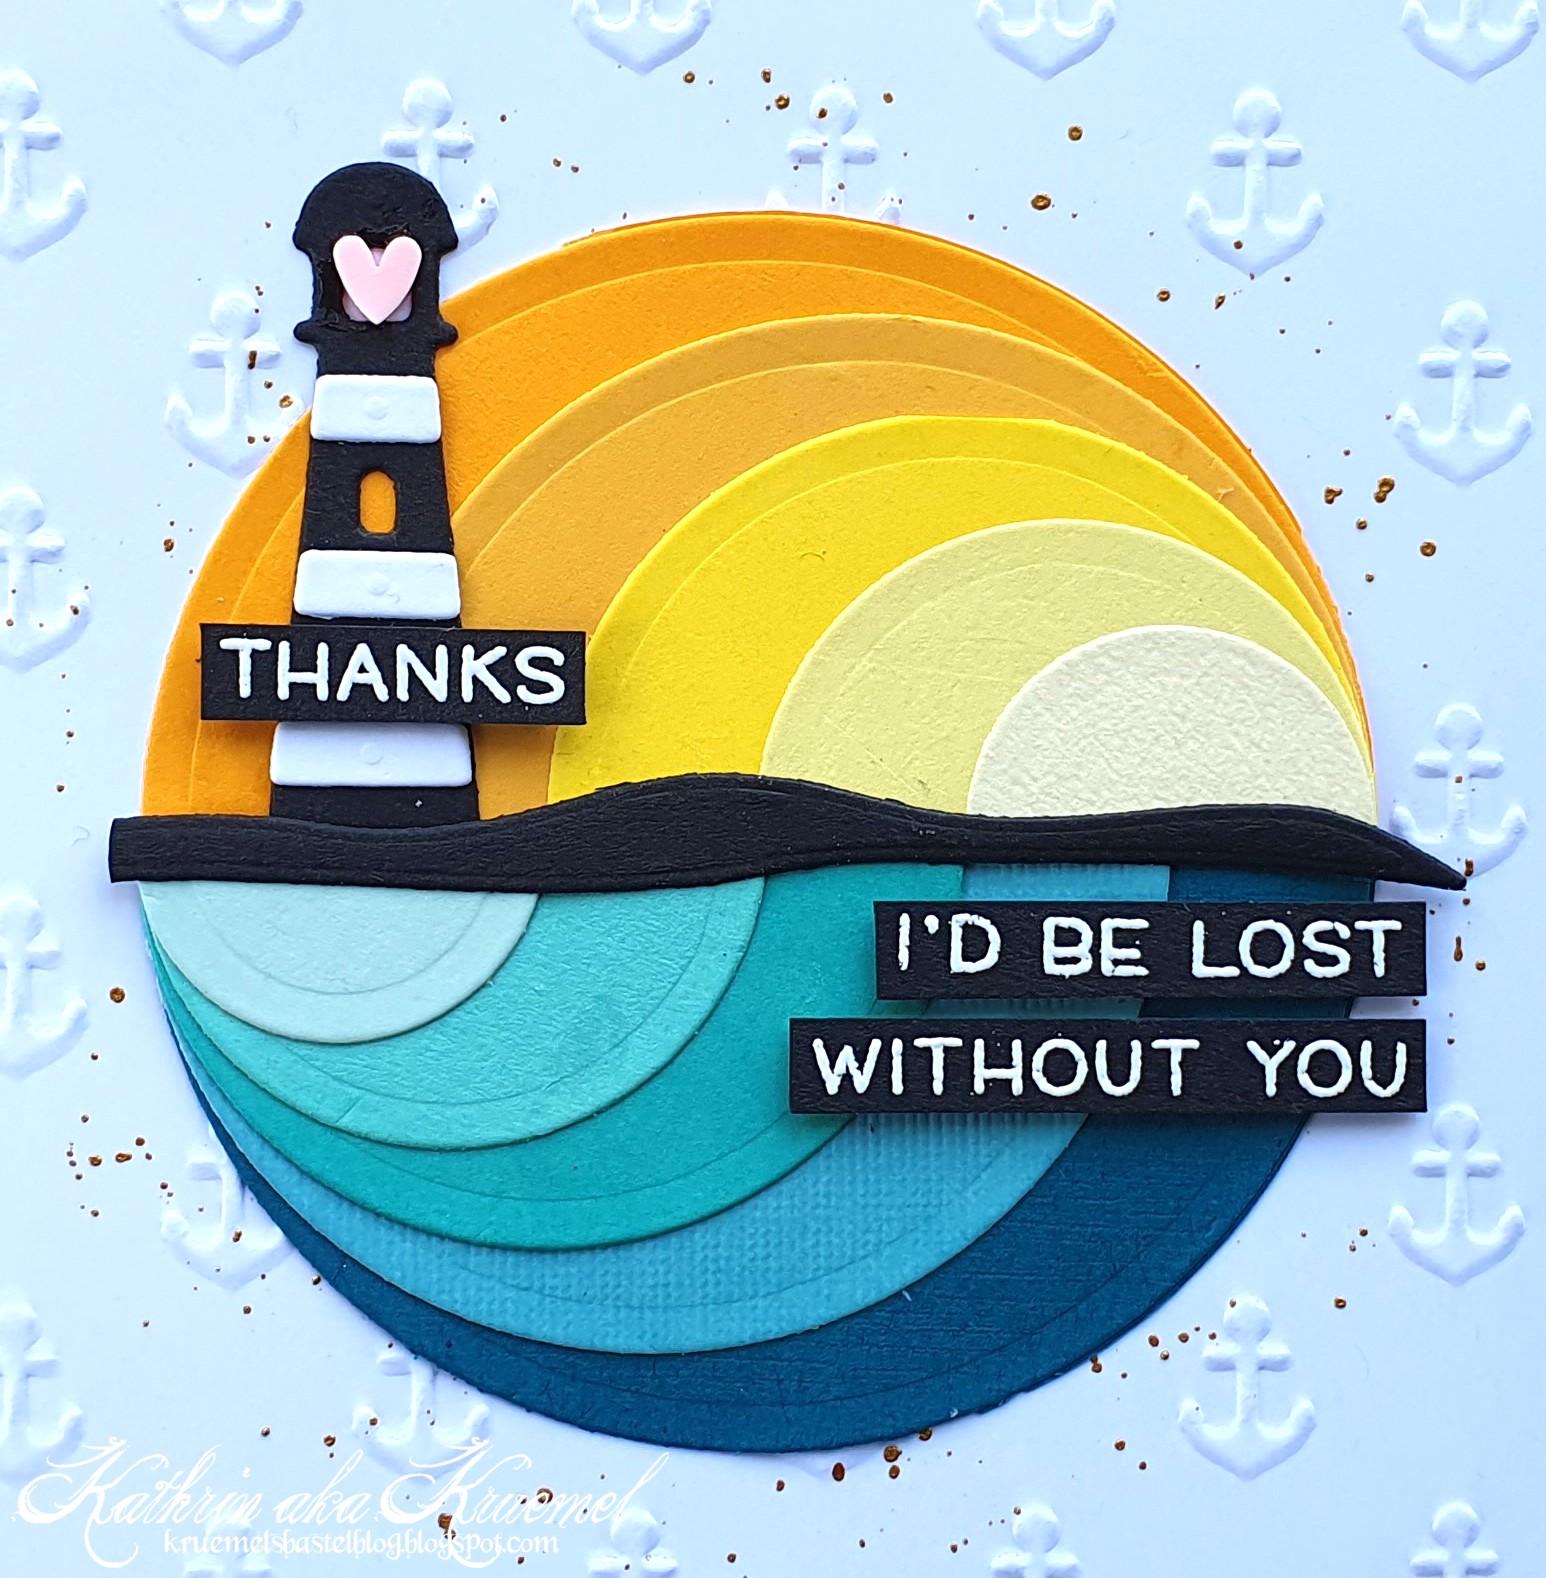
Für die Dekoration habe ich jeweils fünf Kreise, von hell nach dunkel schattiert - aus gelbem und türkisfarbenem Cardstock gestanzt. Die Kreise habe ich dann mittig halbiert und von der Größe nach aufeinander geklebt. Dabei habe ich bei den gelben Stücken mit dem kleinsten Kreis rechts, bei den türkisfarbenen Kreisen links angefangen.
Ich habe beide Teile mit der Naht aneinander stoßend auf den weißen Cardstock geklebt und über die Nahtstelle einen Streifen schwarzen Cardstocks geklebt, den ich mit einer der Cloud Cover Stanzen von MFT ausgestanzt habe. Sicher habt Ihr es schon erkannt - der obere Halbkreis soll Sonne/Himmel, der untere das Meer darstellen. Der schwarze Streifen dazwischen sieht nun aus wie eine Insel.
Auf die Insel habe ich einen Leuchtturm, gemacht mit einer Stanze von Action, geklebt. In das obere Fenster habe ich ein kleines, hellrosafarbenes Herz geklebt.
Die Texte sind aus dem Car Critters Stempelset von LawnFawn. Sie sind mit weißem Embossingpulver auf schwarzen Cardstock embosst. Beim Aufkleben habe ich die Höhenunterschiede der Cardstockkreise durch verschieden dickes 3D Tape ausgeglichen. Den Text thanks habe ich quer über den Leuchtturm geklebt - er passte genau zwischen die beiden weißen Streifen.
For the decoration I die cut five circles each - shaded from light to dark - from yellow and aqua cardstock. Then I cut the circles into two halfs and stacked them. I put the smallest yellow circle to the right, the smallest aqua one to the left of my stacks.
I attached both half circles, making the cut lines meet, onto my white background and put a strip of black cardstock that I had cut with one of the Cloud Cover dies by MFT, onto the seam. I'm sure you've already noticed - the top part is meant to be the sun/sky, the bottom the ocean. The black strip between them now looks like an island.
I built a lighthouse on this island, die cut with a die I found at Action. Into the top window I added a small light pink heart.
The texts are from the Car Critters stamp set by LawnFawn. I white heat embossed them onto black cardstock. When attaching them to the card I used thick and thin foam tape, to level out the different heights of the circles. The text thanks I glued across the lighthouse - it fit exactly between two of the white stripes.

Diese schräg aufgenommenen Bilder mache ich inzwischen schon ganz automatisch - ich finde, sie zeige die Karte nochmal aus einer anderen Perspektive, aus der man oft weitere Details sehen kann.
This picture taken from an angle is something I take automatically right now - and I think, the different perspective often show additonial details.

Von der vorherigen Karte blieben jeweils ein gelber und ein türkisfarbener gestapelter Halbkreis übrig. Zumindest den türkisfarbenen habe ich für eine weitere Karte benutzt. Auch sie ist maritim ausgefallen. Diesmal habe ich in den Hintergrund ein senkrechtes Streifenmuster geprägt. Da das Muster des Embossingfolders - von Provocraft - etwas kleiner war, musste ich den Cardstock kleiner schneiden und später ist der weiße Rand auf der Karte dadurch breiter ausgefallen. Aber das gefällt mir sogar ganz gut. Auch hier habe ich wieder kreisförmig nur hinter dem späteren Motiv goldene Metallic Watercolor aufgespritzt.
I had a yellow and a aqua stacked half circle left over from my first card. At least the aqua one I used for a second card. And again the card has a maritime theme.
This time I dry embossed a vertical stripe pattern onto my background cardstock. Since the pattern of the embossing folder - it's by Provocraft - is a bit smaller than the anchor one I had to cut the cardstock a bit further down and this way ended up with a wider white frame on my finished card later. But I actually like that.
Also onto this background I flicked some gold metallic watercolor only onto that area where I wanted to place my decoration later.

Wieder habe ich den türkisfarbenen Halbkreis als Meer verwendet. Diesmal habe ich im oberen Bereich einen blauen Kreis - ein einfacher Kreis gestanzt aus einer Farbe an Cardstock - verwendet und obenauf einen Halbkreis mit Sonne und Sonnenstrahlen - aus gelbem wieder gemacht mit einer Stanze von Action - aufgeklebt.
Über die Nahtstelle bzw. obere Kante des gestackten Halbkreises habe ich einen Streifen goldenen Spiegelcardstocks geklebt und dahinter ein Segelschiff aus schwarzem Cardstock gesetzt.
Am Himmel habe ich einige winzige Wolken verteilt. Der Text ist aus dem Occasional Label Stempelset von MamaElephant, schwarz auf weißen Cardstock gestempelt und wieder mit 3D Tape aufgeklebt.
Again I used the aqua half circle as an ocean. This time I used a blue circle - just a plain one cut from one color of cardstock - as the sky and put a half circle with a sun and sun rays - cut from yellow cardstock again using a die by Action - onto the blue circle.
Over the seam or top edge of the stacked half circle I put a strip of gold mirror cardstock and put a sail boat cut from black cardstock behind it.
Onto the sky I added three tiny clouds. The text on this card is from the Occasional Label stamp set by MamaElephant, black stamped onto white cardstock and again adhered to the circles with foam tape.

Ich finde, ohne den Streifen goldenen Spiegelcardstocks hätte die Karte definitiv noch ein paar Glitzersteine oder etwas in der Art gebraucht. So aber sorgt dieser Streifen für den nötigen Glanz.
I think, without the strip of gold mirror cardstock this card would have needed some rhinestones or pearls. But now this strip adds a special touch to the card.

Und dann habe ich noch eine dritte Karte, die ich Euch heute zeigen will. Je nachdem, welche Farben man verwendet oder wie man die Kreise anordnet, entstehen komplett verschiedene Looks.
Hier habe ich den Hintergrund nicht embosst sondern mit Distress Ink Lost Shadow den Birthday Background von MFT aufgestempelt und anschließend graue Metallic Watercolor darüber gespritzt.
And then I have a third card that I want to share with you today. Depending on which colors you use or how you put the circle/half circles together you get completly different looks.
Here I didn't use an embossing folder on the background but stamped the Birthday Background by MFT with Distress Ink Lost Shadow onto a piece of white cardstock. Then I flicked some grey metallic watercolor on top.

Hier habe ich pro Halbkreis vier Kreise verwendet und sie in Regenbogenfarben ausgestanzt. Da ich jeweils vier Kreise verwenden wollte, habe ich den üblichen Regenbogenfarben noch pink und türkis hinzugefügt. Und hier habe ich die Halbkreise seitlich versetzt aneinander geklebt, so dass nur die beiden kleinsten Halbkreise einen kompletten Kreis ergeben. So wird die Deko zwar breiter - deswegen habe ich die Karte hier auch im Querformat gestaltet - aber die Deko gefällt mir super gut.
Für den Text habe ich das Wort Friend mit einer Stanze von MFT aus holografischem Spiegelcardstock ausgestanzt und auf die obere Anordnung von Kreisen geklebt, als i-Punkt habe ich ein kleines weißes Herz verwendet. Dann habe ich einen der Texte aus dem Rainbow Greetings Stempelset von MFT weiß auf einen Streifen schwarzen Cardstocks embosst und den über die Kanten der Halbkreise und das gestanzte Wort geklebt.
Da auf der Karte noch ziemlich viel freie Fläche war, habe ich noch Pailetten in meinen 8 Regenbogenfarben - pro Farbe eine - herausgesucht und jeweils neben den Halbkreisen aufgeklebt.
Here I usedfour circles for each half circle and die cut them from cardstock in the colors of a rainbow. I wanted to use four circles for each half circle so I added pink and aqua to those colors. And on this card I adhered the circles moved sidesways, so I don't end up with a whole circle again, but only the two small half circles create that whole circle in the center. This way the decoration becomes wider - that's also why I made a landscape oriented card here - but I really like that look.
For the texte I die cut the word friend from holographic mirror cardstock using a die by MFT and attached it to the top half circle. As the tittle of the i I used a small white heart. Then I white heat embossed one of the texts from the Rainbow Greetings stamp set by MFT onto a strip of black cardstock and glued that over the edges of the half circles and the die cut word.
Since there was still pretty much white left on this card, I brought out sequins in all colors I used for my circles - one of each color - and adhered those to the background, placing them next to the each half circle.

Und hier macht das schräg aufgenommene Bild wieder durchaus Sinn, sieht man doch nur hier den Glanz des Holographic Cardstocks und der Pailetten wirklich.
And here the picture taken at an angle really makes sense again, because only on this one you can really see the shine of the holographic cardstock and the sequins.