

Hallo Ihr Lieben!
Heute startet die Februar-Moodboard Challenge von Create a Smile. Gleich vorweg - eigentlich hatte ich eine andere Karte gemacht, und als ich die dann hochladen wollte, fand ich irgendwie, dass sie das Moodboard nicht so richtig repräsentiert. Das ist nämlich noch ziemlich winterlich anghaucht, ich hatte aber eine Frühlingskarte gemacht:
Hello everyone!
Today starts the new february moodboard challenge by Create a Smile. To mention it at the beginning - I had already finished a different card. But when I wanted to upload it, it thought, it didn't represent the moodboard enough. I had made a spring card, but the moodboard is still pretty winter-ish:
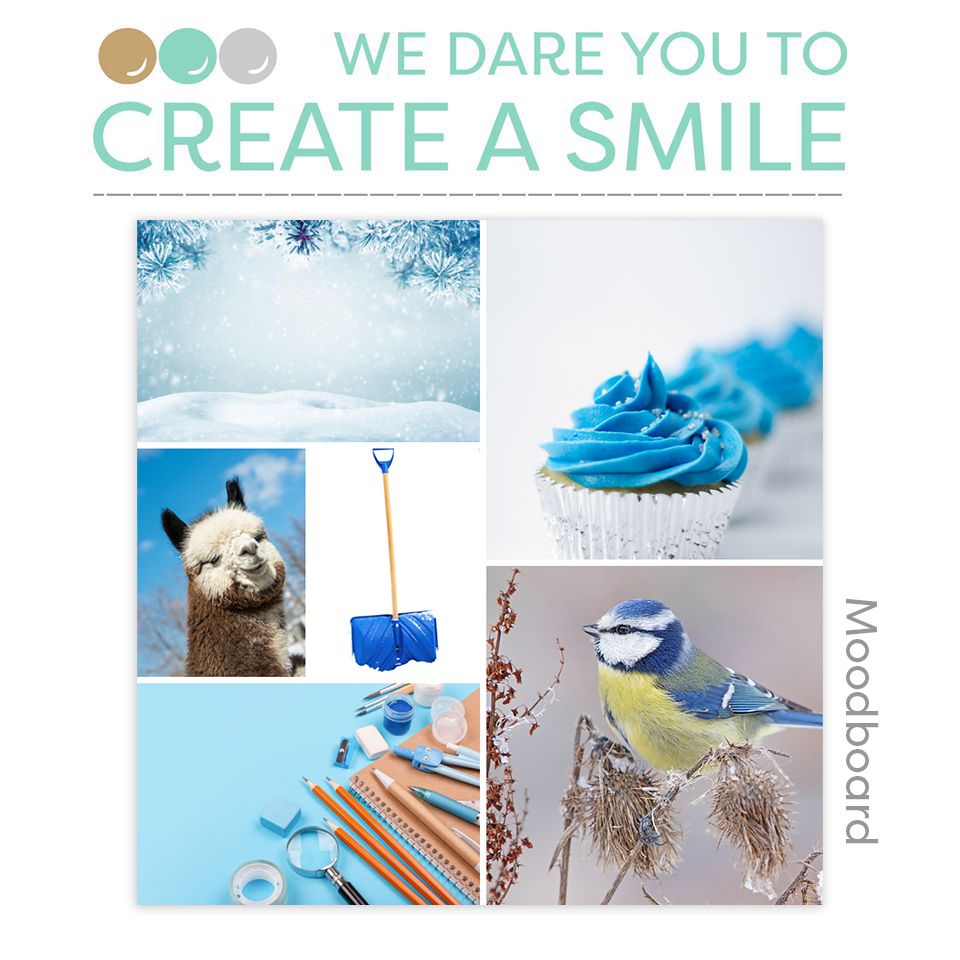
Also habe ich mich von dem Bild unten links zu dieser Karte inspirieren lassen:
So I used the bottom left picture as an inspiration for this card:

Wie Ihr seht, habe ich das Bild recht getreu auf meine Karte transportiert.
Ich habe ein Stück weißen Cardstock genommen und zuerst den Bereich rechts maskiert, anschließend habe ich den Rest des Cardstocks mit Distress Oxide Tumbled Glass gewischt.
Dann habe ich den Rest des Cardstocks abgedeckt und den nun noch weißen Bereich mit Spiced Marmalade gewischt. Hier wollte ich das Notepad nach"bauen".
Über den hellblauen Bereich habe ich dann einige Wassertropfen sowie goldene Metallic Watercolor gespritzt.
As you can see, I did re-create the picture quite close.
I used a piece of white cardstock, masked off the area on the right and inked up the rest with Distress Oxide Tumbled Glass.
Then I covered the rest of the cardstock and inked up the left over area with Spiced Marmalade. I wanted to re-create the note pad here.
Onto the light blue area I spritzed some droplets of water and also some gold metallic watercolor.

Um aus dem orangefarbenen Viereck ein Notepad zu machen, habe ich den T-Outline-Stempel aus dem Stempelset Clear Letters benutzt und in regelmäßigen Abständen an die linke Kante des Vierecks gestempelt. Dann habe ich einen schwarzen Copic benutzt, um den Querstrich des T einzufärben. Und schon sieht es so aus, als wäre das die Bindungs des Blocks.
Als Titel habe ich hier dann den Text meiner Karte - Möge das Mojo mit Dir sein aus dem Set Stempelfreunde - schwarz aufgestempelt.
To turn the orange square into a note pad, I used the T outline stamp from the Clear Letters stamp set and stamped it with even distance onto the left edge of the square. Then I used a black Copic to fill in the shorter line of the T. And voilà, it looks like the binding of a note pad.
As the title on the note pad I stamped on the text of my card - may the mojo be with you - from the Stempelfreunde stamp set.

Alle aufs Kreativsein bezogenen Motive auf meiner Karte sind aus den Stempelsets Stempelfreunde und Endlich Schulkind. Ich habe alle mit No-Line Coloring mit Copics und ein wenig Polychromos coloriert, ausgeschnitten und auf der Karte verteilt aufgeklebt.
Und um der Karte ein wenig Tiefe zu verleihen, habe ich einen C3-Copic Marker benutzt, um links und unterhalb jedes Motivs einen Schatten aufzumalen. Für diesen Zweck habe ich einen eigentlich schon kaputten Marker verwendet, so kann ich mir mit der Oxide Tinte die Spitze nicht ruinieren.
Oh, und bevor Ihr Euch jetzt fragt, was mit der anderen Karte passiert ist: die zeige ich Euch die nächsten Tage natürlich auch noch!
All the craft related images on my card are from the stampsets Stempelfreunde und Endlich Schulkind. I did no-line coloring with Copics and a bit of Polychromo, cut them out and adhered them all over my card.
To give the card some dimension, I used a C3 Copic marker to draw a shadow to the left and under each image. I used an old, kind of already ruined marker for that to make sure, the Oxide ink doesn't ruin the tip of my marker.
And before you wonder, what happened to the other card I made: I am going to share that with you one of the next days.