

Hallo Ihr Lieben!
Nachdem das schöne Wetter nun vorbei ist und ich am liebsten nur vor die Türe gehe, wenn es nötig ist, habe ich wieder den lieben langen Tag Zeit zu basteln. Und so ist gestern diese Karte von meinem Tisch gehüpft - entstanden für die aktuelle "Fall and Halloween Inspiration" Challenge bei LawnFawn.
Hello everyone!
After the nice weather has ended and I only leave the house when necessary. So I have finally time again to craft the days away. And so this card was made yesterday - made for the new "Fall and Halloween Inspiration" challenge at LawnFawn.
Ich gebe Euch hier einen kleinen Einblick in den 31. Oktober. Steht auch dick drauf...
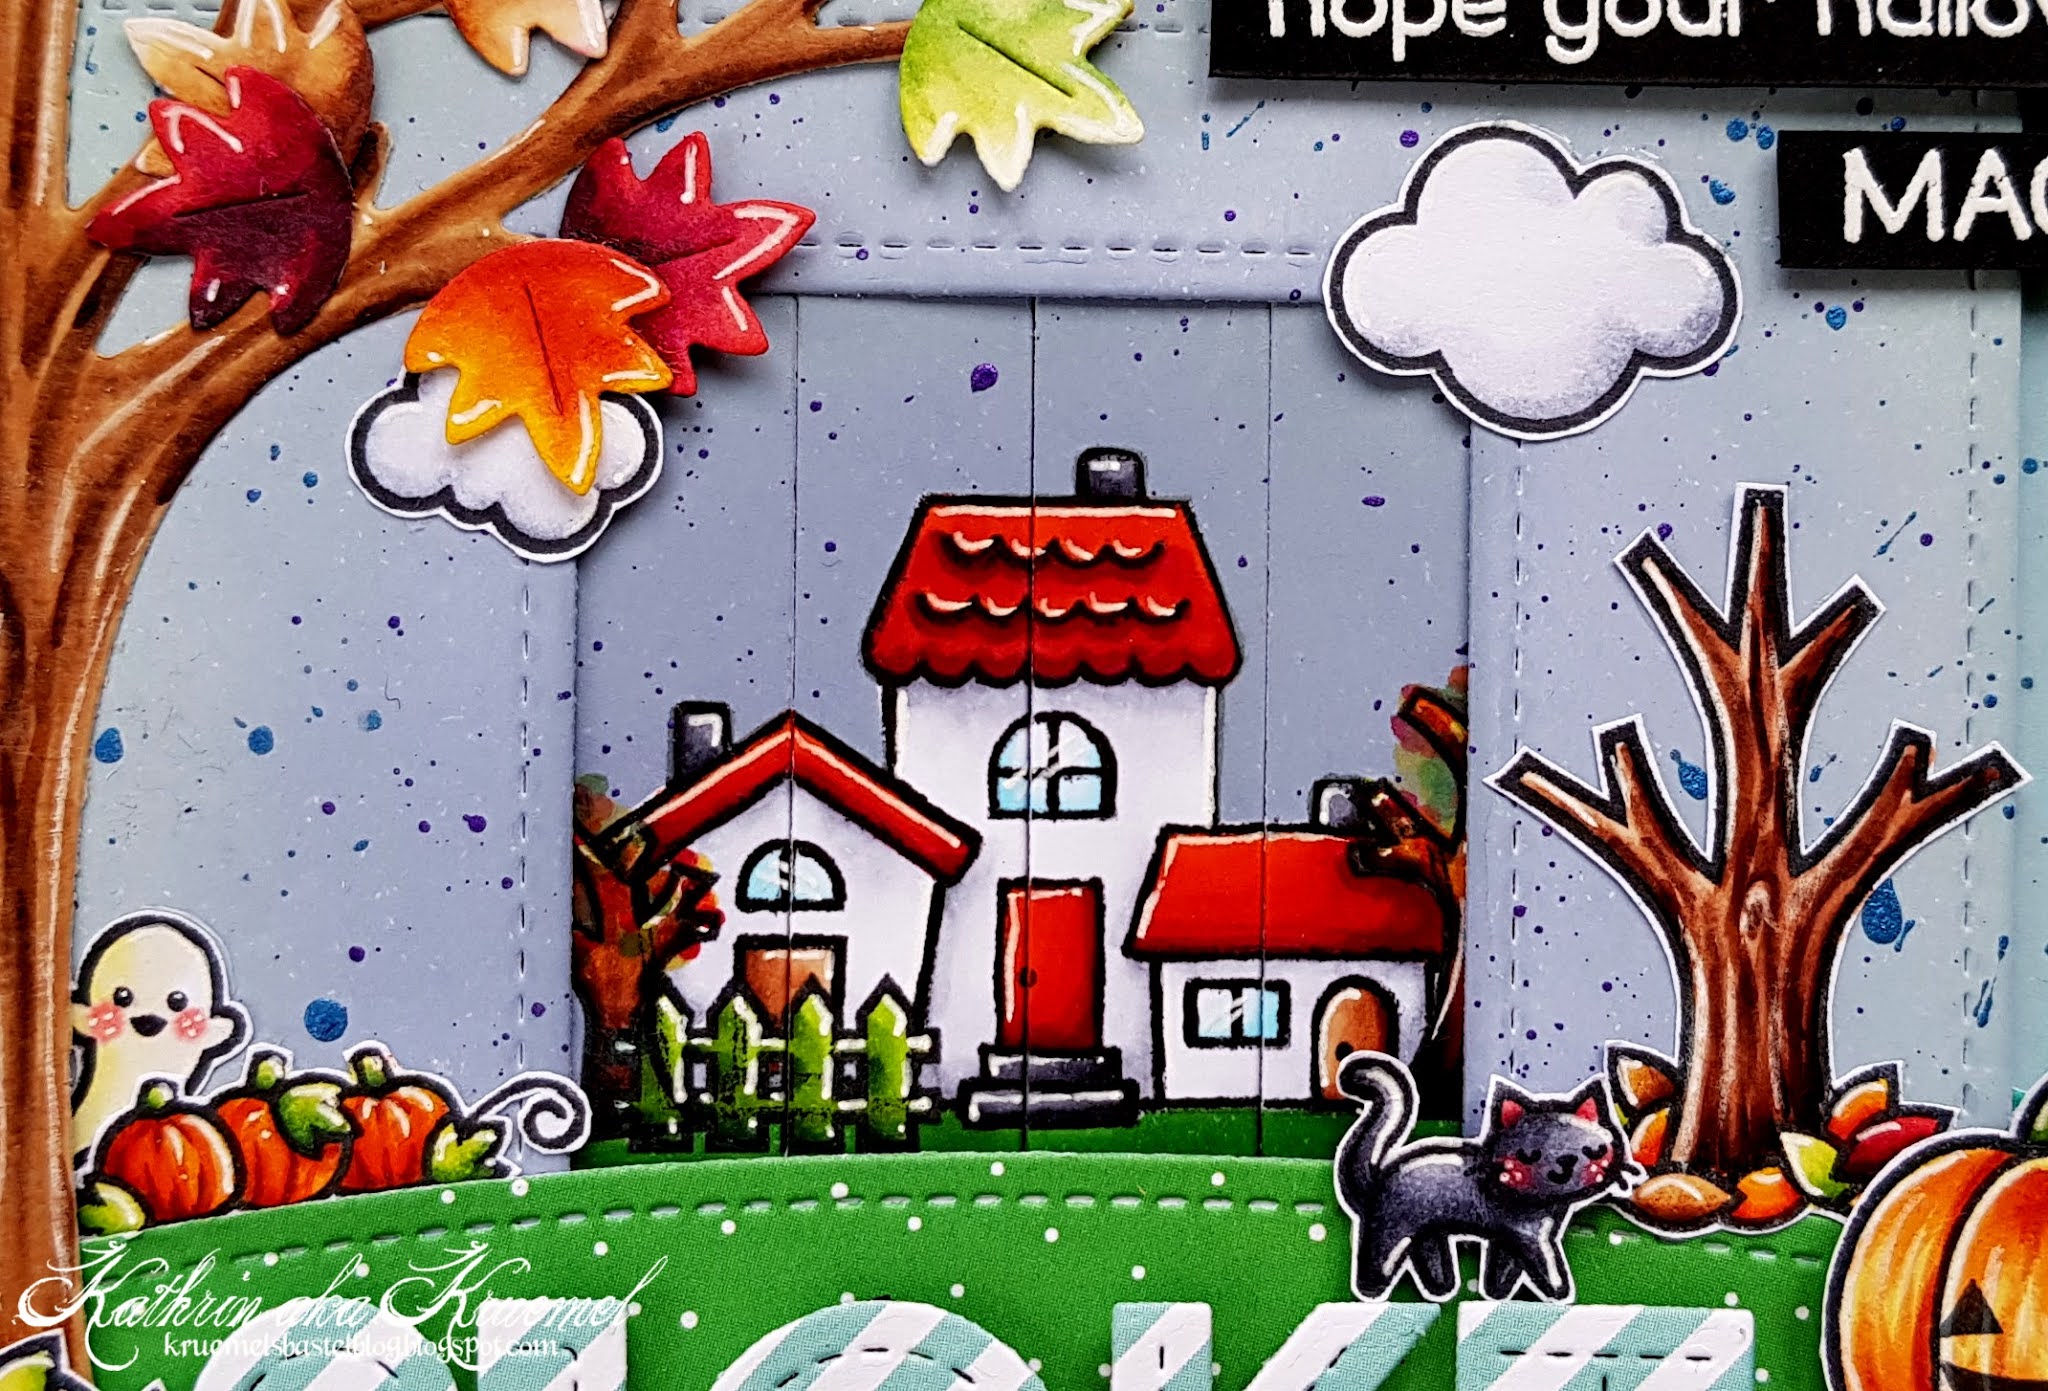
Im Hintergrund habe ich weißen Cardstock mit Distress Oxide Tumbled Glass, Speckled Egg und Stormy Sky gewischt und lilafarbene und blaue Schimmerwasserfarbe darüber gespritzt.
Die beiden Hügel habe ich aus hell- und dunkelgrünem Designpapier mit kleinen Punkten aus dem Let it Shine Papierpack mit den Slimline Simple Stitched Hillside Border Stanzen gestanzt. Darüber kam einmal der Leafy Tree Backdrop Landscape. Den habe ich aus hellbraunem Cardstock gestanzt und den Baum mit Copics weiter coloriert. Die Blätter, die ich aus weißem Cardstock gestanzt und mit Copics coloriert habe, sind aus dem Leafy Tree Backdrop Portrait Stanzenset. Bevor ich die an den Baum geklebt habe, habe ich noch einen der Stitched Rectangle Frames aus dem helltürkis und weiß gestreiftem Designpapier ausgestanzt und über den braunen Rahmen geklebt.
Vor dem Baum liegt ein Haufen bunter Blätter aus dem Let's Go Nuts Stempelset, unten rechts in der Ecke steht ein Baumstumpf aus dem Lift the Flap Meadow Stanzenset. Darauf sitzt ein dicker Halloweenkürbis. Der ist aus dem Stempelset Happy Harvest Stempelset, das Gesicht aus dem Costume Party Set habe ich nach dem Colorieren darüber gestempelt.
Aus dem selben Set ist auch der Text. Den habe ich weiß auf schwarzen Cardstock embosst und oben rechts auf der Karte aufgeklebt.
Und unten auf den hellgrünen Hügel habe ich noch 31. OKT geschrieben. Ich habe die Oliver's Stitched ABCs und Oliver's Stitched 123s sowie wieder das gestreifte Designpapier benutzt. Den Punkt nach 31 habe ich durch ein kleines Candy Corn aus dem Stempelset Costume Party ersetzt.
I'm giving you a little glimspe forward to october 31st. That's also what's written on it - in Germany we write dates a bit different.
In the background I've used Distress Tumbled Glass, Speckled Egg and Stormy Sky to ink up some white cardstock and then flicked some blue and purple shimmer watercolor over it.
The two hills are cut from light and dark green designer's paper with tiny white dots from the Let it Shine paper pad using the Slimline Simple Stitched Hillside Borders dies. On top of that I've glued the Leafy Tree Backdrop Landscape, cut from light brown cardstock. Then I've added some more colors to the tree with my Copics. The leaves, that are cut from white cardstock and colored with Copics, are from the Leafy Tree Backdrop Portrait die set. Before I've glued those to the branches of the tree I've glued a frame cut from light turquoise and white striped designer's paper with one of the Stitched Rectangle Frames onto the brown frame.
In front of the tree there's a pile of colorful leaves from the Let's go Nuts stamp set, in the bottom right corner I've put a tree stump from the Lift the Flap Meadow die set. On top of it a big Halloween pumpkin is placed. This one's from the Happy Harvest stamp set, I've stamped the face from the Costume Party stamp set onto it after I've done the coloring.
The saying is also from the same stamp set. I've white heat embossed it onto black cardstock and glued it to the top right corner.
Onto the light green hill I've written 31. OKT - that's how dates are written here, the number first with a dot behind it and then the month. I've used the Oliver's Stitched ABCs and the Oliver's Stitched 123s die sets here to cut the numbers and letters from the striped designer's paper again. I've replaced the dot after the 31 with a small candy corn from the Costume Party stamp set.
Hinter dem Hügel, auf der linken Seite, liegen ein paar frische Kürbisse aus dem Spooky Village Stempelset. Und ein kleiner Geist aus dem Tiny Halloween Set zeigt sich hier auch schon mal - er traut sich auch bei Tage raus.
Rechts auf dem Hügel steht ein Baum aus dem Tree Before 'n' After Stempelset, der in abgeworfenem Laub steht. Und über das K und T von OKT läuft eine kleine schwarze Katze.
In der Mitte der Karte seht Ihr einen kleinen Ort. Den habe ich mit Stempeln aus den Sets Happy Village und Spooky Village zusammengesetzt. Außerdem habe ich ihn mit der Mirror Image Technik gespiegelt - warum, erfahrt Ihr gleich.
Über dem Ort schweben noch zwei Wolken.
Behind the hill, on the left side of the card, is a pumpkin patch, made with a stamp from the Spooky Village stamp set. And a small ghost from the Tiny Halloween stamp set is also out already - he isn't afraid of the light.
On the right side there's a tree from the Tree Before 'n' After stamp set, standing in a pile of fallen leaves. And a black cat is walking on top of the K and T of the word OKT.
In the middle of my card there's a little village. I've stamped this using stamps from the sets Happy Village and Spooky Village. I also did some mirror stamping to mirror the town - you'll see why in a minute.
In the sky two small clouds are floating.

Aber wenn die Nacht anbricht, dann verändert sich die Szene auf der Karte! Ist ja schließlich Halloween!
Ich habe hier die Magic Picture Changer Stanze benutzt, um den Mechanismus zu werkeln. Da ich das Picture Changer Element auf eine Karte aufgeklebt habe, habe ich den Streifen zum Herausziehen etwas verlängert. Über den Mechanismus habe ich noch einen Rahmen aufgeklebt, der mit der Magic Picture Changer Add-On Stanze gemacht ist. Diesen Rahmen habe ich aus weißem Cardstock gestanzt und ebenfalls mit Distress Oxide, passend zum Hintergrund auf der Karte, gewischt und bespritzt habe, ebenso den - verlängerten - Ziehstreifen des Mechanismus. An desssen Ende habe ich einen Stopper geklebt, ebenfalls aus dem Magic Picture Changer Add-On Stanzenset, den ich wieder aus dem gestreiften Designpapier gestanzt habe. Den Pfeil im Stopper habe ich aus dem dunkelgrünen Designpapier mit den Punkten gestanzt und in die Pfeilausstanzung hineingeklebt.
But when night falls the scene changes! Well, it's Halloween after all!
Here I've used the Magic Picture Changer die to create the mechanism. Since I've glued the Magic Picture Changer element onto a regular sized card I've enlarged the pull tab. On top of the mechanism I've glued a frame, made with the Magic Picture Changer Add-On die. I've decorated the frame and the strip I've used to make the tab longer like I did the background on the card. To the end of the pull tab I've glued a stopper, also die cut with a die from the Magic Picture Changer Add-On die set. The arrow in the stopper is die cut from the dark green designer's paper again and glued back into the cut out.

Und der kleine Ort verwandelt sich in Halloween Town. Hier habe ich Stempel aus dem Set Spooky Village benutzt. Das besteht - von der Deko mal abgesehen - aus fast den selben Häusern wie der Stempel aus dem Set Happy Village, den ich für die erste Szene benutzt habe. Aber er ist gespiegelt, deswegen habe ich den Stempel für die erste Szene auch gespiegelt, so wirkt es mehr, als wäre der selbe Ort zu sehen. Das mit dem Spiegeln klappt bei mir nie so richtig sauber. Deswegen habe ich die Stempellinien der ersten Szene nach dem Colorieren nochmal mit einem schwarzen Fineliner nachgezogen. Da das weniger Linien waren, habe ich mich dazu entschieden, die erste Szene zu spiegeln.
Den Himmel habe ich hier zusätzlich mit Distress Oxide Wilted Violet gewischt, so wirkt die Szene bedrohlicher.
And the little village turns into Halloween town. Here I've used a stamp from the set Spooky Village. Besides the Halloween decorations the houses look pretty much like the ones from the Happy Village that I've used for the first scene. But it's mirrored, so I've also mirrored the houses on the first scene. Well, mirroring images never gives me a crisp or clear image. So after coloring this scene I've re-drawn the stamped lines with a black fineliner. That's also why I've mirrored the town on the first scene because they have less lines.
I've also added Distress Oxide Wilted Violet to the sky here to make the scene look more spooky.