

Hallo Ihr Lieben!
Auch im April gibt es in der Share Handmade Kindness Gruppe natürlich wieder einen Technique Throwback Thursday. Das Video diesen Monat ist über Ink Lifting - und weil man bei den meisten der Techniken gleich zwei tolle Hintergründe auf einmal erhält, habe ich auch zwei Karten zu zeigen.
Hello everyone!
Of course, also in april they are doing the Technique Throwback Thursday over at the Share Handmade Kindness group. This month's video is about ink lifting - and since you end up with two great backgrounds with most of the techniques shared in the video I also have two cards to share today.
Auf dem Bild oben kann man schon erahnen, dass es sich bei dem helleren Hintergrund um das Spiegelbild des dunkleren handelt.
Für die Hintergründe habe ich Distress Ink Mowed Lawn, Salty Ocean und Prize Ribbon direkt mit dem Kissen satt auf ein Stück weißen Cardstock aufgetragen. Anschließend habe ich den Marble Background von MFT mit klarem Embossingpuler aufembosst. Und dann kommt das Magische an dieser Technik - der Cardstock wird mit Wasser besprüht, mit einem weiteren Stück Cardstock abgedeckt und beide gleichzeitig durch die Big Shot gedreht. So überträgt sich etwas der Tinte auf den blanken Cardstock, aber nur an den Stellen, an denen sich kein Embossingpulver befindet und die Farben sind hier viel zarter. Gleichzeitig wird an den nicht embossten Stellen des ursprünglichen Cardstocks die Farbe, die ja hier abgetragen wird, etwas aufgehellt, so dass man das klar embosste Muster nun dunkler sieht.
Ich hatte wohl eine Ecke nicht so gut mit Wasser eingesprüht, aber bei dem von mir verwendeten Muster fällt das fast gar nicht auf.
On the picture above you can already guess that the lighter background is the mirror image of the darker one.
For the backgrounds I inked up one piece of white cardstock really good with Distress Ink Mowed Lawn, Salty Ocean and Prize Ribbon by pressing the ink pads directly onto the paper, then clear heat embossed the Marble Background by MFT onto it. And then the magic happens - you mist the cardstock with water, place another piece of white cardstock and top and run both together through your die cutting machine. This way, some of the ink gets transfered to the blank cardstock, but only in the areas, that are not covered with embossing powder, and the ink on that second piece of cardstock is also way softer. At the same time, the ink in the non embossed areas gets lightened up a bit - since the ink gets transfered to the other sheet - and the clear embossed areas are darker now which makes the pattern better visible.
Seems like I didn't mist one of the corners of my cardstock good enough, but with the pattern I used that really isn't noticeble.

Mit dem farblich kräftigeren Hintergrund ist diese Geburtstagskarte entstanden. Vor dem Dekorieren habe ich etwas weiße Metallic Watercolor aufgespritzt.
With the bolder background I made this birthday card. Before decorating it, I flicked some white metallic watercolor onto the background.

Als Deko habe ich die Oops-Stanze von WhimsyStamps verwendet. Die Schattenlage habe ich aus weißem Cardstock gestanzt, die Buchstaben jeweils dreimal aus türkisfarbenem Cardstock und alles zusammengeklebt.
Auf das zweite O habe ich diesen süßen Froschkopf aus einem Stempelset von Action aufgeklebt. Er ist mit Copics coloriert. Außerdem habe ich zwei Luftallons aus dem Adorable Elephants Stempelset von MFT aufgeklebt, auch die sind mit Copics coloriert.
Aus demselben Set ist auch der schwarz auf weißen Cardstock gestempelte Text. Ich habe ihn auf mehrere Male gestempelt und den Cardstock dabei etwas verschoben, um das O und R in Forgot zu tauschen, so dass da nun "frogot" steht. Ich fand, das passt super zu dem Froschgesicht...
Der Text, den ich unten quer über die Karte aufgeklebt habe, ist aus dem Stempelset Bitty Birthday Wishes von MFT. Ich habe ihn weiß auf schwarzen Cardstock embosst und mit 3D Tape aufgeklebt. Am Himmel habe ich noch drei kleine Wolken verteilt.
To decorate this card, I used the Oops die by WhimsyStamps. I die cut the shadow layer from white cardstock, the letters three times from aqua cardstock and then put the word together.
Onto the second O I adhered this cute frog, that I found at a local dollar store. I colored him with Copics. I also added two balloons from the Adorable Elephants stamp set by MFT, again colored in with Copics.
From the same set is also the text, that is stamped black onto white cardstock. I stamped it divided into parts, moving my cardstock in the Misti inbetween to switch the O with the R in the word forgot, so not there's a "frogot" written. I thought, that would be cute in combination with the frog image...
The text, that I attached across the bottom of the card, is from the Bitty Birthday Wishes stamp set by MFT. I white heat embossed it onto black cardstock and adhered it with foam tape. Then I also added three white clouds to the top of the card.

Hier kann man im oberen Bereich das Embossingpulver auf diesem Hintergrund recht gut erkennen.
Als Deko habe ich noch ein paar blau-grün changierende Glitzersteine aufgeklebt und alles auf einem weißen Kartenrohling befestigt.
Here, in the upper half of the card, you get a pretty good look at the embossing powder on this background.
To decorate the card I added a few blue-green iridescent rhinestones and attached everything onto a white note card.
Nun wollte noch der hellere Hintergrund verarbeitet werden. Da sich hier kein Embossingpulver auf dem Hintergrund befindet, konnte ich direkt darauf stempeln. Zuvor habe ich goldene Metallic Watercolor aufgespritzt.
Now the lighter background wanted to get turned into a card. Since there is no embossing powder on this background I was able to stamp directly onto it. Before I flicked some gold metallic watercolor onto the cardstock.

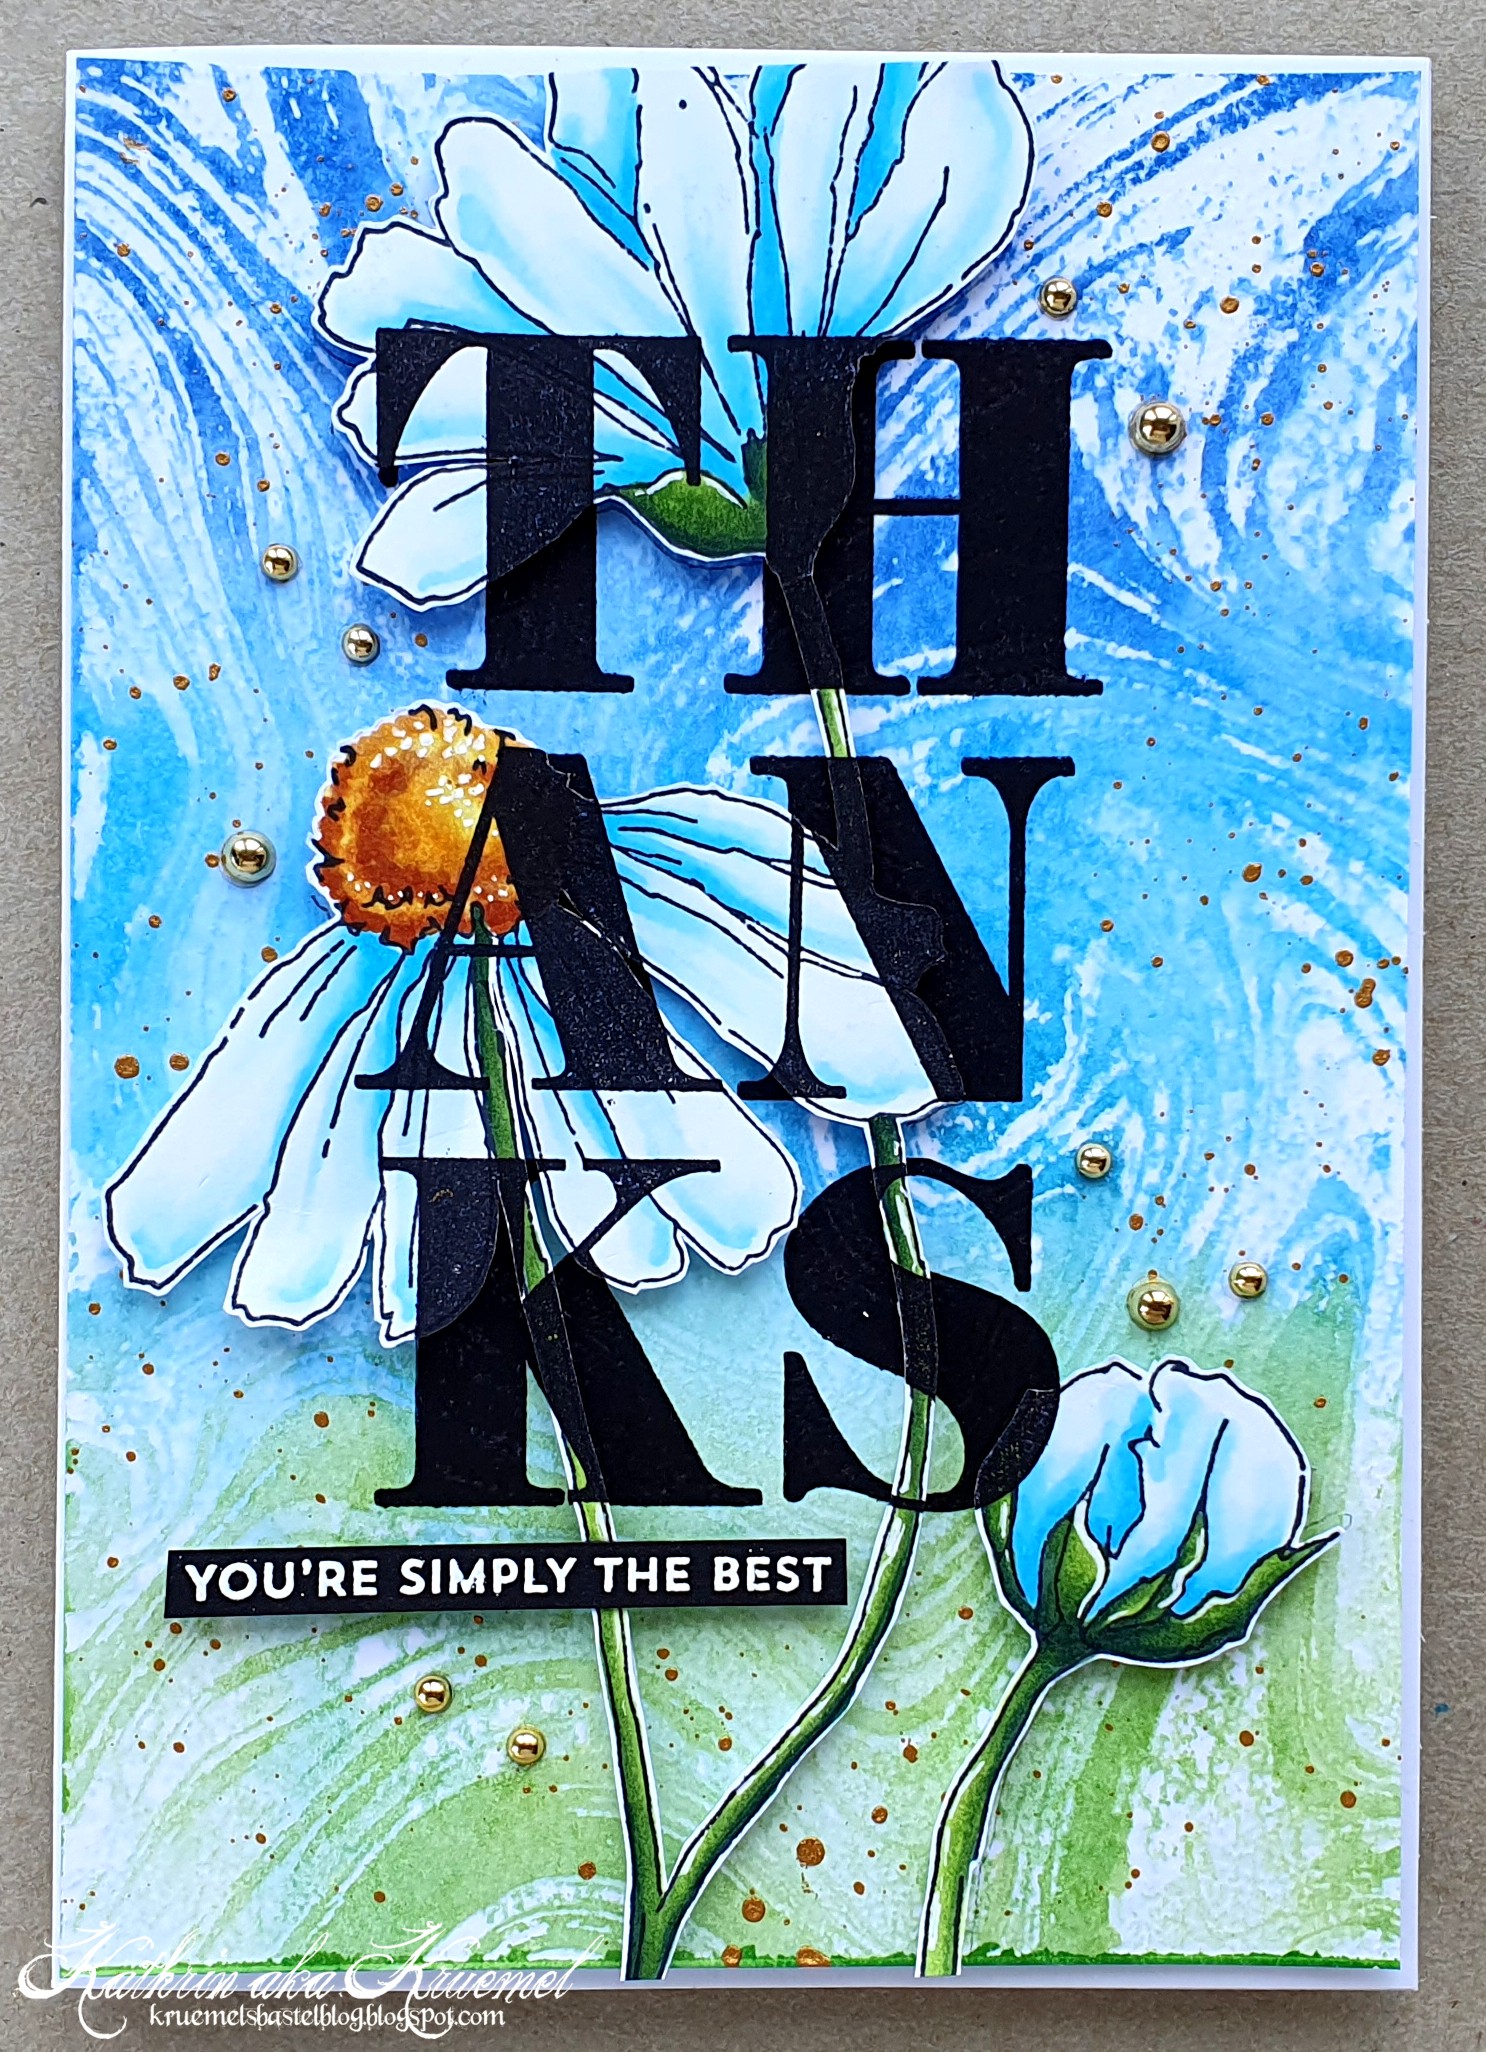
Hier habe ich zuerst die tollen Blumen aus dem Essentials No463 Stempelset von StudioLight abgestempelt, mit Copics coloriert und sie anschließend mit der Schere ausgeschnitten. Dann habe ich sie genau an die Stelle meines Hintergrunds gelegt, an der ich sie später aufkleben wollte und mit dem großen Thanks Stempel aus dem Jumbo Sentiments Stempelset von TheTon mit Versafine Clair Nocturne aufgestempelt. Die Blumen habe ich dann vorsichtig entfernt und den Text nochmal an die selbe Stelle auf dem Hintergrund gestempelt. Dann habe ich die ausgeschnittenen Blüten mit 3D Tape wieder aufgeklebt.
Der kleine Text ist aus dem Set Itty Bitty Thanks von MFT und weiß auf schwarzen Cardstock embosst. Ich wollte goldenes Embossingpulver verwenden, aber ich tue mich immer ein wenig schwer, das auf schwarzem Cardstock zu lesen, vor allem, wenn die Linien recht dünn sind. Deswegen habe ich lieber zu weißem Pulver gegriffen.
Here I first stamped those beautiful flowers from the Essentials No463 stamp set by StudioLight, colored them with Copics and cut them out with my scissors. Then I placed them exactly in the place of my background, where I wanted to glued them down later and used the large thanks image from the Jumbo Sentiments stamp set by TheTon and Versafine Clair Nocturne ink to stamp the text onto the flowers. I carefully removed the flowers and stamped the text again on the background, making sure to not move the cardstock. Then I attached the flowers to the background using foam tape.
The small text is from the Itty Bitty Thanks stamp set by MFT and white heat embossed onto black cardstock. I wanted to use gold embossing poweder, but I think, it's a bit hard to read on black cardstock, especially when the lines are thinner. So I went with the white one.

Hier sieht man, wie die dicken gestempelten Buchstaben fließend von den erhöht aufgeklebten Blumen zum Hintergrund übergehen.
Als Deko habe ich dann noch ein paar goldene Perlen aufgeklebt und alles auf einem weißen Kartenrohling angebracht.
Here you can see, how the bold letters on the raised flowers and the background continue smoothly.
I added a few gold pearls as decorations and then adhered everything to a white note card.