Freitag, 22. November 2013

Ein Weihnachts-Tag


Hallo Ihr Lieben!
Heute zeige ich  Euch einen weihnachtlichen Tag, den ich gestern auf dem Copic Marker Europe Blog gezeigt habe.

Hello everyone!
Today I am sharing a christmassy tag that I've shown at Copic Marker Europe yesterday.

Das Motiv ist von Lili of the Valley und einfach soo süß!
Und da die kleinen Pinguine das Banner aufspannen, ist es Text und Motiv in einem...
Die Papierränder habe ich mit Frantage Embossing Pulver überzogen. Sieht doch aus wie echter Schnee, oder? 
Die Schneeflocke und der gefalzte Streifen sind aus weißem Glitzerpapier, den Weihnachten muss es glitzern. 
An der Schleife aus Tüll und Spitze ist noch ein kleines Glöckchen befestigt.

This image is by Lili of the Valley and I think it is soo cute!
And since these little penguins are holding the banner this is image and saying together.
The edges of the papers have been covered with Frantage Embossing Powder. Doesn't that look like real snow?
The snowflake and the pleated strip are cut from white glitter paper, because there has to be glitter for christmas.
To the bow from tulle and lace there is a little silver bell attached.

Und falls Ihr neugierig seid und mal einen Blick in mein Bastelzimmer werfen möchtet - heute gibt es auf dem Whiff Of Joy Ideenwelt Blog einen Post mit ganz vielen Bildern von meinem Reich... ;)

And if you are curious and want to have a peak into my craftroom - today there is a post over at Whiff Of Joy World of Ideas Blog with many pictures of my spcae... ;)


Mittwoch, 20. November 2013

Whiff Of Joy # 168


Hallo Ihr Lieben!
Es ist wieder Zeit für eine neue Challenge bei Whiff Of Joy. Und unser neues Thema lautet "christmas cheer".

Hello everyone!
It's time for a new challenge at Whiff Of Joy. Our new theme is "christmas cheer".

 Diesmal habe ich einen Zip-Open-Umschlag gemacht - hier noch unbefüllt. Denn was gibt es schöneres, um jemanden zu erfreuen, als ihm eine Kleinigkeit in etwas Selbstgebasteltem zu schenken. Die Anleitung für den Umschlag findet Ihr übrigens hier auf dem Whiff Of Joy Ideenwelt Blog.

This time I made a zip open envelope - not yet filled on the photo. Because what better can cheer one up than getting a little something in a handmade wrapping. The tutorial for how to make this envelope can be found here at the Whiff Of Joy World of Ideas Blog.

Das Motiv "Elf Maya & Kitty schreiben ans Christkind" ist natürlich der perfekte Stempel für einen Umschlag. Elfen müssen bei mir einfach grün sein, aber etwas weihnachtliches Rot durfte dann auch nicht fehlen. Verziert habe ich das ganze dann noch mit goldenen Stickles und einem goldfarbenen Glöckchen.

The image "Elf Maya & Kitty writing Santa's list" is just the perfect one for an envelope. Elfs just have to be dressed up green to me, but a little christmassy red should be there as well. And to make it even more festive I used golden Stickles and a golden bell as decoration.

Coloriert habe ich mit Copics:
Coloring has been done with Copics:


Samstag, 16. November 2013

Stempeleinmaleins - Ausgabe vom 16. November 2013


Hallo Ihr Lieben!
Es ist wieder Zeit für das Stempeleinmaleins. Diesmal zeigen wir Euch eine kleine Box, die schnell zu machen ist und mit nur zwei kleinen Klebestellen auskommt.

Hello everyone!
Time for a new issue of Stempeleinmaleins. This week we show you how to make this little box which can be done fast and which only needs two little glue dots to bring it together.

Den Cardstock für meine Box habe ich mit Schimmerfarbe bestempelt und daraus dann die Box gefertigt. Als Deko habe ich einen Stern, hinterlegt mit Glitterpapier, etwas Band und zwei kleine Glöckchen verwendet. Und auf dem Schildchen steht "für Unartige, für Brave" - und mit einem Glitzerstein habe ich das Feld für Brave markiert.

I used shimmer paint to stamp all over the cardstock I used for my box. As decoration I went with a star, matted with glitter cardstock,  some bakerstwine and tulle and two little bells. On the tag is written "for naughty ones, for good ones" and I marked the "for good ones" with a little rhinestone.


Montag, 11. November 2013

Whiff Of Joy Digi Stamp Release


Hallo Ihr Lieben!
Ab heute gibt es bei Whiff Of Joy die Motive des Herbst- und des Winter-Stempelkits als Digi Stamps zu kaufen!
Und ich zeige Euch heute ein weiteres Motiv aus dem Winterkit.

Hello everyone!
Today Whiff Of Joy is releasing the images of their secret fall and winter stamp kit as individual digi stamps!
And I am showing you another image from the winter kit today.

Ich habe eine Geldgeschenk-Karte gemacht.
Vorne natürlich das süße Motiv - den Christbaum haben die beiden prima ausgesucht!
Im Hintergrund steht eine weitere Tanne, überzogen mit Crackle Paint.
Der Anhänger samt Text und Sternchen-Hintergrund ist aus dem deutschen Text-Set Weihnachtsanhänger, ausgestanzt mit der passenden Stanze "Kleiner Weihnachtsanhänger".

I made a card to hand out some money.
On the front there is of course this cute image - these both did a great job picking their christmas tree!
In the background I added another tree, covered with Crackle Paint.
The tag, but also the saying and the stars background is from the german text set "Weihnachtsanhänger", cut out with the matching die "Christmas Tag".


Klappt man das Motiv zur Seite, finden sich noch ein paar weitere verschneite Tannen. Schließlich konnte ich diese Lage ja nicht so einfach "nackig" lassen...

If you open up the first layer of the card there are a few more snow covered trees. I just couldn't leave this layer plain...


Und wenn man die Karte dann komplett öffnet, findet man einen Text auf großer Schneeflocke sowie ein kleines Täschchen aus Vellum, in dem sich dann der Schein versteckt. So sind dann auch Geldgeschenke schön verpackt.

And if you open up the card completly there is a saying on a big snowflake and a little pocket made from Vellum, that is holding some money. And like this even handing out money can look nice.

Coloriert ist mit Copics, aber irgendwie ist mir das Bild davon abhanden gekommen...

Coloring has been done with Copics, but somehow the photo disappeared from my computer...


Sonntag, 10. November 2013

Magnolia Down Under # 222


Schönen Sonntag Euch allen!
Es ist wieder Zeit für eine neue Challenge bei Magnolia Down Under - und diesmal dreht sich alles um die Kleinen bei unserem Thema "just for the kids".

Happy sunday everyone!
It's time for a new challenge at Magnolia Down Under - and this week it's all about the little ones in our lives with the new theme "just for the kids".

Ich weiß ja nicht, wie es bei Euch war. Aber ich fand Karten als Kind ziemlich langweilig. Text, den man evtl. selbst noch gar nicht lesen konnte, und die Motive waren auch  nicht wirklich besonders. Aber da war die Karte meiner Oma, an der man ein Rad drehen konnte und es änderten sich die Zahlen auf der Karte - sowas fand ich spannend!
Mit dieser Erinnerung bin ich an meine Karte für die neue Challenge herangegangen und habe sie so kreiert, dass es einiges zu entdecken gibt. Inspiriert wurde ich von einer Schneekugelkarten-Datei aus dem Silhouette-Store.
Vorne auf der Karte ist eine Schneekugel, die ich wie eine Shaker-Card gemacht und mit viel Glitzer und Schnee gefüllt habe.

I don't know if it is the same for you. But when I was a kid cards were quite boring to me. A lot of text that I sometimes even wasn't able to read (yet) and the prints weren't too special as well. But then there was this card my grandma sent where you could turn a wheel and the  numbers on the card changed. That's something I loved!
I had these memories in mind when I made my card and made it with lots of things to discover for the little ones. I was inspired by a snowglobe card cutting file from the Silhouette Store.
On front of the card I put a snowglobe that is  made like a shaker card and filled with lots of glitter and snow.


Die Karte ist eine Trifold-Card. Wenn man die Schneekugel beiseite klappt, erscheint darunter der Text und die ganze Szene ist genauer zu erkennen - der süße Pinguin und das Schild aus der neuesten Kollektion von Magnolia. Und natürlich zeigt es den Weg zu Santa. Der wohnt im Hintergrund in dem schneebedeckten Häuschen. Und rundherum fallen Schneeflocken. 
Ich denke, so mögen auch Kinder Karten. 
Pinguin und Schild klappen mit dem mittleren Element auf - und dahinter ist dann Platz für einen persönlichen Gruß. Und ich weiß auch schon, wer diese Karte bekommt... ;)

The card is a trifold card. If you open up the first layer, which is the snowglobe shaker part, there is a little saying stamped on the lower part and the whole scene can be discovered - the cute penguin and the sign from the newest Magnolia Collection. And of course the sign shows the way to Santa, who is living in the house with the snowy roof in the backround. And there are snowflakes all around.
I guess, that's how kids enjoy getting cards.
Penguin and sign open up with the next layer - and behind them I can add some text. And I even know already who will be getting this card... ;)

Coloriert habe ich wieder mit Copics:
Coloring has been done with Copics again:


Samstag, 9. November 2013

Stempeleinmaleins - Ausgabe vom 09. November 2013


 Hallo Ihr Lieben!
Es ist Zeit für die neue Ausgabe des Stempeleinmaleins. Und apropos Zeit - wir gehen inzwischen immer schneller auf Weihnachten zu. Und darum gibt es heute eine weihnachtliche Anleitung von den Schnipselchen: ein Adventskalender/-kerzen-Tablett.

Hello everyone!
Time for the newest issue of Stempeleinmaleins. And talking about time - christmas is coming closer and so we have a christmas-sy tutorial by Schnipselchen today: a adventcalendar/adventcandle decoration.

Die Kerzen sind 4 Boxen, die natürlich auch befüllt werden können. Ich hatte meinen Adventskranz kurz vor Weihnachten vor Augen - die 4. Kerze ist immer am größten. Aber das könnt Ihr natürlich auch andersrum machen.

The candles are 4 boxes that can also be filled. I had my advent wreath in mind while making this - the 4th candle is always the biggest. But of course you can switch that.


Ich habe die Kerzen mit Designpapier überzogen und die Flammen mit Stickles. 
Sie sind mit einem Band zusammengebunden und mit Schleife und Glöckchen verziert. Auch ein paar Blumen durften nicht fehlen. 
Und außerdem versteckt sich auf meinem Tablett die nächste Vorschau auf einen der neuen Digi-Stamps von Whiff Of Joy: der süße Schneemann! Er war genau das Element, das auf dem Tablett noch gefehlt hatte und macht sich da doch super, oder?

I covered the candles with designer's paper and the lights with Stickles.
The candles are all together wrapped with some ribbon and decorated with a bow and a bell. I also added some flowers.
And there is also another preview of one of the new digi images by Whiff Of Joy hiding on this one: the cute snowman! It was exactly what my project needed to look finished. And isn't he looking good on it?

Zum Colorieren habe ich hier nur wenige Copics gebraucht:
I only needed a few Copics to do the coloring:


Donnerstag, 7. November 2013

Whiff Of Joy Digi Release Preview


Hallo Ihr Lieben!
Heute gebe ich Euch eine Vorschau auf eines der neuen Digi-Motive, die es nächsten Montag bei Whiff Of Joy geben wird. Und wem das Motiv bekannt vorkommt - ja, es ist aus dem Geheimen Winter-Stempel-Kit. Wenn Ihr Euch das nicht gesichert habt, dann habt Ihr ab Montag die Chance, die Motive trotzdem zu bekommen.

Hello everyone!
Today I am giving you a preview on one of the new digi images that will be available next monday at Whiff Of Joy. And if you think you've seen this image before, you are right. It is one from the secret winter stamp kit. If you didn't buy this you have now the chance to get these images individually.

Ich habe einen 3D-Stern gebastelt, den ich an unsere Wohnungstür hängen möchte. Passend zum Motiv habe ich ein paar silberfarbene Glöckchen mit als Deko angebracht. Allerdings habe ich mich generell mit Deko zurückgehalten. Bei 3 Teenie-Töchtern, die ganz gern mal mit den Türen knallen, sollte der Stern robust genug sein, um auch einen Sturz zu überleben. ;)
Aber so ist immerhin das Motiv der Star des Sterns.

I made a 3D star that I want to hang on our door. Matching the image I used a few silver bells as decoration. But in generall I didn't use many embellishments here. With 3 teenager daughters in the house that love to slam doors every now and then the star should be made in a way that it also survives falling... ;)
But so the image is the main part of the decoration.

Coloriert habe ich wieder mit Copics:
Coloring is once again done with Copics:


Mittwoch, 6. November 2013

Whiff Of Joy Challenge # 167


Hallo Ihr Lieben!
Schon wieder ist Zeit für eine neue Challenge bei Whiff Of Joy - wo ist nur die Zeit hin?!

Hello everyone!
It's time again for a new challenge over at Whiff Of Joy - where is time going?!

Diesmal gibt es einen Sketch für Euch. Ich habe ihn für meine Karte auf den Kopf gestellt...

This fortnight we have a sketch for you to follow. For my card I turned it upside down...

Die süße Katze, die her versucht  mit ihrer Zunge die Schneeflocken zu fangen, ist aus der neusten Kollektion und heißt "Kitty fängt Schneeflocken". 
Neben zwei dicken Schneebällen habe ich auf meiner Karte ein kleines Röhrchen voll mit glitzernden Eiskristallen untergebracht. 
Der Text ist aus dem Set Glaube, Liebe, Hoffnung. Und ich habe den Text zusätzlich mit der Mützen aus dem Die-Lights-Set Winterliches Zubehör gekrönt.

This cute cat trying to catch some snowflakes with her tongue is from the newest collection and is called "Kitty catching snowflakes".
Beside two big and fluffy snowballs I also added a little bottle filled with sparkeling ice crystals to my card.
The saying is from the german text set "Glaube, Liebe, Hoffnung" and means white christmas. I also put the little hat from the die-light set Winter Accessoires on top of the saying.

Coloriert habe ich mit Copics:
Coloring has been done with Copics:


Sonntag, 3. November 2013

Meine neue Karte für Copic Marker Europe


Hallo Ihr Lieben!
Heute möchte ich Euch die Karte zeigen, die ich für meinen Post auf dem Copic Marker Europe Blog gemacht habe. 

Hello everyone!
Today I want to share the card I made for my new post over at Copic Marker Europe.


Die Peaceful Tilda ist einer meiner Lieblingsstempel aus der neuen Magnolia-Kollektion. Und sie zu colorieren, hat einfach wahnsinnig viel Spaß gemacht. 
Da ich das Motiv im Mittelpunkt stehen haben wollte, habe ich den Rest der Karte weiß in weiß gehalten. 
Näheres findet Ihr auf dem Copic Blog!

Peaceful Tilda is one of my favourites from the new Magnolia collection. And coloring her in was so much fun.
Since I wanted the image to be the focus I kept the rest of the card white on white.
More information can be found over at the Copic Blog!


Samstag, 2. November 2013

Stempeleinmaleins - Ausgabe vom 02. November 2013


Hallo Ihr Lieben!
Es ist wieder Zeit für eine neue Ausgabe des Stempeleinmaleins - diesmal mit einer Anleitung für eine einfache, schnell gebastelte Schachtel.

Hello everonye!
It's time for a new issue of Stempeleinmaleins - this week with a tutorial for an easy, fast to make box.

Und ja, ich weiß - Halloween ist vorüber. Aber ich hatte extra diese Gummi-Augen gekauft und es dann nicht mehr vorher geschafft. Und da die Box einfach perfekt in der Größe/Höhe war, habe ich eben jetzt noch ein Halloweenprojekt - für nächstes Jahr dann eben. ;)

Yes, I know, Halloween is over. But I bought these gumcandy eyes and just didn't make it in time. And since the box was perfect in size/heigth I have another Halloween project to share - as an early idea for next year. ;)


Ich habe oben ein Loch in den Deckel gestanzt - der 1 3/4 Kreis von SU passte genau! - und dann das Auge von innen dagegen gesteckt, mit etwas Klebeband fixiert. Da die Augen einzeln eingepackt sind und in der Mitte einen Ring haben, kann das Auge auch nicht herausfallen...
Der Text ist von SU - die Clearstamps sind ja so schön biegsam - da habe ich einfach den Radius des Textes erweitert.

I punched a hole in the lid - the 1 3/4 circle by SU was perfect in size! - and then put the eye inside the box and through the hole, fixed with some doublesided tape. The eyes are wrapped individually and have a kind of brim around the middle so the eye can't fall out...
Saying is by SU - these clear stamps are so flexible - I just bend it to get a larger radius of the saying.

Schnell und einfach, und trotzdem schön, oder?
Vergesst nicht, bei unserem Geburtstags-Blog Hop mitzumachen! 

Fast and easy but still beautiful, right?
Don't forget to join our birthday blog hop!


Donnerstag, 31. Oktober 2013

Stempeleinmaleins - Geburtstags-Blog-Hop zum 4. Geburtstag!

Willkommen zum Blog Hop des 4. SEME Geburtstags!
Welcome to the blog hop for the 4th birthday of Stempeleinmaleins!

Kaum zu glauben, wie schnell die Zeit vergeht! Das Stempeleinmaleins feiert heute bereits seinen 4. Geburtstag und wir möchten diesen Tag zusammen mit Euch in Form eines Blog Hops feiern. Der Blog Hop startet beim Stempeleinmaleins! Fangt also dort and und besucht dann die einzelnen Blogs der SEME Teammitglieder in der angegebenen Reihenfolge. 
Wenn Ihr von Nadine hierher gekommen seid, dann seid Ihr genau richtig!

It's hard to believe how time flies by. But today Stempeleinmaleins is already celebrating its 4th birthday and we want to celebrate this day with a blog hop. The hop starts at Stempeleinmaleins! So start there and then visit all the DT members' blogs in the order listed. 
If you came here from Nadine's blog then you're on the right track!

Das Team vom SEME bedankt sich herzlich für all eure Unterstützung in den letzten vier Jahren! Ohne  Euch wäre all dies gar nicht möglich. Nach unserem 4. Jahr haben wir über 2200 Leser und hatten über 1.042.790 Besucher. 
Unser Dank gilt natürlich auch unseren  Sponsoren, die unsere monatliche Challenge und diesen Blog Hop noch interessanter machen. Und was täten wir ohne unsere Gastdesigner, die uns in den letzten Jahren so tatkräftig unterstützt haben? DANKE!

The SEME team wants to thank all of you for your support over the last 4 years!
All this would not be possible without you. After 4 years we have more than 2200 followers and had over 1.042.790 visitors.
We also want to thank our sponsors, that make our monthly challenge and this blog hop even more exciting. And where would we be without our gues designers, that were with us during the last years? THANK YOU!

Dieser Blog Hop soll für Euch und uns etwas besonderes sein und deshalb verlosen wir unter allen Blog Hop Teilnehmern Einkaufsgutscheine, die uns netterweise von unseren Sponsoren zur Verfügung gestellt wurden. Um einen Gutschein oder Preis zu gewinnen, müsst Ihr folgendes tun:

We want this blog hop to be special for you and us and so we are giving away gift vouchers, that have been give to us by our sponsors. To win a price or gift voucher you have to follow these steps:

- Blogghoppt vom SEME Blog der Reihenfolge nach durch alle teilnehmenden Blogs und hinterlasst bei jedem SEME Mitgied unter den jeweiligen Postings einen Kommentar
- Sucht Euch eine Anleitung oder Vorlage vom SEME Blog aus und bastelt sie nach
- Postet Euer Projekt anschließend auf Eurem Blog und verlinkt  zum SEME und der verwendeten Anleitung/Vorlage
- Tragt Euch dann unter dem Blog Hop Posting direkt auf dem Stempeleinmaleins Blog (mit dem direkten Link zu Eurem Projekt) in die InLinkz Lliste ein

- Hop around starting at SEME blog and leave a comment at each of the DT members' blog under the blog hop postings
- Choose a tutorial or pattern posted at SEME and make a creation using this tutorial/pattern
- Post your project on your blog and link to SEME and the used tutorial/pattern
- Write your name with a direct link to the project you created in the InLinkz list in the blog hop posting at Stempeleinmaleins blog

Am Blog Hop teilnehmen könnt Ihr bis Donnerstag, 07. November 2013! Am Freitag den 08. November 2013 werden wir alle Blog Hop Gewinner/-innen auf dem SEME Blog bekannt geben. Die Gewinner/-innen werden mit random.org ermittelt.

You can join the hop until thursday, november 7th 2013! All winners will be posted on friday, november 8th 2013 over at the SEME blog. All winners will be choosen by random.org.

Ich habe mir für den Blog Hop die Streichholzschachtel-Anleitung ausgesucht:
I picked the  matchbox tutorial for this blog hop:


Na und weil heute Halloween ist, musste ich die Schachtel auch dementsprechend dekorieren. Hier mit dieser süßen Schnecke von Lelo.

And since it's Halloween today I also had to decorate the matchbox matching this day. I used this cute snail by Lelo Design.


Die  Seitenränder sind mit Spinnennetzen überzogen, vorne ist ein  dicker Brad zum Öffnen der Schachtel angebracht.

The sides of the box are covered with spiderwebs and I added a large brad to open the box.

Aber ich habe noch ein Extra-Gimmick eingebaut - denn was wäre Hallowenn ohne eine kleine "Überraschung"?

But I also added a special effect - what would Halloween be without a little trick?


Wenn man die Box öffnet, dann hüpft einem dieser kleine Geist - der vom gleichen Motiv stammt - entgegen. BOO!

If you open this box, this little ghost, that belongs to the image, comes out of the box. BOO!


Die Süßigkeiten fehlen auf dem Foto noch - aber so ist die Box Süßes und Saures in einem...

The candies are still missing on the photo - but now the box is both, a trick and a treat...

Coloriert habe ich mit Copics:
Coloring has been done with Copics:


Vielen Dank für Euren Besuch. Wir hoffen, dass Ihr auch weiterhin jede Woche beim SEME vorbeischaut oder es ab sofort tut, falls Ihr neu dazugekommen seid. Weiter geht es auf dem Blog von Yvonne.

Thanks for your visit! We hope you keep on visiting the SEME every week - or start doing so if you're new. 
The next stop on the hop is Yvonne's blog.


Dienstag, 29. Oktober 2013

Whiff Of Joy Blog Hop Oktober 2013


Hallo an alle - und herzlich willkommen zum Whiff Of Joy Blog Hop Oktober 2013!
Falls Du hierher nicht von Vicky's Blog gekommen bist, dann schnell zum Start des Blog Hops auf dem Whiff Of Joy Ideenwelt Blog. Ihr wollt doch bestimmt nichts verpassen, oder?
Welcome to the october Whiff Of Joy blog hop!
If you didn't come here from Vicky's Blog, then head on over to the start of the hop at Whiff Of Joy World Of Ideas blog. I don't want you to miss a single stop on this hop!

Diesen Monat gibt es von Whiff Of Joy neue wunderbare Feiertags-Motive, die perfekt für all Eure Weihnachts-Werke sind. Jedes Motiv kommt mit einem oder  mehr passenden Texten, die Euch helfen, Eure Werke noch schöner zu machen. 
Ganz besonders aufgeregt sind wir diesen Monat über die neuen Die-Light  Stanzen. Sie sind einfach grandios und wir wissen, dass Ihr sie lieben werdet - Engelsflügel, Schneeflocken... und mehr! 
Es gibt auch ein neues deutsches Text-Set und ein neues Mixed Media Stempelset von Stephanie Schütze.

This month Whiff Of Joy is releasing more special holiday images that will be perfect for all your Christmas creations. Each image comes with one or more lovely sentimients that will help make your project extra-special. 
We are especially excited with our new die lights this month. They are absolute perfection and we know that you will adore them. Angel wings, snowflakes... and more! 
We also have a new German sentiments set and another gorgeous mixed media stamp set from Stephanie Schütze.

Auch diesen Monat gibt es etwas zu gewinnen: einen Stempel und ein Set Die-Lights aus dieser neuen Reihe. Die Gewinnerin wird unter allen Kommentaren der DT Blogs gezogen. Geht am Ende des Hops zurück auf den Whiff Of Joy Ideenwelt Blog, tragt Euch in das dortige InLinkz Tool ein - dadurch lasst Ihr uns wissen, dass Ihr auf jedem Blog einen Kommentar hinterlassen habt - und schon hüpft ihr in den Lostopf. 
Dort findet Ihr auch eine komplette Blog Hop Liste, falls Ihr unterwegs verloren geht.

This month, we will be giving one stamp and one die-light from our new release to one very lucky winner. The winner will be drawn from the comments on our DT blogs. At the end of the hop, go back to the Whiff Of Joy World of Ideas Blog, let us know that you have left a comment at each stop of the hop by using the InLinkz tool and you will be entered for a chancde to win!
A complete list of the hop is also at this blog, just in case you get lost along the way!

Der Blog Hop endet um Mitternacht am 1. November 2013. Die Gewinner werden auf dem Whiff Of Joy Ideenwelt Blog bekannt gegeben.
The hop will remain open until midnight CEST november 1st. Winners will be announced on the Whiff Of Joy World of Ideas Blog.

Und nun zu meinem Werk:
And now on to my creation:


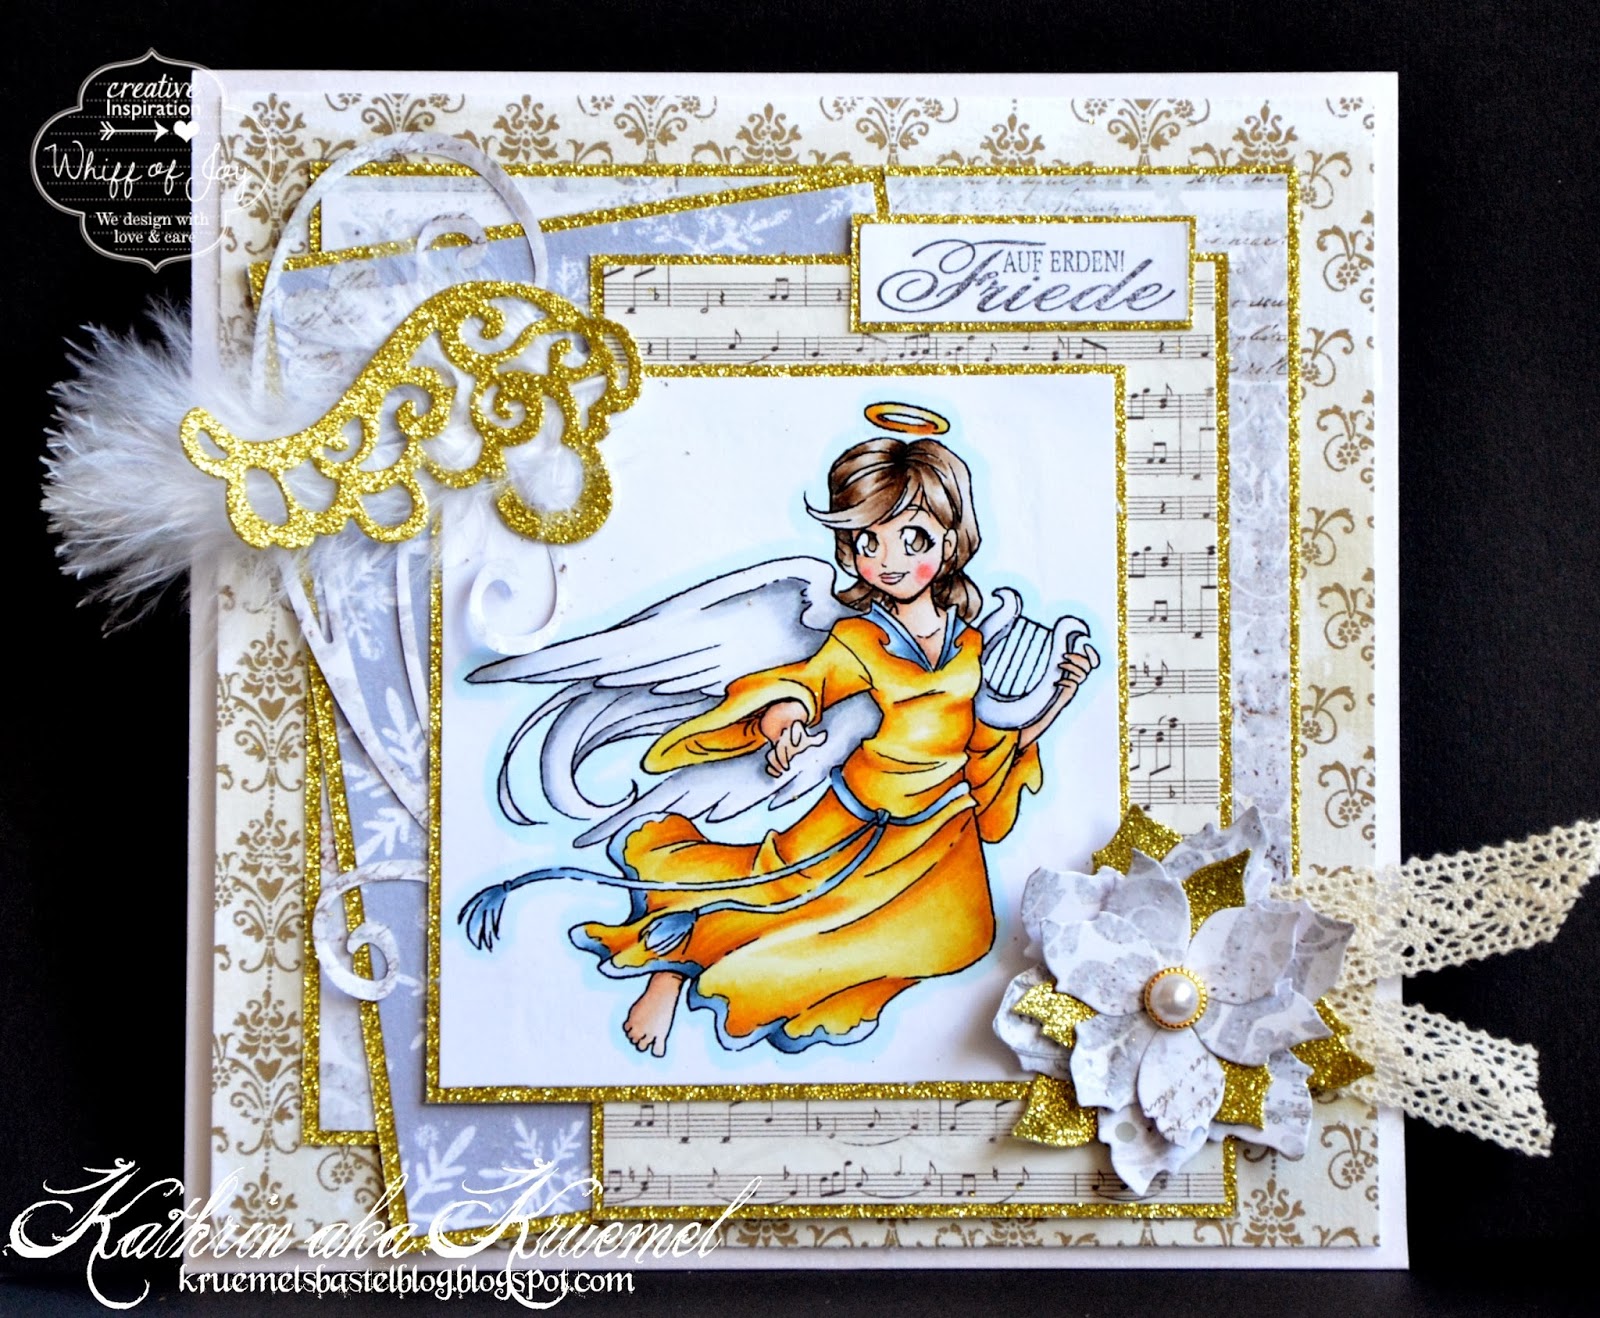
Angel with Harp heißt dieser tolle Stempel. 
Ich weiß  nicht, ob ich es hier je erwähnt habe, aber eine meiner Zwillinge spielt seit 5 Jahren Harfe. Zwar die große Ausgabe, aber dieses Motiv ist einfach perfekt für die Weihnachtskarte für ihre Harfenlehrerin. 

Angel with Harp is the name of this great stamp.
I don't know if I ever mentioned it here but one of my twin daughters plays the harp since 5 years. It's the bigger version she plays but this image is still the perfect one to use on her harp teacher's christmas card.


Das Kleid ist goldfarben coloriert und mit einem Spica Pen habe ich goldenen Glitzer auf die dunkleren Stellen des Kleides aufgetragen. So schimmert es in echt auch  noch wunderbar.

The dress was colored golden and I used a Spica Pen to add golden glitter to the darker areas of the dress. In reality it has a wonderful golden shimmer...

Natürlich durfte Notenpapier nicht fehlen, und um die Karte festlicher wirken zu lassen, habe ich goldenen Glitzerkarton fürs Matting und einge Die Cut Akzente verwendet. 
Der Text ist schon älter, aber ebenfalls von Whiff Of Joy - Friede auf Erden, gibt es einen passenderen Spruch für dieses Motiv?

Of course I had to include some music paper and to make my card more festive I used golden glitter cardstock for the matting and a few die cutting accents.
The saying is a little older but also from  Whiff Of Joy: Peace on Earth. Is there a better saying with this image?

Coloriert habe ich mit Copics:
Coloring has been done with Copics:


So, das wars auch schon von mir - Zeit Euch weiter auf die Reise zu schicken. Der nächste Stop des Hops ist der Blog von Stacy. Habt noch viel Spaß!

 Time to send you forward. The next stop of this hop is Stacy's blog. Enjoy the journey!

Montag, 28. Oktober 2013

Another Whiff Of Joy Sneak Peak


Hallo Ihr Lieben!
Heute gibt es eine weitere Vorschau auf eines der neuen Weihnachtsmotive von Whiff Of Joy, die es ab morgen zu kaufen geben wird: Henry with Tree

Hello everyone!
Today I have another preview on one of the new christmas images by Whiff Of Joy, that will be available tomorrow: Henry with Tree.


Der Baum ist noch nicht fertig geschmückt, aber mit dem glitzernden Stern auf der Spitze sieht er doch schon recht feierlich aus, oder? 

The tree isn't set up yet but with that shining star on top it looks quite festive already, doesn't it?

Die Schneeflocken auf der Karte sind aus Vellum gemacht, zum Mattieren habe ich silberfarbenen Cardstock verwendet. Ansonsten habe ich hauptsächlich Grün- und Türkistöne verwendet. Die sehen prima mit dem Grau der Maus aus. Und der Schnee hat natürlich etwas Stickles bekommen. 
Passend zur Tannenbaumspitze und dem Cardstock habe ich auch noch etwas silberfarbene Spitze unter meinen Schätzen gefunden.

The snowflakes on my card are cut from Vellum, I used silver cardstock to mat my image and papers. For the rest I went with green and turquoise  mainly. These colors look great with the grey of Henry the Mouse. And the snow got some Stickles - what else?
Matching the tree top and the silver cardstock I also found some silver lace amongst my treasures. 

Coloriert habe ich mit Copics:
Coloring has been done with Copics:


Sonntag, 27. Oktober 2013

Magnolia Down Under # 220


Hallo Ihr Lieben!
Auch diesen Sonntag gibt es wieder eine neue Challenge bei Magnolia Down Under. Autumn Vintage ist diesmal unser Thema.

Hello everyone!
Also this sunday there is a new challenge at Magnolia Down Under. And Autumn Vintage is the theme picked for this week.

Ich habe zwei der neuen Weihnachtsstempel verwendet: Tilda mit dem Apfel und den Korb voller Äpfel. Sind die nicht auch perfekt für eine Herbstkarte?
Generell habe ich nur Brauntöne verwendet, nur die Äpfel haben etwas Farbe bekommen. 
Ich habe Frantage Embossing Pulver verwendet sowie weißes Embossingpulver für den Text. Ein Apfelcharm ist an den Tag neben dem Motiv angebracht, dazu viel Spitze und etwas Cheesecloth sowie einige Die Cuts.

I used two of the new christmas images: Tilda with apples and the basket full of apples. Aren't these even perfect for a fall card?
I went with different shades of brown on my card - just the apples got some color.
I used Frantage Embossing Powder and white embossing powder for the text. There is an apple charm attached to the tag next to the image, lots of lace and doilies and some cheesecloth as well as a few die cuts.

Coloriert habe ich mit Copics:
Coloring has been done with Copics: