Samstag, 4. November 2017

Stempeleinmaleins - Ausgabe vom 4. November 2017


Hallo Ihr Lieben!
Mit der heuten Ausgabe des Stempeleinmaleins starten wir offiziell in die Weihnachtszeit. Deswegen gibt es heute einen Easel Box Adventskranz für die Hosentasche für Euch.

Hello everyone!
With today's issue of Stempeleinmaleins we are officially starting christmas season. And so we have an Easel Box Advent Wreath for your pockets today.


Mein Adventskranz ist in weiß, silber und hellgrün gehalten und mit der süßen Schnecke von Lelo dekoriert. Der Adventskranz soll ja in die Tasche passen und ist wirklich nicht groß - das bedeutet auch, dass kein Platz für ein großes Motiv ist. Glaubt es oder nicht, dieses hier war das einzige Motiv, das zum Thema gepasst hat und auf die Box passte, das ich hatte! 
Der tolle Text ist aus dem Adventskalender Set von Kulricke und er passte hier perfekt!
Gefüllt habe ich die Schublade mit 4 weißen Kerzen und einer Mini-Streichholzschachtel, die ich ein wenig beklebt un dekoriert habe. Vor dem Verschenken kommt noch ein Kärtchen mit einem persönlichen Gruß dazu.

My Advent Wreath is made using silver, white and light green and decorated with this cute snail by Lelo. The box is made to fit into your pocket and so it's really not big - and that means there's also nor room for a big image. Believe it or not, this was the only image I had that fitted the theme and size!
I've filled the drawer with 4 white candles and a tiny matchbox that I've covered with designer's paper and added a star and Enamel dot. Before I give it away I will add a little card with a few words.


Öffnet man den Easel Teil, dann kommt der Kranz zum Vorschein. Damit auch nichts passieren kann - Feuer und Papier sind ja nicht die besten Freunde - sind die Kerzen alle im vorderen Teil angebracht. Das hat den Vorteil, dass hinten Platz für etwas Deko ist. Dort habe ich Tannenzweige, kleine silberfarbene Sterne und weiße Blüten angebracht.

When you open the easel part you can see the wreath. To make it safe to burn the candles - fire and paper aren't the best friends - the candles are added to the part thats farther away from the stand with the image. That leaves room for decorations on the back part of the wreath. I've added some fir boughs, little silver stars and some white flowers here.


Und so sieht der Adventskranz dann mit eingesteckten Kerzen aus. Natürlich sollen die nie unbeaufsichtigt brennen lassen!

And this is what the wreath looks with the candles inserted. Of course you should never leave the burning candles unattended!


Donnerstag, 2. November 2017

Ein Adventskalender in einer Box


 Hallo Ihr Lieben!
Heute zeige ich auf dem Kulricke-Blog eine etwas andere Art von Adventskalender. Gemacht ist sie mit der P-Box Stanze (jeder weiß, wofür P steht, aber momentan weiß man ja gar nicht mehr, welche Worte man noch verwenden darf).
Und ich entschuldige mich gleich mal für das Chaos im oberen Teil des Bildes. Dazu weiter unten mehr.

Hello everyone!
Today I am sharing a different kind of advent calendar over at the Kulricke Blog. I made it using a new box die.
And I want to apologize for the mess on the picture, I'll explain it later.

Ich habe die Box aus braunem Cardstock gestanzt und mit dunkelrotem Designpapier mit weißen Punkten beklebt.

I've die cut the box from brown cardstock and covered the front and back with dark red designer's paper with white dots.


Dekoriert habe ich die Box mit dem Zahlenstempel aus dem Stempelset Adventskalender. Ich habe ihn rechteckig ausgeschnitten und braun hinterlegt.
Quer darüber kam dann das ausgestanzte Wort Adventskalender. Das habe ich, genauso wie den Stern aus dem Movers und Shapers Set, aus goldenem Glittercardstock ausgestanzt. Und dieser Glitzer hat meine Kamera offenbar so verwirrt, sie wollte einfach nicht darauf fokusieren.
Vor die Zahlen habe ich dann noch eine Kerze gesetzt. Die ist ein Teil des Mouse The Heat is On Stempels und ich habe sie einfach aus dem Stempelabdruck ausgeschnitten.

I've decorated the box with the numbers stamps from the Adventskalender stamp set. I've cut it out and put some brown cardstock behind it.
Besides a die cut Adventskalender word and a star, both cut from golden glittercardstock that my camera wouldn't focus on, no matter what I tried, I also added a little candle. It is part of the Mouse the Heat is On stamp. I just cut it off the stamped image.


Gefüllt ist der Kalender - oder wird er sein - mit kleinen Papierröllchen an einem Band, auf dem kleine Gutscheine für gemeinsame Unternehmungen am entsprechenden Tag oder auch mal ein Weihnachtsspruch oder -gedicht stehen. Die Röllchen hatte ich noch nicht fertig, wollte aber die Schnüre schon mal in den Kalender stecken - und darum hängen die so unmotiviert aus der Box, denn es sind nur die Schnüre und die Box ist ansonsten leer....Es wird ganz anders aussehen, wenn die Röllchen mal alle an den Schnüren hängen und die Box damit gefüllt ist.
Um die Röllchen kommt rot-weißes Band an dessen Ende ein Kreis mit der Nummer des Tages angebracht ist. Für die Nummern habe ich einfach den Zahlenstempel nochmal abgestempelt und die einzelnen Zahlen dann mit einem ganz kleinen Kreisstanzer ausgestanzt und an das Band getackert.

The calendar is - or will be - filled with little paper rolls on a string on which I will write vouchers for acitivities to do together on that day or also a little christmas poem. I don't have all of these done yet but wanted to have the strings on the picture. And that's why those are standing out kind of strange from the box - it's just the strings in a nearly empty box. It will look different once the papers are attached and the box is filled. ;)
I'll wrap red and white twine around those rolls and add a circle with the number of the day to the other end of the string. I simply stamped the numbers again and used a tiny circle die to cut them out. Then I used a paper stapler with tiny staples to attach the numbers to the circles.

Mittwoch, 1. November 2017

November-Challenge bei Noor!Design UK


Hallo Ihr Lieben!
Es gibt wieder eine neue Challenge auf dem Noor!Design UK Blog. Diesen Monat lautet unser Thema "Winter".

Hello everyone!
We are starting our new challenge over at the Noor!Design UK Blog. This month's theme is "winter".

Ich habe eine Bühnenkarte gemacht. Sie ist aus türkisfarbenem Cardstock gewerkelt. Hinter den Ausschnitt habe ich oben rechts etwas Spitze geklebt, die fast wie Eiszapfen aussieht. Unten rechts habe ich zwei Schneeflocken, einige Blumen und welcher der Glas-Stamen aufgeklebt. Die schauen so schön eis-überzogen aus.

I've made this stage card. It's made from turquoise carstock. Behind the window, to the top right, I've put some lace that reminded me of icicles. On the lower right I've added two snowflakes, a few flowers and some of the glass stamen. Those look like covered from ice.


Außen auf die Karte habe ich Ice Tilda platziert. Hinter ihr im Inneren der Box habe ich ddann eine Winterszene gestaltet. 
Direkt hinter Tilda stehen zwei große Tannen. Ich habe die Pine Trees aus grünem Foamiran ausgestanzt und mit weißer Strukturpaste beschneit.
Die Rückseite der Box ist mit dem Streetwear-Papier von Maja Design beklebt.

To the outside of the card I've put Ice Tilda. And inside the box, behin her, I've created a winter scene.
Two big trees are standing behind her. I've cut the Pine Trees from green Foamiran and used white structure paste to add some snow to them.
The back of the box is covered with the beautiful Streetwear paper by Maja Design.


Und hier sieht man die restliche Deko bzw. restlichen Lagen der Szene. Ich habe hier die Landscape Stanzen von Joycrafts verwendet und etwas versetzt hintereinander gesetzt.

And here you get a look at the other side of the scene. I used the Landscape dies by Joycrafts here and put them behind each other, putting the back one a little higher.


November-Challenge bei Stamping-Fairies


Hallo Ihr Lieben!
Heute startet die neue Challenge auf dem Stamping-Fairies Blog. Und für diesen Monat haben wir uns für das Thema "Weihnachtsstempel und -stanzen" entschieden. 

Hello everyone!
Today the new challenge over at the Stamping-Faires Blog goes life. And for this month we picked the theme of "christmas stamps and dies".

Wie ich sicher schon erwähnt habe, bin ich Mutter von Zwillingstöchtern, und eine der beiden liebt Hunde. Als dann die Happy Pawlidays Stempel von MFT rauskamen, wusste ich, dass ich die für ihre Karte verwenden werde. Und rausgekommen ist dabei diese Shadow-Box Karte.

I guess I already mentioned that I am mom of twin girls, and one of them is a dog lover. So when MFt brought out the Happy Pawlidays stamp set I knew this would make the perfect christmas card for her. And this shadow box card is what I came up with.

Die Karte ist 2 cm hoch, den Ausschnitt habe ich mit der größten der Stitched Square Scallop Frames Stanzen gemacht. 
So wie ich den - hundlich angepassten -Text angeordnet habe, erinnert er mich an das Weihnachtslied von NSYNC - und ja, ich hatte davon zwei Tage lang einen Ohrwurm!

The card is 2 cm high. I used the biggest of the Stitched Square Scallop Frames dies to cut the window.
The way I've added the dog-gy christmas greetings it reminded me of that christmas song by NSYNC. And yes, I had this song stuck in my head for two days!


Das ist die Szene innerhalb der Shadow Box.
Für die "Tapete" habe ich den Distressed Stripes Background in grau auf weißen Cardstock gestempelt. Für das "Parkett" habe ich den Wood Plank Background verwendet.
Alle weiteren Teile sind mit 3D Tape aufeinander gesetzt.
Der Kamin mitsamt Deko ist aus dem Stanzenset Fireplace. Auf die Weihnachtssocken habe ich mit weißem Gelmarker kleine Herzen aufgemalt. Auf den Kamin aus grauem Cardstock habe ich mit Hilfe des Small Brick Backgrounds ein Ziegelmuster aufgestempelt und weiß embosst.
Tannenbaum und Geschenk sind ebenfalls aus dem Happy Pawlidays Stempelset. Und darunter habe ich eine Christbaumdecke gelegt. Dafür habe ich einen der Oval Shadows ausgestanzt und mit einem Gelmarker einen gepunkteten Rand aufgemalt.

This is the scene inside my shadow box.
For the "wallpaper" I stamped the Distressed Stripes Background onto white cardstock using grey ink. For the wooden floor I used the Wood Plank Background.
All other parts are put on top of each other using dimensional tape.
The fireplace with all its decorations is made using the Fireplace die set. I used a white gelly marker to draw two hearts onto the stockings. With the Small Brick Background and white embossing powder I've added the brick pattern onto the fireplace. 
The tree and the gift are from the Happy Pawlidays stamp set again. And I placed a blanket underneath the tree. Therefor I've die cut one of the Oval Shadows and added a few dots to it with a gelly marker.


Und hier kommt endlich der Hund. Weihnachtlich gekleidet ist er ja schon mal, aber er kämpft noch mit der Lichterkette. Die Dinger können aber auch gemein sein! Aber ich hoffe, er schafft es noch rechtzeitig, den Baum zu schmücken.
Auf die Lichter habe ich Glossy Accents aufgetragen, damit sie schön glänzen.

And, finally, here is the dog. He's already dressed up for christmas but is fighting with the lights. Those darn things can be really hard to untangle! And I really hope he will have the tree up in time.
I've covered the light bulbs with Glossy Accents to give them a nice shine.

Und demnächst zeige ich Euch, was ich mir als Pendant für die katzenliebende Tochter habe einfallen lassen!

And soon I will share what I made for the cat loving other twin!


Dienstag, 31. Oktober 2017

8. Geburtstag beim Stempeleinmaleins

Hallo Ihr Lieben!
Wahnsinn, das Stempeleinmaleins feiert seinen 8. Geburtstag! Und es fällt uns immer noch jeden Samstag eine Anleitung für Euch ein. Das ein oder andere mag für den/die ein oder anderen vielleicht nicht neu sein, aber manchmal ist es auch schön, an eine Karten- oder Boxart erinnert zu werden, oder?
Besonders stolz bin ich darauf, dass ich wirklich seit "Stunde null" dabei sein darf. 
Wie auch in den letzten Jahren haben wir Geburtstag und Ihr bekommt die Geschenke. Um die Chance auf einen der tollen Preise, die unsere Sponsoren zur Verfügung gestellt haben, zu haben,  müsst Ihr nur eine unserer vielen Anleitungen - die Colorationsaneitungen gelten nicht! - nachbasteln und im Geburtstagspost verlinken. 

Hello everyone!
OMG, Stempeleimaleins is celebrating its 8th birthday! And we still find something to share with you each saturday. Not everything might be new to everyone but sometimes it's also great to be reminded of a special card or box, right?
I am really proud to be a member of this team from the very first beginning.
Like all the other years we are celebrating and you get the gifts. For a chance to win one of the many prices our sponsors offered you only have to make a project following one of our many tutorials - the coloring tutorials don't count - we've shared so far and add your link to our birthday post.

Auch wir vom Team haben uns jeweils eine "alte" Anleitung ausgesucht - und ich habe mich für die Flatbox entschieden.

Also we from the team picked an "old" tutorial - and I decided to make a Flatbox.


Und weil unser Geburtstag immer auf Halloween fällt, habe ich die beiden Themen verbunden. 
Der süße Frosch ist - mal wieder - von MFT. An denen kann ich momentan einfach nicht vorbei! Er ist mit der No-Lines Technik coloriert. Auf dem MFT-Blog hatte ich einen Post gesehen, in dem geraten wurde, auch mal einen dunklen Hintergrund um das Motiv zu gestalten. So richtig dunkel habe ich mich dann doch nicht getraut, aber mittel- und hellgrau ist er geworden. Und das nächste Mal traue ich mich dann wirklich, denn der Effekt sieht super aus! Und nein, das sind keine Schneeflocken rund um den Frosch sondern Sterne! ;)
Unten habe ich einen BOOO-Text aufgeklebt - der Mund des Froschs sieht so aus, als würde er das sagen. Und in die Os habe ich kleine Wackelaugen geklebt.

And since our birthday is also Halloween I've combined those two themes. 
The cute frog is - again - by MFT. Their images are just my number 1 pick at the moment! He's been colored in without visible lines. And on their blog I read a post where they suggested to add a dark background around your image. Well, I didn't dare to go really dark but at least middle and light grey were used. And next time I'll go really dark because the effect is amazing! I also want to mention that there aren't any snowflakes around him, they are meant to be stars. ;)
To the lower part of the box I've added a BOOO saying. Looking at the frog's mouth made me think that's exactly what he's saying. I also added little goggly eyes as the inner part of the Os.


Die Box ist mit schwarzem Designpapier mit silberfarbenem Spinnennetz-Druck überzogen. Und weil mir die Seiten ein wenig zu fad waren, habe ich da noch grünen Frosch-Schleim aufgeklebt.

The box is covered with a black designer's paper with a silver cobweb print. And since the sides looked too plain to me I also added some green frog slime here.


Sonntag, 29. Oktober 2017

Ein herbstlicher Lollipop Flower


Hallo Ihr Lieben!
Auf dem Noor!Design UK Blog zeige ich heute diese Lollipop Flower, ganz im herbstlichen Design.

Hello everyone!
Over at the Noor!Desing UK Blog I am sharing this Lollipop Flower today, decorated all fall-ish.


Grundlage ist eine große Rosette aus braunem Cardstock, darauf kam ein Kreis aus weißem Cardstock. Das Designpapier ist von Maja Design und Studio 75.
Der Pilz ist aus 3 verschiedenen Lagen zusammengesetzt und mit einem Gelmarker habe ich ein paar weiße Punkte auf den Hut gemalt. Am Stil habe ich den weißen Cardstock ein paar Mal eingeschnitten und die kleinen Streifen ein wenig nach oben gerollt.

As a base I used this large paper rosette, made from craft cardstock. Then I added a circle from white cardstock. The designer's paper is by Maja Design and Studio 75.
The mushroom is put together from 3 different layers and I used a white gelly marker to add a few dots to the red cardstock. I made a few slits into the white cardstock and then rolled up the individual strips a bit.


Die Blätter sind aus elfenbeinfarbenem, olivgrünem und dunkelgrünem Foamiran gemacht. Nachdem ich sie ausgestanzt hatte, habe ich verschiedene Grün-, Gelb-, Orange- und Brauntöne verwendet und so den Blättern ein herbstliches Aussehen verliehen. Langsam scheine ich mit dem Zeug zurechtzukommen. Ich weiß ja nicht, wie das bei Euch ist, aber ich habe normalerweise kein Bügeleisen auf dem Basteltisch. Hier habe ich kurzerhand das Glätteisen meiner Mädels benutzt - das Zimmer ist gleich nebenan und das Bügeleisen ein Stockwerk tiefer - und das hat prima funktioniert! Dann habe ich hier noch ein paar Beeren und einen kleinen Tannenzapfen mit aufgeklebt.

The leaves are made using ivory, olive green and dark green Foamiran. After die cutting the leaves I used different shades of green, yellow, orange and brown inks to give them a fall-ish look. Seems like slowly I am getting the grip on that stuff. Usually I don't have an iron on my craft desk so I used one of my daughters straighteners instead - her room is next door while the iron would have been on the 1st floor and my craftroom is on the 2nd - and that worked great for me!
Then I added some berries and a small pinecone here.


In die Rosette habe ich einen Papierstrohhalm geklebt, den ich direkt unterhalb der Rosette auch ein wenig dekoriert habe. Ich habe etwas Spitze drumgebunden - so wie sie wegsteht passt sie prima zum Pilz - und daran einen großen Schleifen-Charm angebunden.

I've put a paper straw into the rosette and also decorated this a bit. I've wrapped some white lace around it - and it kind of looks like the white cardstock on the mushroom - and then added a big bow charm.


Samstag, 28. Oktober 2017

Stempeleinmaleins - Ausgabe vom 28. Oktober 2017


Hallo Ihr Lieben!
Heute startet die neue Challenge beim Stempeleinmaleins - diesmal wieder mit einem Sketch.

Hello everyone!
Today we are starting our new challenge over at Stempeleinmaleins - and we have a sketch for you to follow this month.

Ich habe diese herbstliche Karte gewerkelt. Das Designpapier hat mich vor eine Herausforderung gestellt, aber ich denke, ich habe es zufriedenstellend hinbekommen.

I made this fall-ish card. The designer's paper was a challenge itself but I think the card turned out okay.


Da im Sketch viel Platz für das Motiv eingeplant ist, habe ich diese Szene gemacht. Dazu habe das Gras gewischt, die Bäume von MFT mehrfarbig abgestempelt und die Blätter auch benutzt, um ein wenig Gebüsch unterhalb der Bäume aufzustempeln.

Since the sketch offers quite some room for the image I created this scene. I used Distress Ink to make the hill/grass, stamped those trees by MFT using several colors and also used the leaves to create the bushes under the trees.


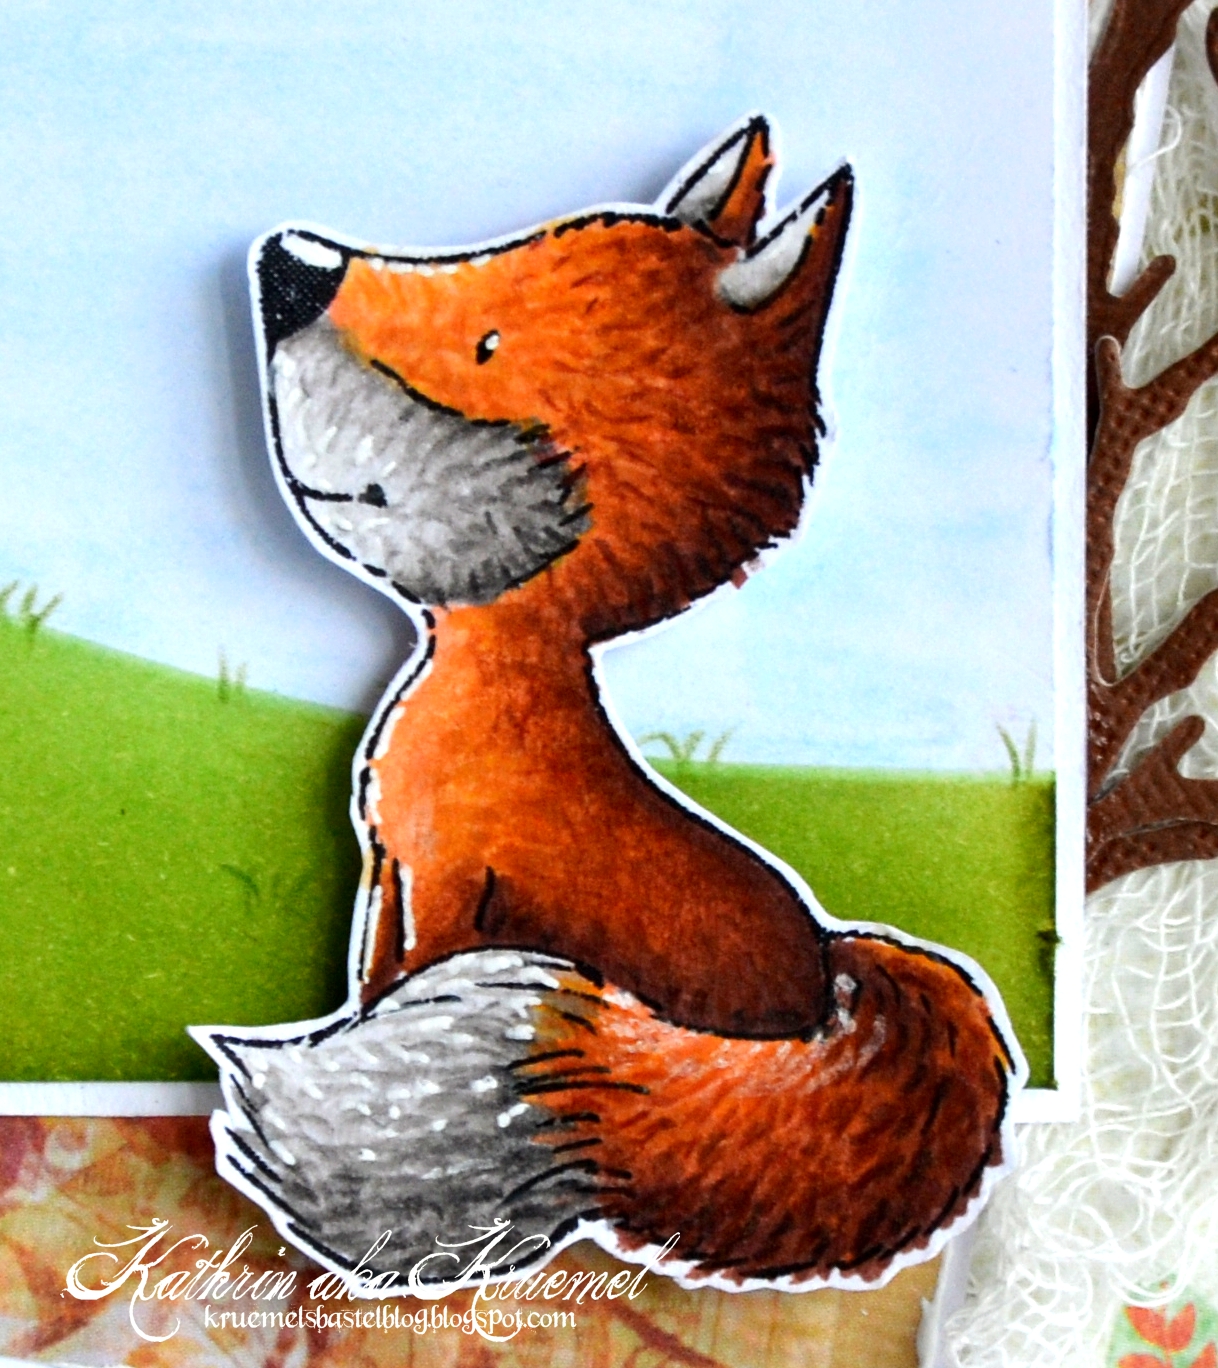
Der süße Fuchs von Kulricke schaut in den Herbstwald. Ich habe ihn mit einer Kombi aus Copics und Polychromos coloriert und dann mit 3D Tape aufgeklebt.

This cute fox by Kulricke is looking into the woods colored by fall. The fox is colored in using a combination of Copics and Polychromos and then glued to the card with dimensional tape.


Oben in der Ecke habe ich einen kleinen Text angebracht. Dazu habe ich die Hälfte der Happy Birthday Frame Stanze von MFT verwendet und in die Mitte ein Herz und ein Blatt mit Schleife gesetzt.
Rechts neben das Motiv habe ich noch ein paar ausgestanzte Zweige geklebt.

In the top right corner I added a saying and used half of the Happy Birthday Frame die by MFT and added a heart, a leave and a bow to the middle.
To the right of the image I also added a few die cut twigs.


Freitag, 27. Oktober 2017

Ein Hexenbesen zu Halloween


Hallo Ihr Lieben!
Heute zeige ich auf dem Stamping-Fairies Blog noch eine schnelle Halloween-Idee. Sieht süß aus und ist - mit einem einfacheren Tag - wirklich schnell gemacht.

Hello everyone!
Today I am sharing another quick idea for a Halloween gift over at the Stamping-Fairies Blog. I think it looks really cute and - with a simpler tag - it's made in like no time.

Es ist ein mit Süßigkeiten gefüllter Hexenbesen. Dafür habe ich einfach ein Reagenzglas "verkleidet".

It's a broom filled with candies. I simply "dressed up" a test tube for it.


Für den unteren Teill des Besens habe ich schwarzen Cardstock und die Mini Fringe Stanze von MFT verwendet. Der untere Teil ist aus zwei dieser Bordüren gefertigt. Den Anfang habe ich an das Röhrchen geklebt und dann einfach drumherum gewickelt. Damit es realistischer aussieht, habe ich die einzelnen Streifen ein wenig nach außen gebogen.
Der obere Teil ist aus nur einer gestanzten Bordüre, die ich dann so zugeschnitten habe, dass nur knapp 1 cm der Fransen übrig ist. Diese Bordüre habe ich dann bündig mit der längeren und verkehrt herum an das Reagenzglas geklebt. Um die Nahtstelle zu überdecken, habe ich etwas grün-weißes Garn um den Besen gewickelt und zur Schleife gebunden.

For the lower part of the broom I used black cardstock and the Mini Fringe die by MFT. The larger part is made from two of those borders. I simply glued the beginning to the test tube and wrapped the border around it. To make it look more realistic I 've bend the fringes a bit outwards.
The upper part here is made from just one of the fringe borders that I've cut so only about 1 cm of the fringes are left. Then this is glued upside down next to the other longer ones. To cover the area where both borders meet I've wrapped some green and white twine around it an tied a bow from it.


Oben habe ich einen Tag ans Reagenzglas gebunden. Dafür habe ich eines der Tall Tag Duos aus weißem Cardstock gestanzt, ihn dann in der Stanze nach oben geschoben und nochmal gestanzt, so dass das Tag kürzer wurde. War etwas frickelig, die Nähte übereinstimmen zu lassen, aber es hat geklappt.
Dann habe ich hier die süße Katze aus dem Stempelset Witch Way is the Candy aufgestempelt und coloriert, mal wieder ohne sichtbare Linien. Zum Schluss kam noch der Text dazu - auch aus dem Stempelset, allerdings habe ich das "alte", bei dem die Text anders geschrieben sind - und also Deko etwas schwarzer Tüll, mehr Garn und ein Kürbis-Charm.

To the top of my test tube I've added a tag. I used one of the Tall Tag Duos here and cut it from white cardstock. Then I've put it back in into the die and cut it again to make it shorter. It was a bit tricky to get the stitches lined up but it worked.
Then I stamped the cute cat from the Witch Way is the Candy stamp set onto the tag and colored it in, again without visible outlines. In the end I've added a saying - from the same stamp set, but I own the old one where the font is different than in the re-released one - and some black tulle, more twine and a pumpkin charm for decorations.

Wundert Euch nicht über die Füllung - irgendwie hatten alle Süßigkeiten, die in das Reagenzglas gepasst hätten, Beine bekommen, so dass ich aus farbtechnischen Gründen auf grüne Keksdeko zurückgreifen musste... ;)

Don't wonder about what I filled the test tube with. Somehow all the candies that would have fit into it disappeared and so, due to color matching, I had to used green tree-shaped sprinkles... ;)


Mittwoch, 25. Oktober 2017

Eine Card in a Box und ein Schulranzen


Hallo Ihr Lieben!
Heute zeige ich gleich zwei Werke auf dem Kulricke-Blog. Das eine ist, wie oben schon zu sehen, weihnachtlich, das andere jahreszeitlich eher ab vom Schuss. Aber dazu später mehr. Erstmal zu meiner Pop Up Card in a Box. Die ist mit der Stanze von Kulricke wirlich fix gemacht - und man hat so schön viel Platz für Deko bzw. Szenen.

Hello everyone!
Today I am sharing two projects over at the Kulricke Blog. As you can see, one is christmas related, the other one is a bit more out of season. But more about that later. First I want to share my Pop Up Card/Box. With the die by Kulricke this type of card is really quickly done - and there's plenty of room for decorations and scenes.

Die drei Seitenflügel sowie die Rückseite habe ich mit Designpapier beklebt. Den Rest habe ich weiß gelassen, passt so schön zum Winter.
Auf den vorderen Flügel habe ich einen Text aus dem Stempelset Weihnachten Elegant aufgeklebt und eine kleine Schleife aus Baker's Twine mit angebracht.

The three side parts and the back were covered with designer's paper. The rest was left blank, it reminds me of snow.
To the front I've added some christmas wishes and also a bow made from green and white baker's twine.


Ich habe in meine Box 4 "Zwischenlagen" eingebaut, was aber absolute Geschmackssache ist. Alle habe ich mit weißem Cardstock beklebt, der den verschneiten Boden darstellen soll.
Felix und Luke holen schon mal den Weihnachtsbaum aus dem Wald. Ich habe hier den Mini-Stempel verwendet.
Auf die Lage dahinter habe ich zwei Häuser geklebt. Für die Dächer habe ich die Häuser noch einmal aus rotem Cardstock ausgestanzt und dann die Dächer abgeschnitten und auf die Häuser aus braumen Cardstock aufgeklebt. Die Fenster sind schwarz hinterlegt.
Der Wald dahinter ist mit dem Tannenbaum aus dem Stanzenset Baum und Blatt gemacht. Ich habe die Tannen mit weißer Paste "beschneit" und dann in unterschiedlicher Höhe festgeklebt. Mit der selben Stanze ist auch die Mini-Tanne im Vordergrund gemacht. Dafür habe ich den unteren Teil des Baumes einfach abgeschnitten.
Und auf der Rückseite der Karte habe ich zwei Wolken sowie den Weihnachtsmann mit seinem Schlitten angebracht.

I've added 4 additional layers inside the box, but that's completl up to you. I've glued some wavy borders from white cardstock to each of them to create a snowy ground.
Felix and Luke are bringing in the tree already. I used the mini stamp here.
To the next layer I've added two houses. For the roofs I've die cut the houses again from red cardstock, then cut off the roof and glued them onto the brown houses. I've added some black cardstock behind the windows.
The woods behind the houses are made using the tree from the Baum und Blatt die set. I used some white paste to add some snow to them and then glued them down to my card. I used the same die for the mini tree on the first panel. I've simply cut off the bottom part.
To the back of my card I've added two clouds and Santa with its sleigh.


Hier kann man die Lagen noch besser sehen. Ich habe zusätzlich bei den Häusern und den Bäumen mit 3D Tape gearbeitet, was für noch mehr Tiefe sorgt.

Here you get a closer look at the layers. In addition I also used dimensional tape between the houses and trees to add even more depth.


Zuerst wollte ich die Seitenteile nicht zusätzlich dekoriere, das war mir dann aber doch zu fad. Darum habe ich hier zwei Schneeflocken aufeinander gesetzt und aufgeklebt. Darauf kam jeweils noch ein kleines Sternchen aus Holz und eine Schleife aus Twine.

First I didn't want to decorate the sides but it just looked too plain. So I've die cut two snowflakes, put them on top of each other and glued them to the sides. Then I've added a small wooden star and a bow from twine.

Und nun noch zu meinem anderen Werk:

And now on to my other project:


Es ist schon eine Weile her, dass die Schule wieder angefangen hat. Aber ich habe trotzdem noch einen Schulranzen zu zeigen... Getreu nach dem Motto "lieber spät als nie". Auch den haben einige von Euch evtl. schon auf einer Messe als Muster am Kulricke-Stand gesehen. Da ich nicht denke, er wäre eines eigenen Blogposts würdig, habe ich ihn hier mit angehängt.

It's a while that school has re-started. But I have a school bag box to share... Better late than never, right? Also this one has already been displayed at the Kulricke booth on a few stamp fairs. Since I didn't think it would be good for an extra blog post I just added it to this post instead.


Der Schulranzen war wirklich schnell gemacht - Dank der Cameo-Datei von Flati. Ich habe ihn aus doppelseitigem Cardstock ausgeschnitten und zusammengesetzt.
Als Deko kam dann der süße Felix mit Schultüte zum Einsatz. Oben an die Schultüte habe ich etwas Zwirn gebunden.
Der Text ist aus dem ABC Schule Stempelset.

This school bag was quickly done - thanks to the Cameo cutting file by Flati. I've cut it from doublesided cardstock.
This cute Felix with his Schultüte - a big cone that is filled with useful stuff, toys and candies and that every child gets at his/her very first day of school - is used for decorations. I've tied some twine around the top of the cone.
The saying means first day of school.


Und ich möchte Euch nicht vorenthalten, dass der Schulranzen auch von hinten perfekt und realistsisch aussieht.

And I also want to show you that this school bag looks perfect on its back also.


Dienstag, 24. Oktober 2017

Eine Karte in Kraft


Hallo Ihr Lieben!
Huch, da habe ich doch glatt vergessen, Euch meine zweite Karte für den Vildastamps Blog diesen Monat zu zeigen! Das wird hiermit nachgeholt - bevor Halloween vorbei ist. Denn auch meine zweite Karte hat das  Thema Halloween.

Hello everyone!
Oops, somehow my post about my second card for october for the Vildastamps Blog went missing! So I am posting it now - before Halloween is over. Because also my second card has a Halloween theme.

Diese Karte ist einfach, ich wollte den Fokus auf dem Motiv haben. Es ist eine weiße Grundkarte mit einem schmalen Rand orange-schwarzem Designpapier, darauf schwarzer Cardstock und darauf dann der Kraftcardstock mit dem Motiv. 
Oben kam der Halloween-Text auf den Cardstock und ich habe mit weißem Gelmarker ein paar Highlights aufgemalt.

This card is pretty simple, I wanted the image be the focus. It's a white card base on which I've put some black and orange designer's paper and then some black carstock on top of that. The next - and last - layer is the craft cardstock with the image.
On the upper area I've stamped the Halloween text and added some white highlights using a gelly marker.


 Und das ist das Motiv "Witch on Pumpkin" -  und das hat aber ewig gedauert. Es ist mein erster Versuch mit Polychromos auf Kraftpapier - bzw. mit Polychromos überhaupt. Ich dachte ja nicht, dass das so lange dauert! Aber mit dem Ergebnis bin ich zufrieden...
Ich habe fleißig Lage über Lage gemalt, damit ich die Farbbrillianz bekomme, die ich wollte und trotzdem mit der Coloration zufrieden war. An den Haaren muss ich definitiv noch üben!
Mit einem weißen Gelmarker habe ich auf den Himmel/Hintergrund ein paar Sterne aufgetupft.
And this is the "Witch on Pumpkin" image - and it took forever! It is my first try with Polychromos on craft paper - and Polychromos in general. I didn't expect the coloring to take that long! But I like the outcome...
I've put layer on layer here to get the colors as brilliant as possible and still am happy with the coloring. I definately have to practice on the hair here!
I used a white gelly marker again to add a few dots on the background meaning them to be stars.


Montag, 23. Oktober 2017

Clean und simple


Hallo Ihr Lieben!
Heute zeige ich auf dem Stamping-Fairies Blog diese Herbstkarte. Ich hatte sie für die "CAS" Kategorie der Design Superstar Challenge bei MFT gemacht. 
CAS ist für mich ja immer die größte Herausforderung. Und auch bei dieser Karte musste ich mir mehrfach sagen "stop, das reicht!".

Hello everyone!
Over at the Stamping-Fairies Blog I am sharing this fall card today. I made it for the CAS category of the Design Superstar Challenge over at MFT.
CAS is always the hardest for me. And also while making this card I had to tell myself several times "stop, that's enough".


Und hier habe ich ein Foto des dekorierten Teils meiner Karte.
Ich habe mir aus einem Stück Kopierpapier ein Rechteck in der Größe ausgeschnitten, das mein Hintergrund haben sollte und dann das Negativ auf die Karte gelegt. So konnte ich innerhalb des Rechtecks wischen.
Für das Gras habe ich einen der Stitched Snow Drifts ebenfalls aus Kopierpapier gestanzt und als Schablone verwendet. Dann habe ich das Gras mit Distress Ink Peeled Paint und Mowed Lawn gewischt. Im Anschluss habe ich mit Distress Ink Weathered Wood und der Mini Cloud Edge Schablone die Wolken gewischt.
Dann habe ich den Baum aus dem Modern Trees Stempelset gestempelt. Auf die Blätter habe ich verschiedenfarbige Tinte aufgetragen und die Blätter mehrfach gestempelt. So entsteht der Look der mehrfarbigen Blätter.
Über die Szene kam dann der Rectangle Shaker Window and Frame - nur der äußere Rahmen -, den ich beim Stanzen etwas verängert habe, so dass genug Platz für Baum, Hintergrund, Bär und Text war.
Der Text aus dem Forest Friends Stempelset ist weiß auf dunkelbraunen Carstock embosst und mit der Hand zu einem Fähnchen zugeschnitten. Dieses Fähnchen kam dann quer über die Karte, so dass oben und unten etwas Gras zu sehen ist.
Ganz zum Schluss kam dann noch der süße Bär aus dem Bitty Bears Stempelset. Er ist mit Copics coloriert und auf dem Regenschirm habe ich dann noch mit einem Gelmarker ein paar kleine weiße Punkte aufgemalt.
Und da ich doch nicht ganz ohne Deko kann, haben zumindest noch 4 Gloss-Punkte, gemacht mit  Enamel Accents Lemon Twist, Platz auf der Karte gefunden.

And here is a close-up of the decorated part of my card.
I've cut a rectangle from a sheet of copy paper, making it the size I wanted my background to be. Then I used the paper with the cutout as a stencil to be able to create the background within the rectangle.
For the grass I've die cut one of the Stitched Snow Drift edges from copy paper and used as a stencil as well. Then I used Distress Ink Mowed Lawn and Peeled Paint to bring the grass onto my card. For the clouds I used the Mini Cloud Edge stencil and Distress Ink Weathered Wood.
Next I've added the tree from the Modern Trees stamp set to my scene. I used different inks for the leaves, only inking up parts of the stamp each time. That is how those multi-colored leaves were made.
On top of the scene I've put the frame from the Rectangle Shaker Window and Frame die set that I made a little longer while cutting it out. That left enough room for the tree, the background, the bear and the saying.
The saying is from the Forest Friends stamp set and heat embossed with white embossing powder onto dark brown cardstock. Then I handcut the cardstock with the sentiment to create the little banner. The banner was then added across my card, leaving a bit of grass visible over and under the banner.
At the end I've added this cute bear from the Bitty Bears stamp set. He's colored in with Copics and I added a few white dots to the umbrella with a white gelly marker.
And since I can't go completly without embellishments I added at least four yellow glossy dots, made using Enamel Accents Lemon Twist.


Sonntag, 22. Oktober 2017

Eine Halloweenbox


Hallo Ihr Lieben!
Heute zeige ich wieder etwas auf dem Noor!Design UK Blog. Und ja, ich habe mal wieder das Thema Halloween aufgegriffen. Und ich möchte Euch zeigen, dass Ihr dafür nicht unbedingt spezielle Halloween-Dies oder -Stempel braucht.

Hello everyone!
Today I am sharing another creation over at the Noor!Design UK Blog. And yes, it's Halloween related. I also want to show you that you don't have to have any dies or stamps made especially for Halloween to make a Halloween craft.

Ich habe eine Mini-Popcornbox gemacht. Sie ist aus grauem Cardstock und ich habe ein Designpapier mit Mauerdruck in grau-weiß daraufgeklebt.
Gefüllt ist die Box mit diesen geschredderten Papierstreifen und einem Cellophanbeutel  voll mit Süßem. Um die Tüte zu verschließen, habe ich grün-weißes Twine drumgewickelt und eine kleines Stück Spitze mit in die Schleife gebunden.

I made a mini popcorn box. It's cut from grey cardstock and I've put some designer's paper with a wall print in white and grey on it.
The box is filled with those shredded papers and a clear treat bag filled with candies. To close the bag I've tied some green and white twine around it and added a piece of lace here.


Der süße Singing Napoleon von Magnolia sieht mit seiner Mütze doch aus wie ein Zauberer, oder? Und außerdem hat er sich ein grünes Lätzchen umgebunden.
Dahinter habe ich einen weißen Holzzaun gesetzt, den ich etwas schwarz eingefärbt und durch den ich eine Efeuranke habe wachsen lassen. Die Efeuranke ist aus grünem Foamiran gestanzt. Ich komme damit ehrlich gesagt nicht ganz klar, darum muss es für kleinere Deko herhalten. Aber mit einem Embossingföhn angewärmt, biegt es sich ganz leicht, was der Ranke einen tollen Look gibt.

The cute Singing Napoleon looks like a magician, right? He also put on a green bib. 
I've put a white wooden fence behind him that I put some black ink on and wrapped some ivy through it. The ivy is cut from green Foamiran. Honestly, I can't figure out how to use it, no matter how many videos I watch. So I am using it to cut decorations from it. And if you heat it up with an embossing tool the edges bend which adds a nice look.


Das Boo ist aus lilafarbenem Foamiran gestanzt. Und für den Mond aus gelbem Cardstock habe ich einfach zwei Kreisstanzer verwendet.

The Boo is cut from purple Foamiran and for the moon from yellow carstock I simply used two circle punches.