Samstag, 18. Februar 2023

Eine Freundschaftskarte

 
Hallo Ihr Lieben!
Vor kurzem habe ich Euch ja eine Karte mit Pinsel und Regenbogen gezeigt. Auf der Suche nach einem passenden Text für diese Karte, bin ich über das Rainbow Greetings Stempelset von MFT gestolpert, in dem ein Text "friendship is like a rainbow between two hearts" enthalten war. Sofort kam mir die Idee, diesen Text zum Star einer Karte zu machen. Und voilà - hier ist sie.

Hello everyone!
A few days ago I shared a cards with a paint brush and rainbow with you. While looking for the right text for that card, I came across the Rainbow Greetings stamp set by MFT, that includes a "friendship is like a rainbow between two hearts" text. So I got the idea to make this text the star of its own card. And voilà - here it is.

Beim Ausstanzen der Buchstaben war mir ziemlich schnell klar, dass sie nur auf eine Slimline Card passen würden. Also habe ich ein Stück schwarzen Cardstocks passend zugeschnitten und mit goldener Metallic Watercolor bespritzt.

While die cutting the letters for my text I realized quite quickly, that they will only fit a slimline card. So I cut a piece of black cardstock the right size and flicked some gold metallic watercolor onto it.


Die Buchstaben für die Worte Friendship und Hearts sind jeweils 4 mal aus weißem und einmal aus rotem Cardstockstock gestanzt und aufeinander geklebt, wobei ich die rote Lage ein wenig versetzt habe. Gestanzt habe ich sie mit dem Wedding Alphabet Stanzenset von XCut. 
Die kleineren Buchstaben habe ich mit dem Alphabet Lowercase Set von CraftEmotions jeweils nur dreimal aus weißem Cardstock gestanzt und ebenfalls aufeinander geklebt.

I die cut the letters for the words friendship and hearts four times from white and once from red cardstock, then stacked them, offsetting the top red layer a bit. I used the Wedding Alphabet die set by XCut to cut the letters.
The smaller letters I only cut three times each from white cardstock, using the Alphabet Lowercase die set by CraftEmotions, and stacked those as well.


Statt das Wort Rainbow ebenfalls auszuschreiben, habe ich einen gestanzten Regenbogen verwendet. Der Regenbogen ist mit der Rainbow Whimsy Stanze von MFT gemacht, für die Wolken habe ich Stanzen aus dem Spring Showers Set von LawnFawn benutzt. 
Da der Regenbogen nur fünf statt sechs Bögen hat, habe ich diese aus orangefarbenem - der wirkt auf dem Bild aber irgendwie ebenfalls gelb -, gelbem, grünem, blauem und lilafarbenem Cardstock gestanzt. Das Rot habe ich dann durch die großen Buchstaben mit auf die Karte gebracht. 
Nach dem Zusammenkleben habe ich die Bögen des Regenbögens noch mit einem klaren ZIG Aqua Shimmer Pen beglittert.

Instead of actually writing the word rainbow I decided to use a die cut rainbow.
The rainbow is made with the Rainbow Whimsy die by MFT, for the clouds I used dies from the Spring Showers die set by LawnFawn.
Since this rainbow only has five instead of six arches, I die cut these from orange - which strangely looks yellow on the photo-, yellow, green, blue and purple cardstock and added the red by using red cardstock to die cut the large letters from. 
After putting the rainbow together I used a ZIG Aqua Shimmer Pen to make it a bit sparkly.


Wie Ihr sicher schon mitbekommen habt, liebe ich Karten mit Dimensionen. Also habe ich ein Stück Acetate ausgeschnitten, das rundum einen etwas 1cm breiten Rand zum schwarzen Cardstock hat. Darauf habe ich dann einen Rahmen aus goldenem Metallic Cardstock geklebt. Um den zu fertigen, habe ich eine der Stitched Rectangle Frames Stanzen von LawnFawn benutzt und sie durch Partial DieCutting von der Höhe her verdoppelt. 
Das Acetate mit dem Rahmen habe ich mit 3D Tape auf dem schwarzen Cardstock befestigt. Darauf kamen dann die ausgestanzten Buchstaben und der Regenbogen.
Zum Schluss habe ich noch einige goldene Pailetten auf dem Regenbogen verteilt, auf die roten Buchstaben weiße Highlights gemalt und alles auf eine weiße Slimline Card geklebt.

As you might have noticed already I love cards with dimension. So I cut a piece of acetate, cutting it to a size that leaves a brim of about 1 cm to each side of the black cardstock. On top I attached a frame cut from gold metallic cardstock. To die cut this, I used one of the Stitched Rectangle Frames by LawnFawn and did partial diecutting to make it about twice as long.
I adhered the acetate with the glued on frame onto the black cardstock using foam tape, then put the die cut letters and the rainbow on top.
To finish the card I added a few gold sequins to the rainbow, drew some white highlights onto the red letters and adhered everything to a white slimline card.

Freitag, 17. Februar 2023

Valentinstag mal 3

 
Hallo Ihr Lieben!
Wir haben schon immer unseren Kindern eine Kleinigkeit zu Valentinstag gegeben. Keine großen Geschenke oder so, nur ein kleines "Wir haben Dich lieb". Unsere Große wohnt in derselben Stadt wie wir, also kein Problem, aber unsere Zwillinge studieren in verschiedenen Städten ein Stück entfernt. Also wollte ich diese Kleinigkeit dieses Jahr verschicken. Und nachdem die pünktlich ankamen, kann Euch die Karten nun zeigen.

Hello everyone!
Valentine's isn't as big a thing here in Germany as it is in the US and most likely other countries. Usually only your significant other will get a little something liked chocolats or flowers - and many don't do it. Well, we've always been giving our girls a little something. No big gifts, just a little "we love you". Our oldest is living in the same town as we do, so that wasn't a problem. But our twins are attending universities in different towns a bit away from us. So I wanted to send them a little note. And since those have arrived in time, I can share the cards with you.

Ich gebe zu, die Idee, ihnen eine Karte mit kleinem Geschenk zu schicken statt sie ihnen persönlich zu geben - dieses Wochenende kommen beide mal nach Hause - kam mir recht spät. Und dann drohte die Post noch damit, wieder zu streiken, so dass die Zeit etwas knapp wurde, zumindest wenn alle Karten rechtzeitig ankommen sollten. Also habe ich kurzerhand drei identische Karten gemacht. Mag ich ja eigentlich nicht so gerne. Da ich aber zudem einen sehr ausgeprägten Gerechtigkeitssinn habe, kommt mir das sehr entgegen. So muss sich jede mit der selben Karte "zufrieden geben". ;)

I have to admit, that I got the idea of sending them something instead of giving it to them personally - they both will be home the coming weekend - pretty late. And then the german post announced more strikes and I was running out of time, at least if I wanted to make sure it arrived on time. So I made three identical cards. Something I don't enjoy usually. I have to add, that I have a very distinct sense of justice, so making three identical cards felt great because each of them had to "deal" with the same card. ;)


Für den Hintergrund habe ich die Herzen aus dem schon älteren Stempelset Klassische Hochzeit von CreativeDepot mit Distress Ink Lumberjack Plaid auf Watercolor gestempelt. Dann habe ich sie mit der selben Farben, gemischt mit Wasser, ganz rudimentär coloriert. 
Nachdem der Hintergrund getrocknet war, habe ich erst schwarze Metallic Watercolor aufgespritzt, dann mit Distress Oxide Hickory Smoke noch den Typewriter Background von MFT darüber gestempelt. Das neue Lost Shadow hätte mir fast ein wenig besser gefallen, da es heller ist, aber das habe ich zwar bestellt, aber noch nicht im Haus. Also musste das Altbewährte herhalten.

For the background I stamped the hearts from the already older stampset Klassische Hochzeit by CreativeDepot with Distress Ink Lumberjack Plaid onto watercolor cardstock. ThenI used the same ink, mixed with water, to very simply color the hearts in.
After the background had dried, I first flicked some black metallic watercolor onto it, then staped the Typewriter Background by MFT over it using Distress Oxide Hickory Smoke. I think, the new Lost Shadow would have looked a bit better since it's lighter. I have ordered it, but didn't have it by the time I was making the cards. So I had to stick with the "good old stuff". 


Apropos Altbewährtes - momentan nehme ich sehr oft ältere/alte Stempel und Stanzen für meine Karten. Fast wie wiederentdeckte Schätz. So auch hier.
Ich habe den You are so Loved Stempel von MFT erst mit Versafine Clair Nocturne auf Vellum gestempelt, dann klar darüber embosst. Schwarzes Embossingpulver und ich stehen auf Kriegsfuß, egal wieviel Antistatic Powder ich auf den Cardstock packe, das schwarze Pulver klebt einfach überall. Deswegen habe ich mir hier so beholfen.
Der süße Bär ist ebenfalls von MFT, aus dem Joyful Heart Bears Stempelset. Ich habe ihn mit einem hellen Hybrid-Stempelkissen von MFT abgestempelt und dann in No-Line Technik mit Copics und Polychromos coloriert. Dann habe ich den Bären ausgeschnitten. 
Als kleinen Untertext habe ich dann noch ein Happy Valentine's Day aus dem Itty Bitty Love Stempelset von MFT weiß auf schwarzen Cardstock embosst.
Den Bären habe ich mit dünnem 3D Tape auf die untere rechte Ecke des Vellums geklebt, dann habe ich dahinter ebenfalls 3D Tape aufgebracht. Um das Vellum zumindest noch an einer weiteren Stelle auf der Karte zu fixieren, habe ich oben noch ein rundes Schaumklebepad verwendet. Die hatte ich nur in schwarz da und so sieht man einen kleinen schwarzen Rand hinter der roten Perle, die ich zum Verdecken darüber geklebt habe. Außerdem habe ich zwei weitere Perlen auf das Vellum geklebt.
Auch der schwarze Streifen mit dem Valentinstagsgruß ist mit dünnem 3D Tape aufgeklebt.

Talking about the good old stuff - recently I have been using older/old stamps and dies often. They feel like re-discovered treasures.
I stamped the You are so Loved stamp by MFT onto Vellum using Versafine Clair Nocturne ink, then put some clear embossing powder on top. Black embossing powder and me, we are no friends. No matter how much of an antistatic powder I put on my cardstock, that black stuff is sticking everywhere. So that's what I did instead. 
The cute bear is also by MFT, from their Joyful Heart Bears stamp set. I stamped it with a light hybrid ink pad by MFT and then did some no-line coloring with Copics and Polychroms. Then I cut the bear out.
As a little subtext I white heat embossed the "happy Valentine's Day" text from the Itty Bitty Love stamp set by MFT onto black cardstock.
I attached the bear with thin foam tape to the bottom right corner of the vellum, then put more foam tape behind it. To be able to fix the vellum on at least one other spot, I used a foam dot in the top left area. I only had black ones at hand, so there's a little black frame visible behind the red pearl that I used to cover the foam pad. I also added two more pearls to the vellum.
Also the strip with the Valentine's text is adhered with thin foam tape.


Zum Schluss habe ich den Cardstock schwarz gemattet und auf einen weißen Kartenrohling geklebt. 
Da ich hinter 3D Tape immer ein klein wenig Flüssigkleber setze - dem Tape alleine traue ich nicht so ganz - hat sich mein Vellum an den beiden Ecken, die nicht am Hintergrund angeklebt sind, nach oben gewellt. Das hat sich etwas später noch ein wenig gelegt, ich fand das aber von Haus aus nicht schlimm, eher ein wenig lustig.

To finish this card I matted the cardstock black and attached it to a white note card.
Since I always put a bit of liquid glue behind my foam tape - I just don't trust it to hold over a longer period of time - the two corners of the vellum, where there was no foam tape used to fix it to the card, curled up a bit. It got a bit better after a few hours, but it generally didn't bother me. I thought it looked kind of funny.

Donnerstag, 16. Februar 2023

Kuschelzeit

 
Hallo Ihr Lieben!
Heute zeige ich auf dem Stampcorner Blog eine weitere Karte mit einem Motiven aus dem zuckersüßen Stempelset Kuschelzeit. Das kleine Hasenmädchen wollte ja auch in Szene gesetzt werden!

Hello everyone!
Today over on the Stampcorner Blog I am sharing another card with an image from the very cute stamp set Kuschelzeit. The cute little bunny girl wanted to get on a card as well!

Hier habe ich einfach ein Stück weißen Cardstocks für den Hintergrund verwendet. Erst wollte ich rote Metallic Watercolor aufspritzen, habe mich dann aber dagegen entschieden.
Quer über die Karte habe ich dann zwei Streifen Designpapier aus dem Paper Pack 02 geklebt. Dabei habe ich den Rand des gestreiften Papiers mit einer der Stanzen aus dem Stanzenset Wave gestanzt. Ich habe einfach die größte der Stanzen quer genommen und konnte so einfach die Kante meines Papiers in Querformat ausstanzen. Über die Stoßkante der beiden Designpapiere habe ich dann mit dünnem 3D Tape ein Stück weißen Cardstocks geklebt, dessen obere Kante ich mit einer Wolkenstanze gestanzt habe.

Here I simply used a piece of white cardstock for my background. I had planned to flick some red metallic watercolor onto it, but then decided against it.
Across the card I attached two strips of patterned paper from the Paper Pack 02. I used one of the Waves die to cut the edge of the striped paper in a wavy shape. I simply used the largest of these rectangle dies in a landscape orientation to cut the edge of my portrait sized paper. Over the seam of those two patterned papers I adhered a strip of white cardstock, the top edge I had cut into clouds with a cloud border die, using thin foam tape.

 
Als Rahmen um das Motiv habe ich den Big Hugs Circle Frame von MFT aus korallefarbenem Cardstock gestanzt und auf die Wolken geklebt.
Das Hasenmädchen habe ich mit Copics coloriert und das Muster auf dem Kleid sowie die Highlights mit einem weißen Gelstift dazugemalt. Dann habe ich es ausgeschnitten und mit 3D Tape auf den Wolken befestigt. 
Den Text aus dem selben Stempelset habe ich mit weißem Embossingpulver auf einen Streifen schwarzen Cardstocks embosst und mit dünnem 3D Tape aufgeklebt. Dabei habe ich die Kante des Streifens ein klein wenig unter das Motiv geschoben. 
Als Deko habe ich einige kleine rote Herzen auf der Karte verteilt. Außerdem habe ich die Love Speech Bubbles von MFT aus rotem Cardstock gestanzt, schwarze Herzen in die Sprechblasen eingesetzt und eine davon direkt über dem Hasenmädchen - wieder mit 3D Tape - aufgeklebt.

As a frame around my image I die cut the Big Hugs Circle Frame by MFT from some coral cardstock and adhered it to the clouds.
The bunny girl I colored with Copics and added the pattern to the dress as well as some highlights with a white gel pen. Then I cut her out and attached her to the clouds with foam tape.
The text means "time to snuggle" and is white heat embossed onto a strip of black cardstock. I used thin foam tape to attach the strip to the card, tucking the end of it under the image.
To decorate the card I added a few small hearts, cut from red cardstock. I also die cut the Love Speech Bubbles by MFT from red cardstock, put black hearts into the bubbles and glued one of them directly above the bunny's head, using foam tape again.

 
Der obere Rand der Karte war noch etwas leer. Deswegen habe ich aus dem rot-weiß gestreiften Designpapier noch ein kleines Banner geschnitten, aufgeklebt und mit zwei weiteren der Herz-Sprechblasen verziert. Dabei habe ich die kleinen "Spitzen" der Sprechblasen abgeschnitten, so dass sie eher wie unebene Kreise wirken.
Zum Schluss habe ich alles rot gemattet und auf einen weißen Kartenrohling geklebt.

The top edge of the cardstock looked a bit plain to me. So I cut a little banner from the red and white striped paper, glued it down and decorated it with two more of the speech bubbles. I cut off the little "tips" of the bubbles so they look a bit more like wonky circles. 
To finish this card, I matted the white cardstock red and attached it to a white note card.

Dienstag, 14. Februar 2023

Make a Wish

 
Hallo Ihr Lieben!
Heute habe ich wieder eine Geburtstagskarte für Euch - diesmal eher elegant gehalten. 

Hello everyone!
Today I have another birthday card to share - and this one is a more elegant one.

Für den Hintergrund habe ich mit goldener Folie und der Hynotic Hotfoil Plate von Spellbinders die gepunkteten Strahlen auf weißen Cardstock foliert. 

For the background I gold hot foiled the Hypnotic background by Spellinders onto a piece of white cardstock to created those dotted rays.


Für den großen Text in der Mitte meiner Karte habe ich den Wish Ornament von HeroArts aus goldenem Spiegelcardstock gestanzt und per Hand - sowie einer etwas größeren Kreisstanze - einen Schatten aus schwarzem Cardstock geschnitten/gestanzt. Die beiden Teile habe ich aufeinander und dann auf einen wieder etwas größeren Kreis aus Vellum geklebt. Den habe ich dann mit 3D Tape mittig auf dem Hintergrund befestigt und konnte mich super an den folierten Punktekreisen orientieren.
Die kleineren Texte sind aus den Stempelsets Bitty Birthday Wishes, Itty Bitty Celebrations und Itty Bitty Birthday von MFT. Ich habe sie auf schwarzen Cardstock weiß embosst und die Streifen dann mit dünnerem 3D Tape über den Kreis mit dem Text geklebt.
Die tollen Blumen sind aus dem Stempelset Flowers in Bloom, ebenfalls von MFT. Ich habe sie hellgold auf Watercolor Cardstock embosst und mit Watercolors in hellem Goldbraun coloriert. Die Blumenmitten habe ich schwarz eingefärbt, die Stiele habe ich weiß gelassen, das passte farblich am besten. Die Linien in den Blumen habe ich mit einem passenden Polychromo, die Highlights mit einem weißen Gelstift hinzugefügt. Dann habe ich das Motiv per Hand ausgeschnitten - die passende Stanze ließ einen Rand, der mir für diese Karte zu breit war - und mit dickerem 3D Tape so aufgeklebt, dass die Blüten den runden Text auf der linken Seite überlappen.

For the large text in the center of my card I die cut the Wish Ornament die by HeroArts from gold mirror cardstock and then cut a black shadow by hand - and with the help of a slightly larger circle die. I glued both pieces together and then attached them to another slightly larger circle cut from Vellum. I adhered the circles with foam tape to the center of my card - and those foiled dotted circles were a great help to really center the text. 
The smaller texts are from the stamp sets Bitty Birthday Wishes, Itty Bitty Celebrations and Itty Bitty Birthday by MFT. I white heat embossed them onto black cardstock and adhered the strips to the circle with the text using thin foam tape.
The beautiful flowers are from the Flowers in Bloom stamp set, also by MFT. I heat embossed them with light gold embossing powder onto watercolor cardstock and colored them with watercolors in a golden brown. The flower centers are colored black, the stems I kept white, I liked that best for this card. With a matching Polychromo I added the lines to the petals and some highlights with a white gelpen. Then I cut the flowers out by hand - the matching die left a brim too wide for this card design - and adhered them with thicker foam tape, making them overlap the left side of the text circle.


Hier könnt Ihr den Glanz der Folierung und des Spiegelcardstocks besser sehen.
Um die Karte fertig zu stellen, habe ich einige schwarze Perlen als Deko darauf verteilt und dann alles wieder mit 3D Tape auf einen Kartenrohling geklebt. Der dekorierte Cardstock ist 0,5 cm schmäler/niedriger als die Kartenbasis, das sieht man aber auf dem Bild irgendwie nicht wirklich.

Here you get a better look at the shine of the foiling and the mirror cardstock.
To finish the card, I added a few black pearls to the background, then mounted it onto a white card base, using foam tape again. The decorated cardstock is about 1/4" narrower/smaller than the card base, but somehow you can't really tell from looking at the picture.

Montag, 13. Februar 2023

Mit Dir ist alles bunter!

 
Hallo Ihr Lieben!
Monochrom und bunt gleichzeitig - ja, das geht! Wie, zeige ich mit dieser Karte auf dem Stampcorner Blog. Dort ging sie schon im Januar online, weil ich - ganz außer der Reihe - mittwochs einen Extra-Post gemacht habe. Aber ich möchte sie Euch hier nicht vorenthalten.

Hello everyone!
Monochrome and colorful at the same time - yes, it works! And the card that I used both color schemes is the one I was sharing over at the Stampcorner Blog back in january, when I took over a wednesday as an extra. But I want to share it on my own blog as well.

Im Januar-Release war auch ein Stencil mit tollen Farbklecksen, und der passt super zur Künstlerkatze aus dem Mit Dir ist alles Bunter Stempelset aus dem Adventskalender, den es aber wie alle Adventskalenderstempel nun zum regulären Preis im Shop gibt. Und irgendwie kam mir dann die Idee, nur einen Teil der Karte bunt, den Rest in Grautönen zu gestalten.
Ich habe hier ein Stück hellgrauen Cardstock etwas kleiner als meinen Kartenrohling zugeschnitten und dann mit der besagten Kleckse-Stencil sowie Distress Oxide Hickory Smoke und Black Soot Kleckse auf den Cardstock aufgewischt. Dann habe ich noch etwas schwarze Watercolor darüber gespritzt.
Mit dem Canvas and Easel Stanzenset von LawnFawn habe ich dann die Staffelei und die Leinwand gestanzt. Die Staffelei ist aus braunem Cardstock gestanzt und an den Enden mit Distress Oxide Ground Espresso ein wenig abgedunkelt. Die Leinwand habe ich aus weißem Cardstock gestanzt und dort auf den grauen Cardstock gelegt, auf dem ich ihn später aufkleben wollte. Dann habe ich auch auf die Leinwand Kleckse aufgewischt und zwar so, dass sie mit den Klecksen auf dem grauen Cardstock übereinstimmen bzw. fortlaufend sind. 
Später habe ich noch den Text aus dem selben Stempelset auf ein Stück weißen Cardstock gestempelt, der gleichzeitig als Boden für den Maler und die Staffelei dient. Dabei habe ich die obere Zeile des Textes schwarz gestempelt, beim Wort bunter! habe ich jeden Buchstaben in einer anderen Farbe eingefärbt. So sieht das Wort seiner Bedeutung entsprechend aus.
Dann habe ich den Cardstockstreifen unten bündig mit dem grauen Cardstock aufgeklebt und mit einem schwarzen Fineliner noch einen Rahmen aufgemalt.

In Stampcorner's january release there is a stencil included, that can be used to make large splatters - and it goes perfectly with the cat artist from one of the stamp sets from their advent calendar. And then I had the idea of only making part of the card colorful and stick with greys for the rest of the card.
I cut a piece of light grey cardstock a bit smaller than a note card and then used said splatter stencil and Distress Oxide Hickory Smoke and Black Soot to fill the grey cardstock with splatters. Then I spritzed some black watercolor on top.
Using the Canvas and Easel die set by LawnFawn I die cut an easel and a canvas. I cut the easel from brown cardstock and darkened the edges with Distress Oxide Ground Espresso. The canvas I die cut from white cardstock, then laid it in the spot where I wanted to glue it down on my card later. Then I added splatters to the canvas as well, making sure to make them continous to the ones on the background. 
Later I stamped a "you make my life colorful" text onto a strip of white cardstock, that I also wanted to use as the ground for the cat to stand on. I stamped the upper line black, then inked up each letter of the word colorful in a different color. Now the look of the stamped word matches its meaning. 
I attached the cardstock strip with the stamped on text onto the bottom of the grey cardstock and used a black fineliner to add a hand drawn frame.


Ich habe auf die Leinwand vier Kleckse gewischt und dafür jeweils zwei Distress Oxide Farben verwendet: Twisted Citron und Mowed Lawn für den grünen Klecks, Peacock Feathers und Uncharted Mariner für den blauen, Mustard Seed und Carved Pumpkin für den gelben und Crackling Campfire und Festive Berries für den roten Klecks. Dann habe ich goldene Metallic Watercolor auf die Leinwand aufgespritzt.
Die Katze habe ich abgestempelt und ausgeschnitten. Und da alles außerhalb der Ränder der Leinwand in Grautönen gehalten ist, habe ich beschlossen, auch die Katze passend zu colorieren. Also habe ich die Katze auf die Leinwand gelegt und mir die Ränder der Leinwand leicht auf das Motiv übertragen. Anschließend habe ich sie mit Copics coloriert - bunt innerhalb der Ränder der Leinwand, in Grautönen außerhalb. 
Ich habe alle Teile zusammengeklebt und die Katze mit 3D Tape auf der Karte befestigt - und als sie dann an Ort und Stelle war, kam der Effekt so rüber, wie ich es mir vorgestellt habe.

I created four splotches on the canvas and used two tones of Distress Oxides for each one: Twisted Citron and Mowed Lawn for the green one, Peacock Feathers and Uncharted Mariner for the blue one, Mustard Seed and Carved Pumpkin for the yellow and Crackling Campfire and Festive Berries for the red one. Then I spritzed some gold metallic watercolor over the canvas.
I stamped the cat with black ink and cut it out. Since everything off the edges of the canvas is colored grey, I decided to color the cat matching this pattern. I put the cut out image onto in the spot I wanted to glue her down later and used a pencil to lightly mark the edges of the canvas. Then I used my Copics to color the image in - colorful within the edges of the canvas, in greys outside of them. 
I glued everything together and used foam tape to attach the cat to the card - and once it was glued in place the effect looked how I had imagined.

Samstag, 11. Februar 2023

Paint your world happy

 
Hallo Ihr Lieben!
Momentan ist mir nach bunten Karten in Regenbogenfarben. Liegt wohl am grauen Winterwetter, das jetzt doch schon einige Zeit herrscht. Also habe ich meine Stanzen und Stempel auf der Suche nach Inspiration durchsucht und bin auf das Artful Brush von Spellbinders gestoßen. Das wollte ich, als es rauskam, unbedingt haben, habe es bisher aber noch nicht benutzt. Und es war perfekt. Und so ist diese Karte entstanden.

Hello everyone!
At the moment I feel like making colorful cards in rainbow colors. Guess it's because of the grey winter wetter we're having since quite some time. So I went through my dies and stamps, looking for inspiration, and came across the Artful Brush die set by Spellbinders. I wanted this so badly when it was released, but haven't used it yet. And it was perfect! So I made this card.

Für den Hintergrund habe ich den Cloudy Day Stempel von Create a Smile mit weißer Stempeltinte auf hellblauen Cardstock gestempelt. Links von und unterhalb der Wolken habe ich mit einem etwas dunkleren Aqua-Ton als der Cardstock Schatten gemalt, außerdem habe ich die Wolken selbst ganz leicht ebenfalls links und unten mit einem weißen Polychromo gefüllt. Anschließend habe ich aqua farbene Metallic Watercolor über den Cardstock gespritzt.

For the background I stamped the Cloudy Day stamp by Create a Smile with white ink onto light blue cardstock. On the left and under each cloud I drew shadows with a Copic, that's just a bit darker in tone than the cardstock. I also filled the clouds on the left and bottom very lightly with a white Polychromo. Then I also spritzed some light aqua metallic watercolor over the cardstock.


Ich wollte einen Regenbogen vom Pinsel ausgehen lassen, so als ob er damit gemalt worden wäre. Also habe ich mit der Happy Swish Stanze von MFT die Regenbogenteile aus rotem, gelbem, grünem, blauem und lilafarbenem Cardstock gestanzt und zusammengeklebt. Außerdem habe ich aus den selben Cardstocktönen gleich noch einige winzige Blüten und kleine Schmetterlinge, jeweils mit Stanzen von Magnolia, gestanzt. Die und auch den Regenbogen habe ich mit Copics etwas schattiert und die kleinen Teile dann auf dem Regenbogen angeordnet. 
Das Ende des Regenbogens habe ich noch mit der Schere unregelmäßig abgeschnitten, schließlich hinterlässt ein Pinsel keine harte Kante.
 
I wanted a rainbow at the tips of my brush, like it was just painted with it. So I used the Happy Swish die by MFT to die cut the rainbow pieces from red, yellow, green, blue and purple cardstock and glued them together. I also die cut some tiny flowers and small butterflies, using dies by Magnolia for both, from the same cardstock colors. I used my Copics to shade the small decoration pieces and also the rainbow, then attached the flowers and butterflies onto the rainbow. 
With my scissors I cut the end of the rainbow in a uneven line, a brush will not leave a harsh edge here.
 

 Um die Borsten des Pinsels auszustanzen, habe ich wieder die selben Cardstockfarben wie für den Regenbogen verwendet. 
Den Griff des Pinsels habe ich dreimal aus craft farbenem Cardstock gestanzt, mit Distress Ink Walnut Stain ein wenig gewischt um das tolle Holzmuster darauf besser zur Geltung zu bringen, und dann an einem der Griffe erst die Pinselborsten überlappend angeklebt, anschließend obenauf zwei weitere Pinselgriffe. Das Metallteil ist aus mattem silberfarbenem Metalliccardstock gestanzt.
Auch auf und zwischen die Pinselborsten habe ich einige kleine Blüten geklebt. 
Der Text ist aus dem Stempelset Builder Bears von MFT. Eigentlich lautet der "you paint my world happy". Ich habe nur das "paint" und "world happy" weiß auf schwarzen Cardstock embosst und anschließend das Wort "your" mit einem anderen Stempel aus dem selben Set dazwischen gestempelt.

To die cut the bristles of the brush I used the same cardstock colors like I did for the rainbow.
I die cut the brush handle three times from kraft cardstock, inked them up a bit with Distress Ink Walnut Stain to bring out the beautiful wooden pattern a bit better, then attached the bristles to one of the handles, overlapping them to make all five colors fit the width of the brush, and glued the other two handles on top. To die cut the metal part I used matte silver metallic cardstock.
I glued a few more of the small flowers onto and between the bristles.
The text on the card is from the Builder Bears stamp set by MFT. Originally it reads "you paint my worl happy". I only stamped and white heat embossed the "paint" and "world happy" parts onto a strip of black cardstock, then stamped the word "your" between them, using another stamp from the same set.
 

 Aus weißem Cardstock habe ich einen der Single Stitched Rectangle Frames von MFT gestanzt und mit 3D Tape auf dem Hintergrund befestigt. Darauf habe ich dann den Pinsel, den Regenbogen und den Text geklebt. 
Zum Schluss habe ich noch einige sechseckige Mini-Pailetten aufgeklebt und alles auf einem weißen Kartenrohling befestigt.

From white cardstock I die cut one of the Single Stitched Rectangle Frames by MFT and attached it with foam tape to the background. Then I glued the brush, the rainbow and the text on top.
To finish the card I added a few tiny hexagon shaped confetti and attached everything onto a white note card.

Freitag, 10. Februar 2023

LawnFawnatics Challenge #142

 
Hallo Ihr Lieben!
Interactive Card - das ist das Thema der LawnFawnatics Challenge #142. Ich habe eine Shaker Card gemacht. Vielleicht nicht unbedingt die innoviativste interaktive Karte, aber irgendwie kam mir diese Idee und da bot sich ein Shaker an.

Hello everyone!
Interactive card - that's the theme of LawnFawnatics Challenge #142. I made a shaker card. That's maybe not the most innovative interactive card type, but I had that idea in mind and a shaker worked best with it.

Für den Hintergrund habe ich ein Stück hellgrünen Cardstocks mit dem Clover Background Stencil Set sowie Distress Ink Bundled Sage und Mowed Lawn die Kleeblätter aufgewischt. Dann habe ich weiße und goldene Metallic Watercolor aufgespritzt und von der Rändern her noch etwas Distress Ink Rustic Wilderness aufgetragen.

For the background I inked the clovers onto a piece of light green cardstock using the Clover Background stencil set and Distress  Ink Bundled Sage and Mowed Lawn. Then I spritzed white and gold metallic watercolor onto the cardstock and also darkened up the edges a bit with Distress Ink Rustic Wilderness.


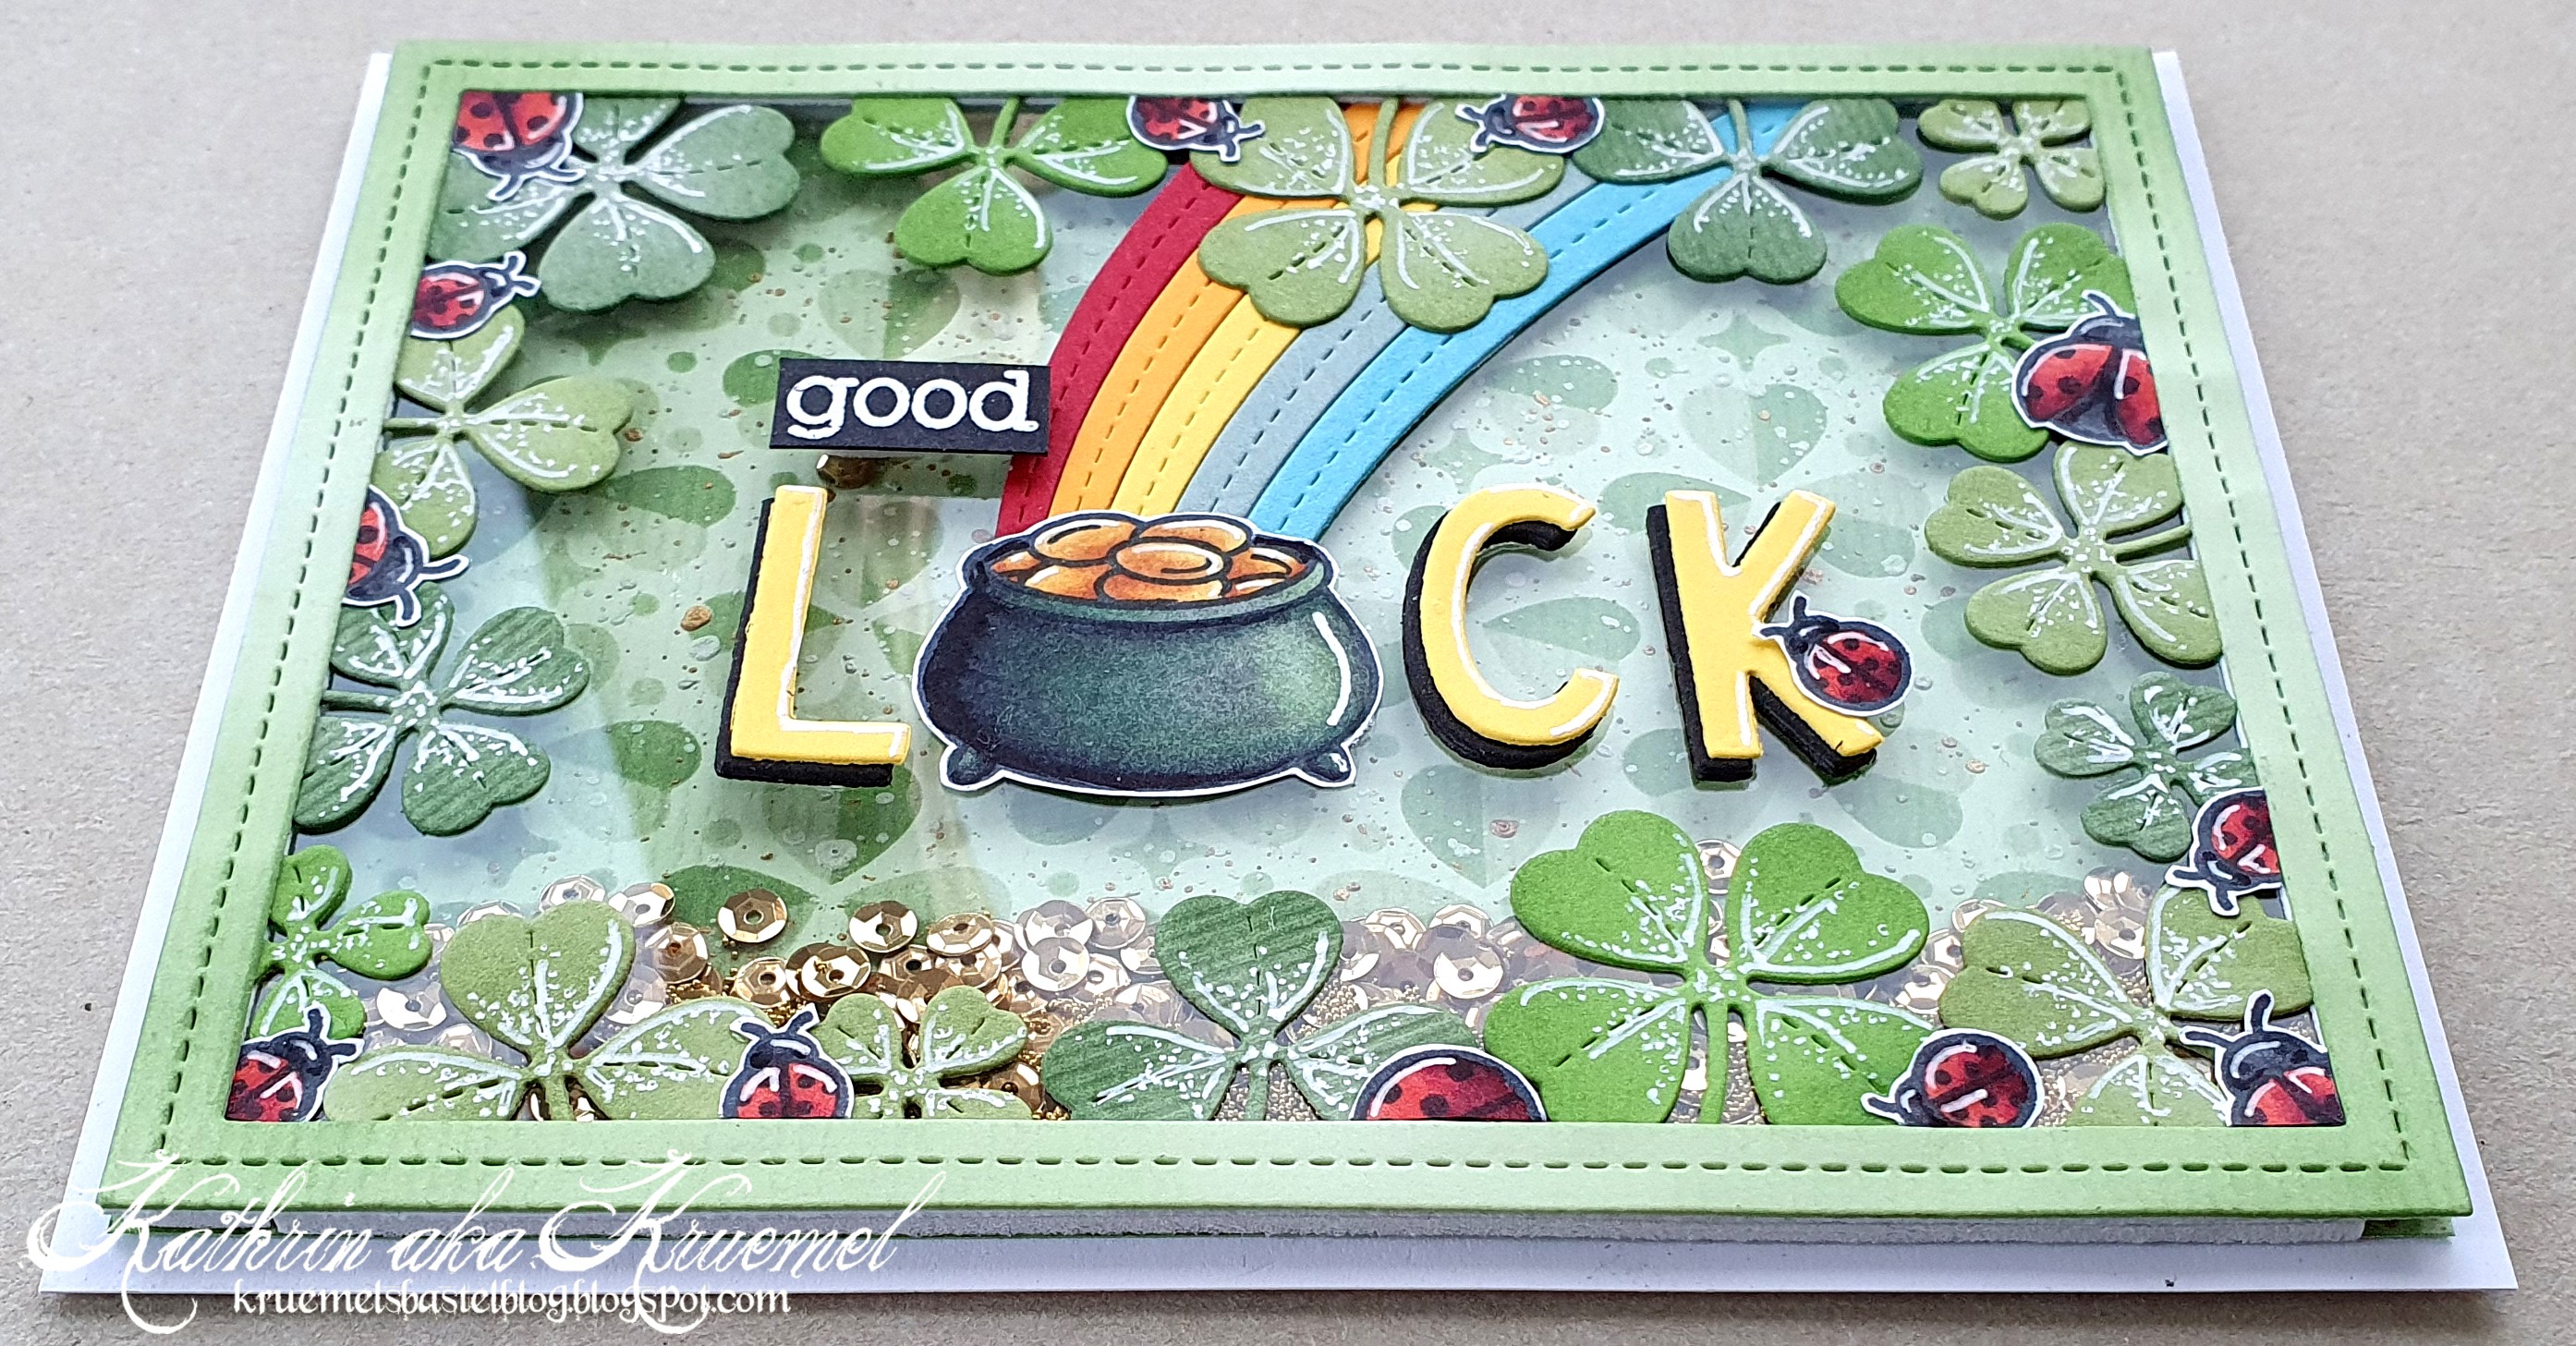
Es gibt ja einige tolle Rahmen von LawnFawn, an denen außen Blumen oder Blätter oder Schneeflocken etc. angebracht sind. Ich habe mir einen mit Kleeblättern gebastelt. Dafür habe ich mit einer der Stitched Rectangle Frames Stanzen wieder aus dem hellgrünen Cardstock einen Rahmen gestanzt und ihn an den Ecken wieder mit Rustic Wilderness ein wenig gewischt. Von hinten habe ich dann Kleeblätter am inneren Rand entlang aufgeklebt. Die habe ich mit den Lucky Clover Stanzen aus Cardstock in drei verschiedenen Grüntönen gestanzt, jeweils an den Rändern ebenfalls ein wenig gewischt und mit einem weißen Gelstift einige Details aufgemalt. 
Zwischen die Kleeblätter habe ich dann viele Marienkäfer aus dem Set Hey, Lady verteilt.

LawnFawn has a few great frame dies, where there are little flowers or leaves or snowflakes cut at the inner edge of the frame. I created one with clovers myself. I die cut one of the Stitched Rectangle Frames from the light green cardstock again and again inked up the corners a bit with Rustic Wilderness. Then I glued lots of clovers along the inner edge of the frame, attaching them to the back of the frame. I had die cut the clovers from three different shades of green cardstock using the Lucky Clovers dies, then darkened the edges again just a bit and added a few white details using a white gel pen.
Between the clovers I attached quite a few ladybugs from the Hey Lady stamp set.


Der Text auf meiner Karte ist gleichzeitig auch die Deko. 
Zuerst habe ich den Hexenkessel aus dem Purrfectly Wicked Stempelset abgestempelt und die Goldmünzen aus der Schatztruhe aus dem Set Ahoy Matey hineingestempelt. Dann habe ich ihn, ebenso wie die Marienkäfer, mit Copics coloriert und ausgeschnitten.
Mit Stanzen aus dem Set Finley's ABC habe ich dann die Buchstaben L, C und K dreimal aus schwarzem und einmal aus gelbem Cardstock ausgestanzt und aufeinander geklebt. Die gelbe Lage habe ich dabei ein wenig nach oben rechts versetzt, so dass ein schmaler Schatten darunter sichtbar bleibt. Mit dem Hexenkessel als U konnte ich so das Wort Luck schreiben. 
Mit weißem Embossingpulver habe ich dann das good aus dem Set My Lucky Charm auf schwarzen Cardstock embosst und ausgeschnitten. 
Für den Regenbogen, der aus dem Goldtopf kommen sollte, musste ich "fremdgehen". Von LawnFawn gibt es nur einen normal gebogenen Regenbogen, ich wollte aber unbedingt einen, der Richtung Kartenrand - und darüber hinaus - geht. Also habe ich eine Stanze von MFT benutzt. Die war ein wenig zu breit für den Hexenkessel, so dass ich statt der 6 nur 5 Bögen benutzt habe. Da auf der Karte schon genug grün vorhanden ist, habe ich diese Farbe ausgelassen und stattdessen zwischen gelb und blau einen grün-grau-blauen Bogen gesetzt. 
Ich habe alle Dekoelemente auf ein Stück Acetate geklebt - das Wort good ist mit 3D Tape befestigt - und das Acetate dann von hinten gegen den Kleeblatt-Rahmen geklebt. Am K habe ich dann noch einen weiteren kleinen Marienkäfer befestigt. 

The text on this card is also the decoration.
I first stamped the cauldron from the Purrfectly Wicked stamp set and stamped the coins of the treasure chest from the Ahoy Matey stamp set "into" it. Then I colored it with Copics, just like I did the ladybugs before, and cut everything out.
Using dies from the Finley's ABC die set I cut the letters L, C and K three times from black and once from yellow cardstock and stacked them. I moved the yellow layer a bit to the top right to have a thin black shadow behind it. Using the cauldron as the U I was now able to write the word luck.
Using white embossing powder I heat embossed the word good from the My Lucky Charm stamp set onto black cardstock and cut it out.
For the rainbow that I wanted to come out of the cauldron I had to use a die by MFT. There's only a "normal" shaped one y LawnFawn, but I really wanted mine to reach the edge of the card, making it look like it continues outside the card. This die I used was a bit too wide for behind my cauldron so I only used 5 of the 6 arches. Since there is already lots of green on my card, I left out this color from my rainbow and used a kind of green-grey-blue arch between the yellow and the blue one.
I attached all decorative elements to a piece of acetate - I used foam tape behind the word good - and then adhered the acetate to the back of my clover frame. Then I added one more little ladybug to the K.


Zum Schluss habe ich den Rahmen mit goldenen Pailetten und winzig-kleinen goldenen Kügelchen gefüllt und mit 3D Tape auf den Hintergrund geklebt.

To finish the card I filled the frame with gold sequins and gold micro beads and attached it to the background using foam tape.

Donnerstag, 9. Februar 2023

Glückspost

 
Hallo Ihr Lieben!
Eigentlich wollte ich für meinen heutigen Post auf dem Stampcorner Blog eine rein schwarz-weiße Karte machen, aber irgendwie war mir das dann doch ein wenig zu farblos. Also habe ich kräftiges Grün dazu kombiniert. Und so ist diese Karte entstanden, die ich besonders für Männer absolut perfekt finde.

Hello everyone!
For today's post over at the Stampcorner Blog I had planned to make a black and white only card. But that seemed a bit too little color for my taste. So I threw in a bit of a bright green. And so I ended up with this card, that, in my opinion, is perfect especially for men.

Für den Hintergrund habe ich den Simple Stripes Diagonal Background von LawnFawn einmal aus weißem und einmal aus schwarzem Cardstock gestanzt und dann die Streifen abwechselnd angeordnet und von hinten mit zwei Streifen Cardstock fixiert. Das tolle ist, man bekommt so gleich zwei fertige Hintergründe! Stellt Euch also schonmal auf eine weitere Karte damit in naher Zukunft ein.... Anschließend habe ich silberfarbene Metallic Watercolor bespritzt.

For the background I cut the Simple Stripes Diagonal background by LawnFawn once from white and once from black cardstock, then interchanged the colors of the strips and connected them by glueing them onto two strips of cardstock. The great thing ist, that you end up with two backgrounds - so be prepared for another card with it in the near future.... Then I flicked some silver metallic watercolor onto the cardstock.


Für mein Hauptmotiv habe ich mal wieder etwas in den älteren Stempelsets gegraben und bin dabei auf das süße Monster aus dem Set Stay Crazy gestoßen. Ich habe es mit grauer Tinte gestempelt und mit Copics coloriert. Dann habe ich ihm das Kleeblatt in die Hand gegeben. Das habe ich mit einer der Stanzen aus dem Set Glückssymbole von CraftEmotions aus grünem Cardstock gestanzt und mit Copics ein wenig schattiert. Die weißen Linien und Punkte sind überall wieder mit einem weißen Gelstift gemacht. 
Auch das Wort Glückspost ist, mit der gleichnamigen Stanze von Stampcorner, aus grünem Cardstock gestanzt und mit Copics schattiert. 
Als Hintergrund für das Monster habe ich einen der Scallop Circle von Stampcorner aus silberfarbenem Glittercardstock gestanzt und darauf dann einen etwas kleineren Kreis, gestanzt aus schwarzem Glittercardstock, aufgeklebt. 
Das Monster habe ich dann mit dünnem 3D Tape auf dem Kreis befestigt. Darunter kam das Wort Glückspost - die Beine des Monsterchens passten genau zwischen das L und K, so dass der Text halb auf den Kreis geklebt ist. 
Die kleineren Texte sind aus dem Stempelset Kleine Worte. Ich habe sie mit weißem Embossingpulver auf schwarzen Cardstock embosst, ausgeschnitten und grün gemattet. 

For my main image I went through some older stamp sets and came across this cute monster from the Stay Crazy stamp set. I stamped it with grey ink and colored it with Copics. Then I let him hold the clover. I die cut it with a die from CraftEmotions from green cardstock and shaded it with my Copics. The white lines and dots are, as always, made with a white gelpen.
Also the word Glückspost - happy mail in german - is die cut from green cardstock and shaded with Copics.
As a backdrop for the monster I cut a scalloped circle by Stampcorner from silver glitter cardstock and glued a smaller circle, cut from black glitter cardstock, on top.
I used thin foam tape to attache the monster to the circle. Underneath I glued down the die cut word - the monster's legs fit exactly between the letters L and K, so I was able to attach part of the word onto the circle. 
The smaller texts are white heat embossed onto black cardstock, cut out and matted green.


Zum Schluss habe ich auch den Kreis mit dem Motiv mit dünnem 3D Tape auf den Hintergrund geklebt und noch einige grüne Pailetten als Deko auf der Karte verteilt.

In the end I used thin foam tape again to attach the circle with the image onto the background and added a few green sequins for decorations.

Mittwoch, 8. Februar 2023

Create a Smile Februar Sketch Challenge

 
Hallo Ihr Lieben!
Mit einem neuen Sketch startet heute eine weitere Create a Smile Challenge. Und mich hat der Sketch zu einer Valentinstags-Karte inspiriert. Allerdings ist sie farblich - und evtl. auch vom Motiv her - nicht ganz so klassisch ausgefallen. Hier ist der neue Sketch:

Hello everyone!
With a new sketch we are starting the next Create a Smile Challenge today. It inspired me to make a valentine's card - it may just not be traditional color- and imagewise. This is the sketch:


Ich weiß nicht, ob es das Herz im Sketch war, das mich so beeinflusst hat, oder ob es später der Frosch und die dazugehörigen Texte waren, denn eigentlich wollte ich gar keine Valentinstagskarte mehr machen. Aber ich finde, die kann man zur Not auch später noch verwenden.

I am not sure if it was the heart in the sketch, that pushed me towards a Valentine's card, or if it was the frog and its sentiments later. I definately hadn't planned to make any more Valentine's cards this year. But I think, I still can give that away later this year.


Ich habe mit einem Stück ziemlich kräftig-grünem Cardstock gestartet. Von unten her habe ich den Cardstock mit Distress Ink Mowed Lawn und Twisted Citron ein wenig schattiert. Dann habe ich den Confetti Hearts Stencil aufgelegt und die Herzen ebenfalls in grün aufgewischt. Im unteren, dunkleren Bereich habe ich dafür Rustic Wilderness, weiter oben dann wieder Mowed Lawn benutzt.

I started with a piece of quite bright green cardstock. I used Distress Ink Mowed Lawn and Twisted Citron to give the cardstock a bit of a gradiant. Then I put the Confetti Hearts stencil on top and added the tiny green hearts. In the lower, darker area of the cardstock I used Rustic Wilderness, then I switched to Mowed Lawn again for the hearts in the upper area.


Als ich den Sketch das erste Mal sah, wusste ich, dass ich die Window Pocket Stanze für die Deko verwenden wollte. Ich habe sie aus zart grünem Cardstock gestanzt und einfach einen Teil davon abgeschnitten, damit die Tasche später besser auf die Karte passt. Und weil im Sketch der Kreis ein wenig weiter links ist, bei der Stanze aber weiter rechts, habe ich zum Zukleben meiner Tasche die größere Lasche verwendet. Da die Tasche aufgeklebt ist, sieht man das gar nicht.
In die Tasche habe ich ein Stück weißen Cardstock geschoben, auf das ich mit hellroas farbener Tinte und dem Cloudy Day Stempel die kleinen Wolken aufgestempelt habe. Leider gibt es den Stempel nicht mehr, aber ich wollte ihn unbedingt verwenden. Rechts am Cardstock  habe ich dann ein Stück eines der Useful Banners, gestanzt aus pinkfarbenem Cardstock, aufgeklebt. An dem kann man die Karte aus der Tasche ziehen - ich werde später noch eine Geschenkkarte an der Rückseite befestigen. Die steht dann zwar etwas weiter aus der Tasche heraus, das stört mich aber nicht.
Der süße Frosch ist natürlich aus dem Stempelset Sei kein Frosch - genauso wie die Texte. Die Texte habe ich schwarz auf gelben Cardstock gestempelt und dann mit 3D Tape auf dem Umschlag/der Tasche angeklebt.
Aus dem Stempelset Steiler Zahn habe ich noch die Rohrkolben und die Libelle abgestempelt und dann alle Motive mit Copics coloriert, ausgeschnitten und auf der Tasche befestigt. Zum Aufkleben des Froschs habe ich wieder 3D Tape benutzt.
Und weil ich das Pink - eigentlich abgeleitet von den Backen des Froschs - nochmal aufgreifen wollte, habe ich noch einige Herzen mit der Hearts Stanze ausgestanzt und über dem Frosch aufgeklebt.

The first time I saw the sketch, I knew, that I wanted to use the Window Pocket die for my decorations. I die cut it from soft green cardstock and then cut off a part of it to make it fit onto the card. And since the circle in the sketch is moved a bit to the left, the die cuts it more to the right, I simply used the wider flap to glue the pocket closed. Since I glued it to the cardstock no one with know.
I cut a piece of white cardstock to put into the pocket and stamped some clouds onto it using some light pink ink and the Cloudy Day stamp. Sadly this isn't available anymore, but I really wanted to use it here. I attached a piece of one of the Useful Banners, cut from pink cardstock, to the right edge of the cardstock piece, which can be used to pull the little card out of the pocket. I plan to attach a gift card to its back later. It won't fit fully into the pocket anymore after I cut that down but I don't mind it being visible.
The cute frog is from the Unfrogettable stamp set - as are the texts. I stamped the texts black onto yellow cardstock and then attached the strips with foam tape to the pocket only.
From the Oh Dam stamp set I stamped the cattails and the dragonfly image and colored all the images with my Copics. Then I cut them out and attached them to the pocket, using foam tape behind the frog again.
And since I wanted to pick up the pink again - which I originally added because of the frog's pink cheeks - I die cut some hearts with the Hearts die set and arranged those above the frog.


Zum Schluss habe ich die Tasche samt Motiven wieder mit 3D Tape auf dem Hintergrund befestigt - das macht das Herausziehen der kleinen Karte einfacher -, habe alles auf einen weißen Kartenrohling geklebt und für ein wenig Bling noch ein paar gelb-pink irisierende Glitzersteine aufgeklebt.

To finish the card, I attached the pocket with foam tape to the background - that makes pulling the tab easier -, adhered everthing to a white note card and added a few yellow-pink iridescent rhinestones for a bit of bling.

Dienstag, 7. Februar 2023

Eine schwere Geburt...

 
Hallo Ihr Lieben!
Kennt Ihr diese Tage, an denen Ihr unbedingt kreativ sein wollt, Euch erst nichts einfallen will, dann bei der Gestaltung alles schief geht und am Ende habt Ihr eine Karte, mit der Ihr so gar nicht zufrieden seid? So ging es mir hier - und es sind sogar zwei Karten entstanden.... Aber ich dachte, ich zeige sie Euch trotzdem.
 
Hello everyone!
Do you know those days, when you really want to make a card, but have no idea, then when you start everything goes wrong and you end up with a card that you don't like? That's what happened to me here - and I ended up with two cards I am not entirely happy with.... But I thought I'd share them anyway. 

Ich muss ein wenig ausholen. Eigentlich wartete ich auf eine Stempellieferung, da hat die Post aber nicht mitgespielt. Und mir geht es oft so, dass ich, wenn ich eine bestimmte Idee im Kopf habe, die erst rauslassen muss, bevor der Kopf wieder frei für neues ist. Aber es war Wochenende, und das wollte ich nicht komplett unkreativ verstreichen lassen. Da es für den Februar eine neue Technique Throwback Thursday Challenge gibt, habe ich mir das dazugehörige Video angeschaut und entschieden, dafür eine Karte zu machen. Es ging einfach alles schief - und statt gleich zu Beginn abzubrechen, habe ich weitergemacht. Bis an den Punkt, wo aufgeben keine Option mehr war, denn ich hatte bereits zu viel Zeit und Material in die Karte gesteckt. Eigentlich sogar Karten, denn bei der Technik erhält man "in einem Aufwasch" gleich zwei Hintergründe....
Begonnen hat alles damit, dass ich Distress Ink Tumbled Glass, Broken China und Uncharted Mariner verwenden wollte, um meinen Hintergrund in Streifen damit zu wischen. Das habe ich auch - allerdings erst während des Wischens festgestellt, dass ich zwar die passenden Schwämmchen gewählt, dann aber aus Versehen die Oxides verwendet habe. Also erstmal Schwämmchen waschen. Und der Hintergrund wurde auch nicht so kräftig, wie geplant. 
Dann habe ich mit einem Streifen-Hintergrundstempel von MFT und klarem Embossingpulver das Muster auf den Cardstock gebracht. Anschließend wird für die Technik der Cardstock mit -viel- Wasser besprüht, mit einem weiteren Stück weißen Cardstocks abgedeckt und alles durch die Stanzmaschine gekurbelt um die Farbe zu übertragen. Ich hatte offenbar zu viel Wasser erwischt, denn die Farbe wurde seitlich am Cardstock rausgedrückt (daher auch der unschöne Rand unten). Also erstmal die Big Shot Platten sauber machen. Dann klebten meine Cardstockstücke auch noch zusammen, so dass beim Auseinanderziehen etwas von der oberen Schicht abgelöst wurde. 
Statt hier jetzt abzubrechen, habe ich eine Kreisstanze genommen und aus der Mitte jedes der beiden Cardstockstücke einen Kreis gestanzt.

I have to tell you the story. Originally I was waiting for a stamp order, but the post was pretty slow and the order didn't arrive. And often when I have a special idea in mind, I have to make that card to have room for new ideas. Well, it was the weekend and I didn't want to not create so I checked the new Technique Throwback Thursday chalenge, watched the video and decided, to give it a try. What could go wrong, went wrong - and instead of stopping right after the first mistake and moving on to something else, I kept going. Until the point where stopping wasn't an option anymore because I had already invested too much time and material in my card. I should say cards, because with this technique you end up with two backgrounds...
It all started with me wanting to use Distress Ink Tumbled Glass, Broken China and Uncharted Mariner to ink up a piece of white cardstock in stripes. I did - but only realized when I was nearly done with the inking, that I had pulled out the right blending foams, but then accidently brought out the Oxides instead of the Ink pads. So, I staretd with washing my blending foams - and the background didn't turn out as dark as I had planned.
Then I used a stripes background stamp by MFT and clear embossing powder to add the pattern to the cardstock. With this technique, the cardstock then gets misted with - lots - of water, you put another piece of white cardstock on top and run it through the die cutting machine to transfer the ink.  Seems like I had used too much of water, because the ink oozed out of the cardstock (that's also why I ended up with this not so nice area on the bottom). So I started with cleaning my Big Shot plates. And then my cardstock pieces kind of stuck together. When pulling them apart the top layer of the paper tore in a few areas. 
Instead of calling it a day, I kept going and die cut a cricle from the center of each cardstock piece.


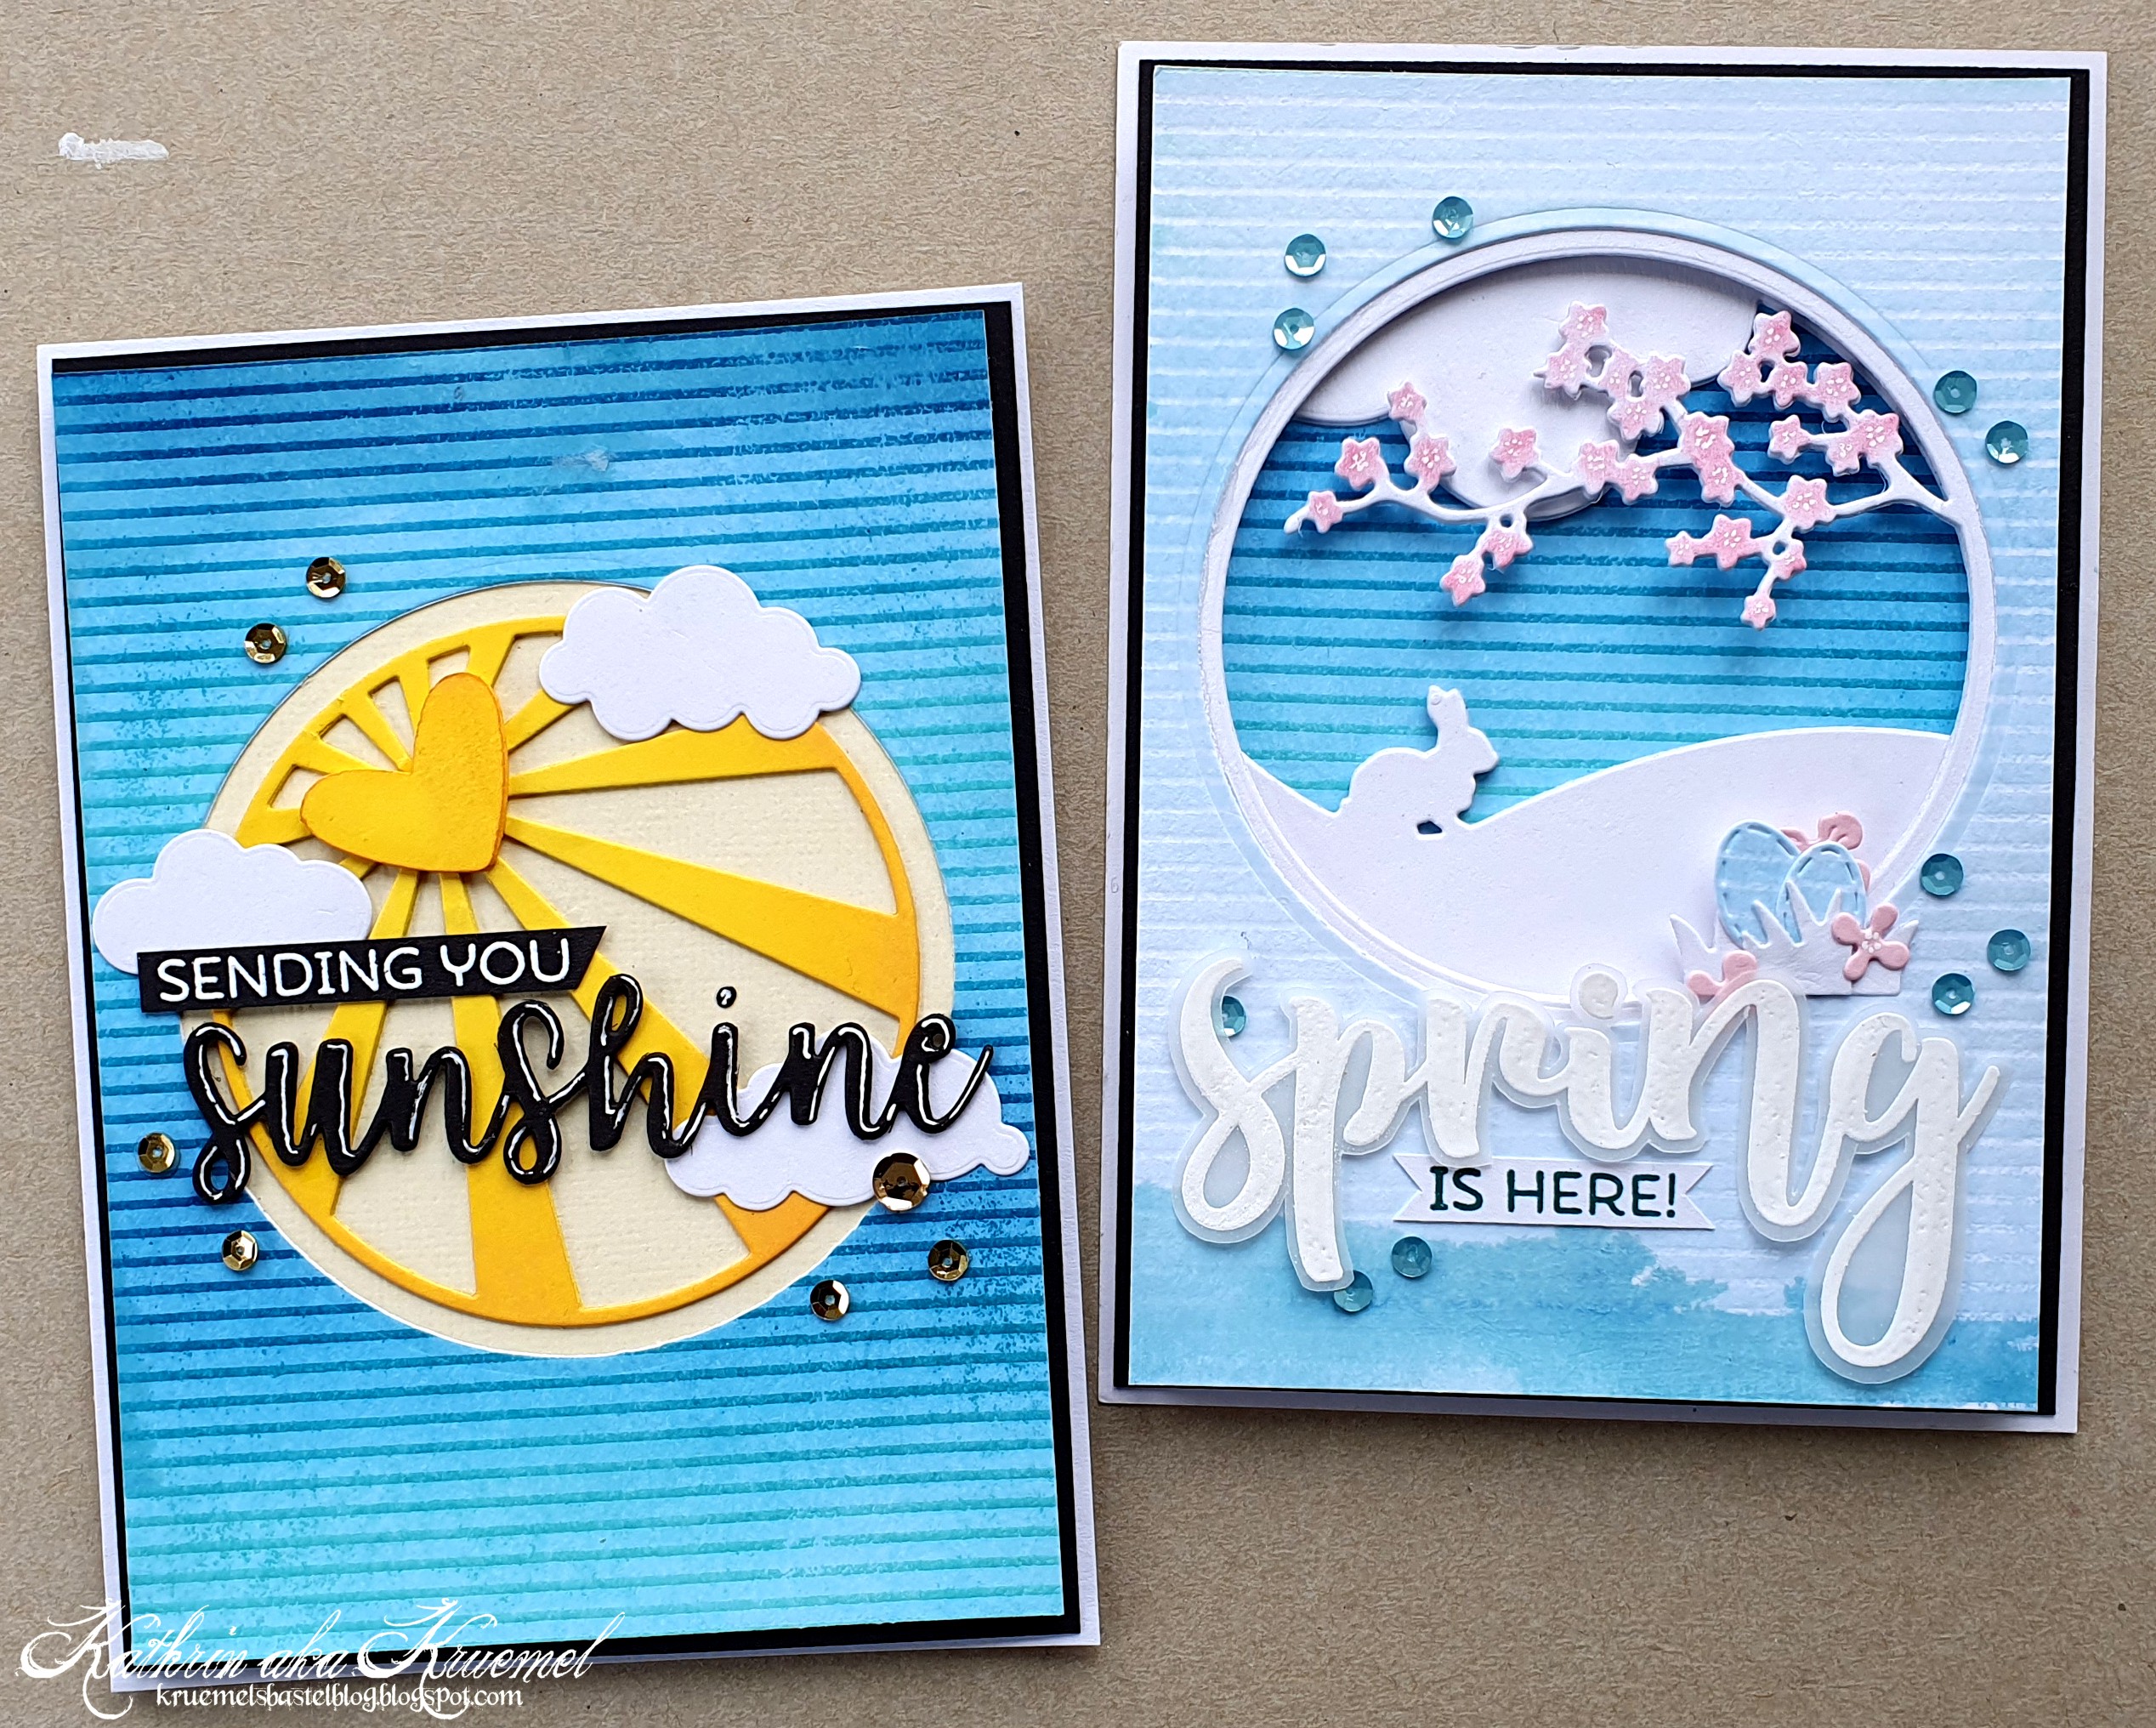
Für die erste Karte - und die gefällt mir noch wenig als die zweite - habe ich dann mit den Panorama-Stanzen Wolke, Frühlingszweig und Hase von Charlie und Paulchen die Szene aus weißem Cardstock zusammengesetzt. Dabei habe ich zwei Wolkenlagen, drei Hasenlagen und mit etwas Abstandsklebeband dazwischen nochmal drei Zweig-Lagen aufeinander gesetzt. Die Karte ist also zum Schluss dementsprechend hoch.... Hinter die Szenen habe ich den Kreis, den ich aus dem dunkleren Hintergrund gestanzt habe, geklebt und obenauf den helleren Hintergrund.

For the first card - and I like this one even less than the second one - I die cut the scene from white cardstock using Panorama cloud, spring branch and bunny by Charlie und Paulchen. I stacked two cloud layers, three bunny layers and with some foam tape inbetween three of the branch layers. So the card is pretty thick in the end. Behind the scenes I glued the circle I had cut from the carker background, then put the lighter one on top.


Um den Zweig ein wenig mehr hervorzuheben, habe ich die Blüten mit rosafarbener Kreide eingefärbt. Außerdem habe ich unten links an den Kreis noch zwei hellblaue Ostereier - gestanzt aus dem übriggebliebenen Kreis, den ich aus dem helleren Hintergrund gestanzt hatte - mit etwas Gras und ein paar hellrosafarbenen Blüten aufgeklebt.

To bring out the branch a bit more, I put some pink chalk on top of the blossoms.
I also added two light blue easter eggs - die cut from the left over circle I had cut from the lighter background - with some grass and a few light pink blossoms.
 

 Für den Text habe ich das Wort Spring aus dem Spring Stempelset von HoneybeeStamps weiß auf Vellum embosst, ausgeschnitten und mit dünnem 3D Tape auf die Karte geklebt. Den Rest des Textes habe ich mit einem Stempel aus dem selben Stempelset und dunkeltürkisfarbener Tinte auf weißen Cardstock gestempelt und unter dem Wort Spring aufgeklebt.

For the text I white heat embossed the word spring from the Spring stamp set by HoneybeeStamps onto vellum, cut it out and attached it with thin foam tape. The rest of the text I stamped with another stamp from the same stamp set and dark turquoise ink onto white cardstock and adhered it under the word spring.


Zum Schluss habe ich einige kleine hellblaue Pailetten als Deko aufgeklebt, den Cardstock schwarz gemattet und alles auf einen weißen Kartenrohling geklebt. Und hier kann man die Tiefe - und Dimension - der Karte ganz gut sehen.

To finish this card, I added a few small light blue sequins, matted the cardstock black and attached it to a white note card. And here you can get a better idea of the depth - and dimension - of the finished card.


Für die zweite Karte habe ich dann den kräftigeren Hintergrund benutzt - und fand gelb eine gute Kombi dazu. 
Man merkt es vielleicht, die Karte ist relativ einfach geworden. Irgendwie hatte mich da die Lust wohl schon verlassen...
 
For the second card I used the darker background - and though, yellow would be a good color to go with it. 
Maybe you can tell from looking at the card and it simple style, that I kind of didn't want to go on...
 

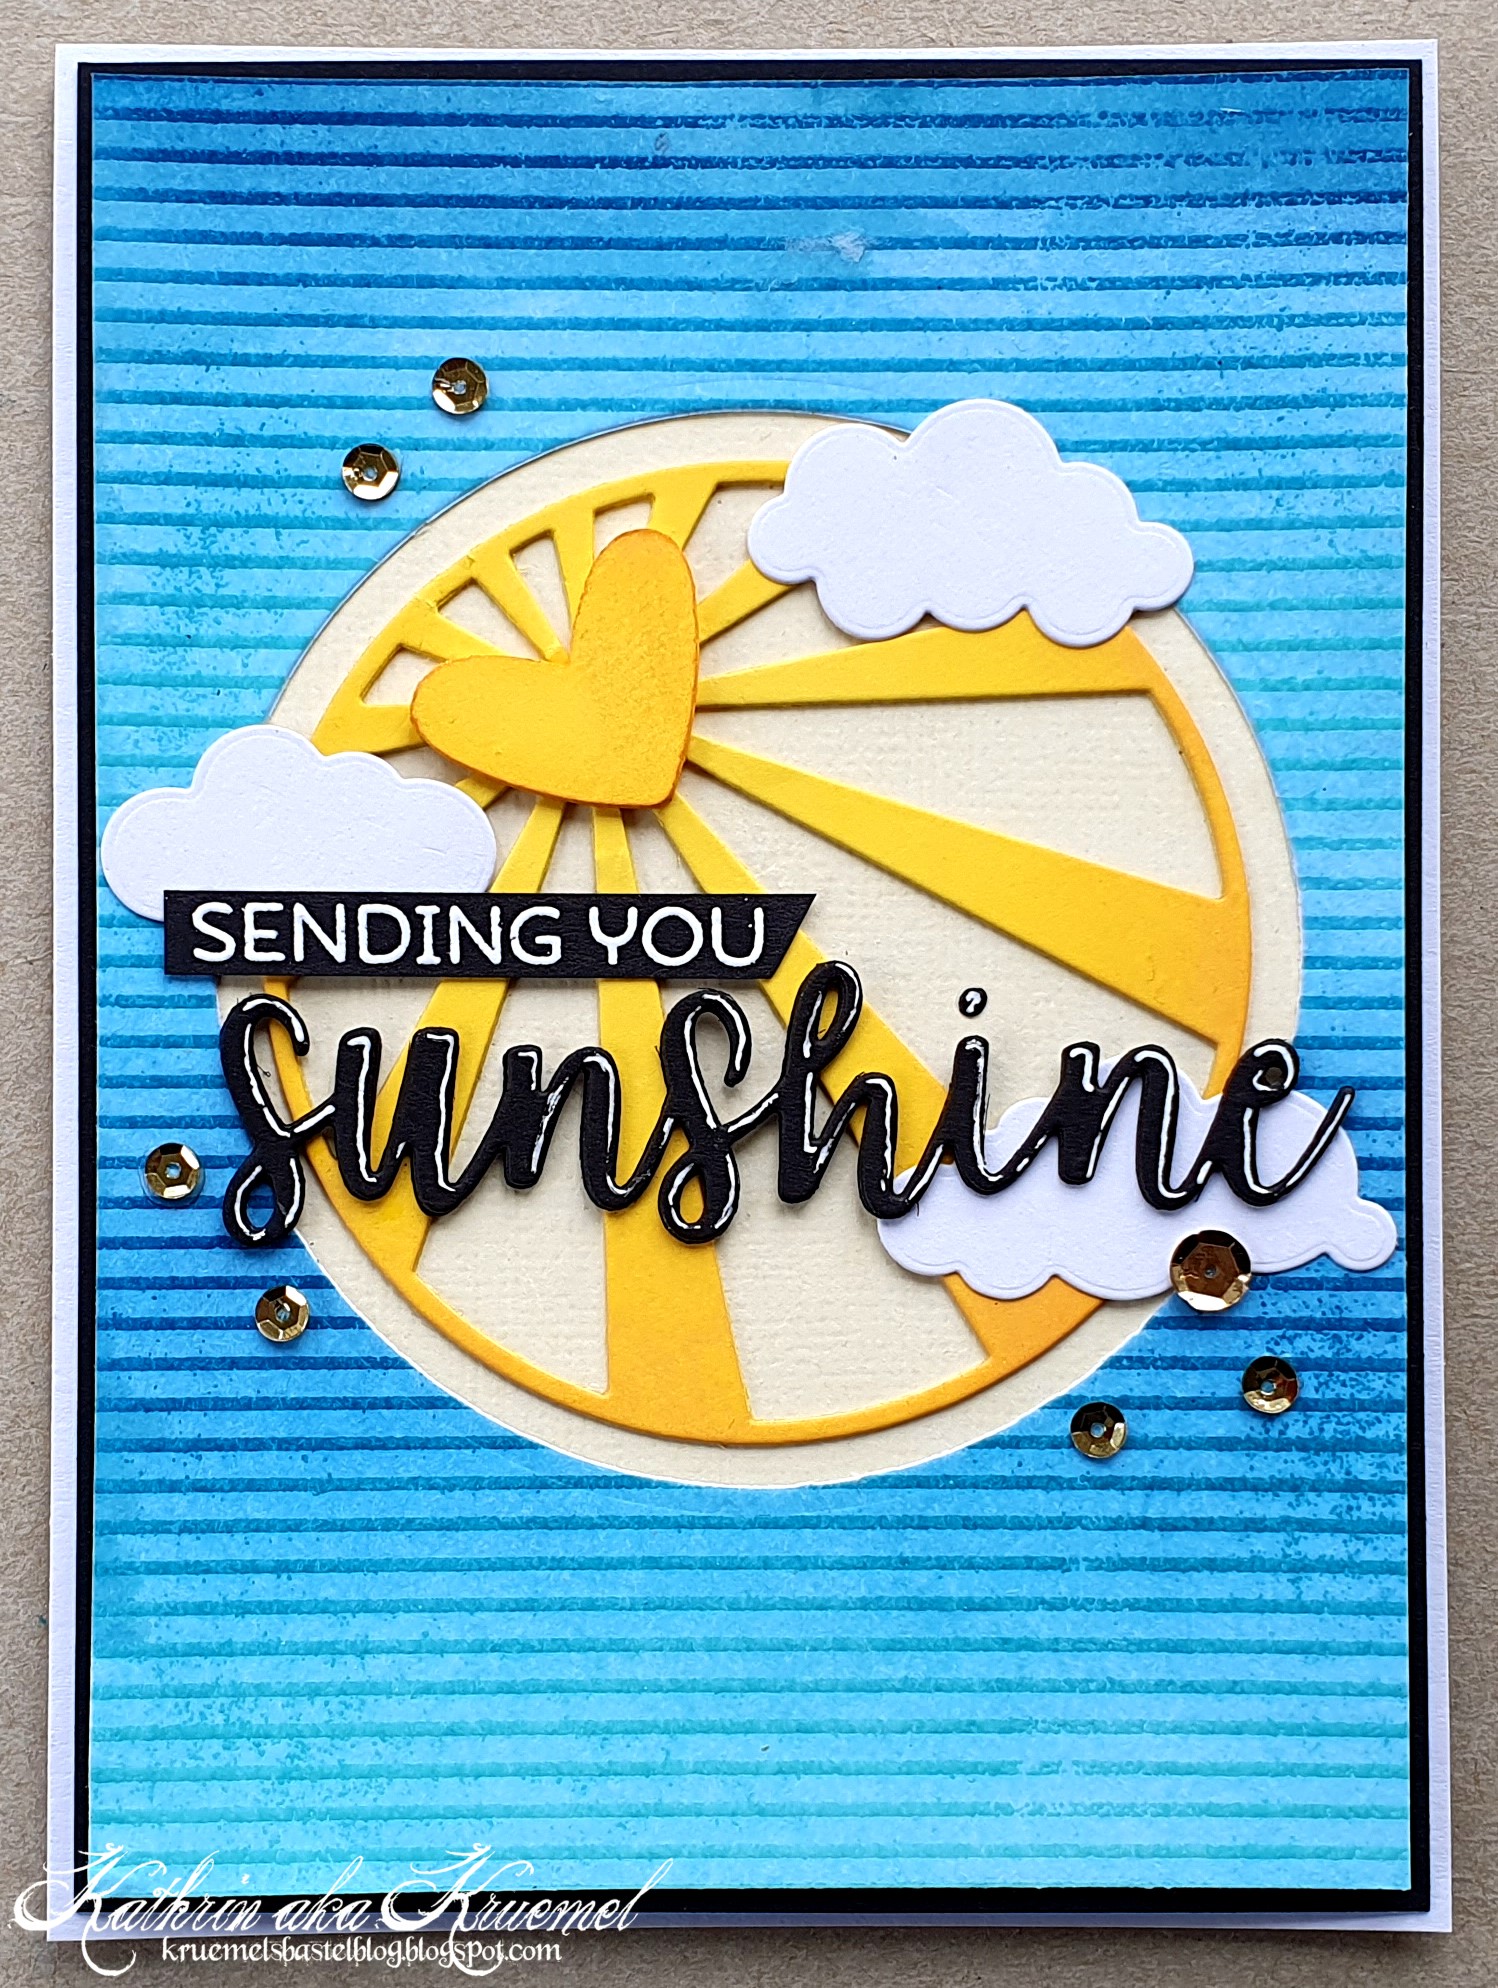
 Den runden Ausschnitt im Hintergrund habe ich diesmal mit hellgelbem Cardstock hinterlegt. Darauf kam dann einStanzteil mit Sonnenstrahlen, gemacht mit einer weiteren Panorama-Stanze von Charlie und Paulchen. Die habe ich zweimal aus kräftig-gelbem Cardstock gestanzt, die obere Lage mit Distress Ink Wild Honey gewischt und beide Lagen auf den hellgelben Cardstock geklebt. Auf die Sonne habe ich dann noch vier aufeinander geklebte und ebenfalls leicht mit Wild Honey gewischten Herzen geklebt.
Rund um die Sonne habe ich drei Wolken, gemacht mit den Puffy Clouds Stanzen von MFT, aufgeklebt.
Für den Text habe ich das "sending you", ebenfalls aus dem Set Spring von HoneybeeStamps, denn das lag noch auf meinem Tisch, weiß auf schwarzen Cardstock embosst und links auf den Strahlenhintergrund geklebt. Darunter habe ich ein sunshine aufgeklebt. Das habe ich dreimal mit der Sunshine Stanze von MFT aus schwarzem Cardstock gestanzt, die Teile aufeinander und dann auf die Karte geklebt. 

I glued a piece of light yellow cardstock behind the circle cut out, then put the sunray frame, made using another panorama die by Charlie und Paulchen, on top. I've die cut it twice from bright yellow cardstock, inked the top layer with Distress Ink Wild Honey, stacked both layers and attached them to the ligth yellow cardstock. Then I cut four hearts from the same yellow cardstock, inked them up a bit as well, and glued them on top of the sun.
Then I added three white clouds, made with the Puffy Clouds dies by MFT, around the sun.
For the text I white heat embossed a "sending you", again from the Spring stamp set by HoneybeeStamps because it was still on my table, onto a strip of black cardstock and glued it onto the left side of the rays circle. Under it I adhere a die cut "sunshine", cut three times from black cardstock with the sunshine die by MFT, and stacked on top of each other.


Um diese Karte fertigzustellen, habe ich dann noch einige goldene Pailetten als Deko aufgeklebt, alles schwarz gemattet und auf einen weißen Kartenrohling geklebt.

To finish this card, I added a few gold sequins, matted everything black and attached the cardstock to a white note card.