
Hallo Ihr Lieben!
Mensch, ich bin selbst überrascht, wie viel ich die letzten Wochen gebastelt habe. Heute dreht sich alles um Wichtel. Von Scrapbook Forever gab es nicht nur Fußballwichtel, sondern auch "Allrounder". Und auch die wollten verbastelt werden.
Hello everyone!
Oh, I am really surprised how much crafting I've done those last weeks. Today it's all about gnomes. There were not only new soccer gnomes but also regular ones. And of course those wanted to get inked up as well.

Angefangen hat alles mit diesem schon etwas älteren Motiv. Aber Doc Wichtel war immer noch unbenutzt - und das wollte geändert werden. Mit den Zubehörstempeln habe ich das Pillenpapier im Hintergrund selbst gestaltet und die Pflaster über Kreuz auf die Karte geklebt, die halten quasi das Designpapier.
Das tolle Stethoskop von Magnolia passte perfekt mit auf die Karte.
It all started with this quite oder image. But Doc Gnome was still unused - and that needed to be changed. I used the accessoire stamps from the set to create the background paper with the pills and the band aid, glued across each other, to hold the paper down.
The great stetoscope by Magnolia was just the perfekt die for this card.

Der Wichtel ist wie fast immer mit Copics coloriert. Der Arme - ich fürchte, das Pflaster aus dem Bart zu entfernen wird weh tun.... ;)
Like most times I used Copics to color the image in. Poor one - I'm afraid removing the band aid from his beard will hurt... ;)

Weiter ging es mit einer interaktiven Karte. Es gab da diese Regentage zwischendrin..
Next was this interactive card. There were a few rainy days inbetween that inspired me.

Der arme Wichtel steht tropfend im Regen....
Poor gnome is standing in the rain, dripping from it....

Aber da war doch dieser Tab oben an der Karte. Richtig zieht man daran, verändert sich das Motiv.
But there was this tab on the top of the card. Right, once you pull it the image changes.

Und da hüpft er fröhlich durch die Pfützen.
And now he's happily jumping in the puddle.

Und so passen Motiv und Spruch wieder zusammen. Der Spruch ist eigentlich ganz anders angeordnet, aber wegen des Motives, auf das ich nichts kleben konnte, musste ich die Aufteilung ändern.
And now image and saying - life's about learning to dance in the rain - go together perfectly.

Als nächstes sind diese 3 Tags entstanden. Ja, ein Fußballer hat sich da nochmal mit eingeschlichen...
Then I made those 3 tags. Yes one more soccer fan made it onto one of them...

Diesen kleinen Wicht finde ich ja besonders süß. Den möchte man doch nur nehmen und knuddeln. Und der Spruch dazu ist klasse!
Für den Hintergrund habe ich mit Brushos gepanscht, das Papier geprägt und anschließend mit silbernem Gilding Polish alles etwas aufgewertet.
Ein Zaun und ein bisschen Deko runden das ganze ab.
I totally adore this litte cutie. I just want to hug him until he feels better. And the saying is so great - falling, getting up again, put the head back on and go on.
For the background I used Brushos on a regular tag, dry embossed it and used some silver gilding polish for the finish.
A fence and some die cuts - and the tag is done.

Das hier ist auch ein Wichtel aus dem Fußballset - aber hier trägt er eine Pusteblume. Und schon ist auch dieser Stempel das ganze Jahr einsetzbar... Die Pusteblume ist mit weißem Embossingpulver embosst, der Hintergrund wieder mit Brushos und Wasser gemacht.
And this gnome is from the soccer set as well - but here he's carrying a dandelion. And voilá - like this he can be used all year long. The dandelion is heat embossed with white embossing powder, for the background I used Brushos and Water again.

Und hier ist ein weiterer Fußball-Gnome. Über Fußball sage ich jetzt nichts.
Die Wolken sind mit Enchanted Gold Gilding Polish gemacht - diese Paste ist einfach nur genial!
And here is another soccer gnome.... I am not saying anything about soccer right now.
For the clouds I used enchanted gold gilding polish - this stuff is so amazing!

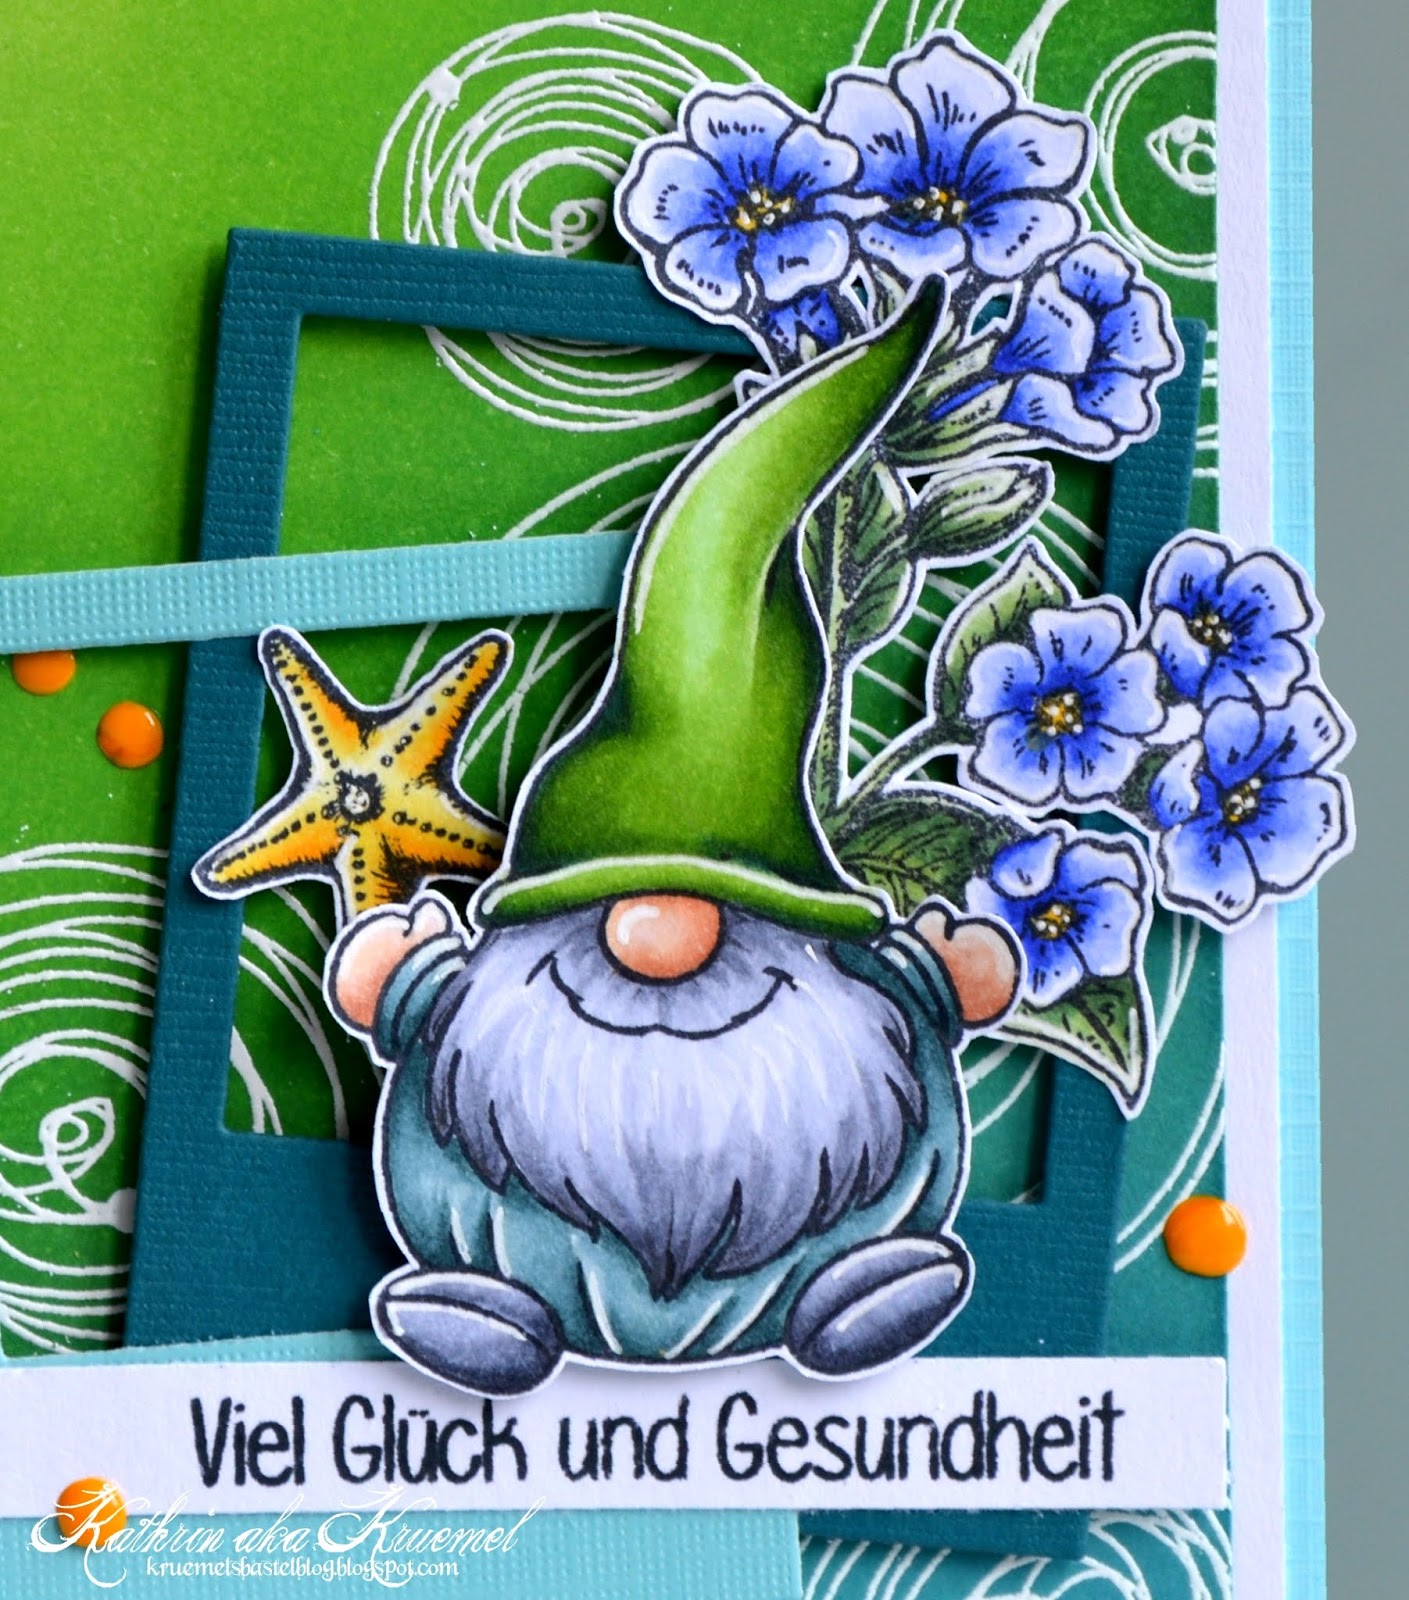
Dieser Wichtel verbreitet ganz viel Freude. Ich habe bewusst knalligere Farben genommen und den Wichtel vor zwei Polaroids gesetzt. Im Hintergrund habe ich vor dem Wischen die Schnörkel-Kreise in weiß embosst.
Im Gepäck hat der Wichtel neben Glückwünschen auch noch einen blühenden Zweig und seinen Freund, den Seestern.
Ein paar gelbe Enamel Accents reichten hier als Deko.
This gnome is full of joy. I went with bolder colors here and put the gnome in front of two die cut Polaroids. Before I put the ink on the background I stamped the scribbly circles and heat embossed them with white embossing powder.
Besides some good wishes the gnome also brings a flowery branch and his friend the star fish.
A few yellow Enamel Accents were all decorations this card needed.
Auch hier habe ich wieder mit Copics coloriert.
Also here I used Copics to color the image in.

Und zuguterletzt möchte ich Euch heute noch diese Karte zeigen.
Die Front besteht aus Folie, die durch die Wolken mit dem Cardstock auf der Rückseite verbunden ist. Den Cardstock, der ja eigentlich das Innere der Karte ist, habe ich mit Distress Ink und einer Wolkenschablone als Hintergrund gestaltet.
Auf der Wolke unten war Platz für einen Text.
And finally, as the last card today, I want to share this one.
The front is made from Acetate, that is connected with the back of the card through the clouds on top. The back, which is the inside of the card, I used as a background and added some clouds here using a stencil and Distress Ink.

Auch dieser Wichtel ist mit Copics coloriert.
Die Seifenblasen bestehen aus Vellum, das ich mit Copics coloriert habe. Das geht nicht ganz so schön, weil die Streifen der Stifte immer ein wenig zu sehen sind. Aber bei Seifenblasen passt das, finde ich. Vellum aufkleben ist ja immer etwas tricky, noch dazu, da hier die Rückseite durch die Folie auch noch sichtbar ist. Also habe ich sie einfach kurzerhand durch meinen Xyron gedreht und siehe da, man sieht keine Klebestellen.
Also this one was colored in with Copics.
The bubbles are circles cut from Vellum that I've colored in with Copics. That's not too easy since you always see the strokes. But I think this goes great with bubbles. Glueing down Vellum is another story, the more here since you'd see the glue on the back also through the Acetate. So I simply brought out my Xyron and turned them into stickers. And guess what - no glue can be seen, neither on the in- or the outside.